Table of Contents
Advertisement
Advertisement
Table of Contents

Related Manuals for Eurobraille ESYS Series

Summary of Contents for Eurobraille ESYS Series
- Page 1 E S Y S B R A I L L E S E R I E S U S E R ’ S M A N U A L – V E R S I O N 2 . 0 4...
-
Page 2: Table Of Contents
28/02/2011 1/48 T A B L E O F C O N T E N T S ESYS 12/24/40/64/80 ........................3 ........................... 3 IN THE BOX ......................3 DESCRIPTION OF ESYS ......................4 ECHNICAL CHARACTERISTICS ......................5 SAFETY INSTRUCTIONS ................5 INTERNATIONAL REGULATIONS COMPLIANCE ESYS MAIN MENU ............................ - Page 3 28/02/2011 2/48 ......................... 29 .......................... 30 SET DATE MENU ......................31 TOOLS FUNCTION ..........................31 OWER MENU ..........................32 EST MENU ........................... 32 PDATE ........................33 ARAMETERS MENU ..........................34 BOUT MENU APPENDIX ................................ 35 ..............35 APPENDIX BRAILLE FUNCTIONS BRAMIGRAPH ....................
-
Page 4: Esys 12/24/40/64/80
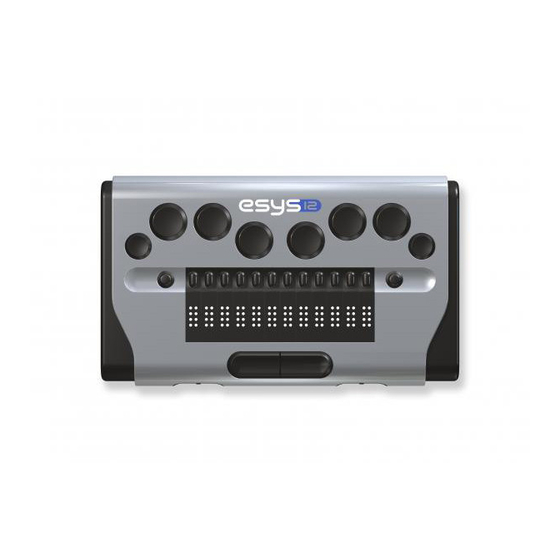
28/02/2011 3/48 ESYS 12/24/40/64/80 IN THE BOX 1 esys 12/24/40/64/80 cell Braille display Power supply 5V/1A Mini standard USB cable for power supply connection and connection to PC 2 GB Micro SD memory card Light carry bag (EsysLight, Esys12 and Esys40) esys12 only: neck strap DESCRIPTION OF ESYS On the left-hand side, from back to front (Braille line facing user and buttons facing upwards):... -
Page 5: Technical Characteristics
28/02/2011 4/48 TECHNICAL CHARACTERISTICS The Lithium-Ion battery included inside the device allows for up to 20 hour continuous use depending on model; recharging time is up to four hours; you can recharge esys using the included USB cable and a normal electronic socket OR the USB port of a PC. esys does not have an on/off button but a stand-by mode in which it can remain for up to 10 days. -
Page 6: Safety Instructions
Except as specifically explained in the user's manual, do not attempt to service esys by yourself. • Do not open the device if you haven’t followed Eurobraille repairing training .It would break the warranty of the device. • Detach esys from power source and refer to a certified service center under the following... -
Page 7: Esys Main Menu
28/02/2011 6/48 ESYS MAIN MENU This part explains esys main features; .menu navigation, the edit box principle, navigates while in a tree folder structure and the main shortcuts. QUICK START-BASIC INFORMATION NOTE: esys has its own operating system and can work independently without any other device. It can also work in combination with computers or mobile phones. -
Page 8: Edit Box Principle
28/02/2011 7/48 The Right hand Joystick (RJ) acts like the 4 arrows of a keyboard while using the 4 directions. When clicking centrally on this joystick it will act on a focused item like the enter button of a keyboard or the double left click of a computer mouse. -
Page 9: Main Menu Shortcuts
28/02/2011 8/48 If sdcard\transport>f,plane is displayed, pressing over one of the sdcard characters will open the root level. NOTE: the “f” letter of “f,plane” means plane is a file type and the “d” of “d,transport” means that transport is a folder. MAIN MENU SHORTCUTS: The four directions (up, down, left, right) of the Left hand Joystick are used in combination with actions on the Right Joystick or navigation wheels to create shortcuts;... -
Page 10: How To Use Esys Via Usb Connection
Before installing any driver disconnect the device and follow the procedure described in the driver Then http://www.eurobraille.com/index.php?lg=uk&page=download- uk&title=download to install the correct driver according for your screen reader software. After the correct driver is installed, connect the USB cable delivered with esys to the PC. Go to “USB”... -
Page 11: How To Use Esys Connected Via Bluetooth
28/02/2011 10/48 HOW TO USE ESYS CONNECTED VIA BLUETOOTH Begin with synchronizing your esys with the target device (computer or cellphone). To activate the Bluetooth connection on your esys just go inside the Bluetooth menu. The Bluetooth of your esys will automatically switch on. “Bluetooth disconnected”... -
Page 12: Esys Functionalities
28/02/2011 11/48 ESYS FUNCTIONALITIES In this section, the main menu items will be described: “esys:bluetooth usb notepad diary calculator alarm-clock tools T” BLUETOOTH MENU This menu allows the user to set Bluetooth parameters and to activate/deactivate the Bluetooth connection. Open the Bluetooth menu, “bluetooth disconnected” can be read on the Braille line. As soon as the Bluetooth menu item is opened, the Bluetooth connection becomes enabled even if you go back to the main menu without pairing with another device. -
Page 13: Usb Menu
28/02/2011 12/48 The “restore factory settings” item will restore the default values of the Bluetooth interface. The following question will be asked: “info:Do you want to restore factory settings of your Bluetooth adapter? yes no T” Click on “yes” to confirm the procedure or select “no” to cancel. USB MENU This menu item allows the user to switch from esys internal functions to the screen reader software. -
Page 14: Notepad Menu
28/02/2011 13/48 NOTEPAD MENU The note taking application of your esys will enable you to easily type text without being connected to a computer. Technical notes: There is one limitation to how you type in text; you can only type paragraphs up to 6 kB of length;... - Page 15 28/02/2011 14/48 Open (Alt f; o / Ctrl o) Select “open” to search for a folder or file on your micro-SD card. If the current document has not been saved or the file has been modified since the last save, the following line will be displayed: “info:Do you want to save current document? yes no cancel T “Yes”...
- Page 16 28/02/2011 15/48 Save (Alt f; s /Ctrl s) This function enables you to save any modifications you have made in a document. This will save the document under its current name; if you have not yet given the document a name, you will be asked to do so using the “Save as”...
- Page 17 28/02/2011 16/48 Delete a File or Folder To delete a file or a folder, you have to indicate where the target is located on your micro-SD card. To do so use the “navigate while in a tree folder structure”. If man:sdcard>d,transport is displayed you are ready to delete the transport folder located at the root of your micro-SD card and all its including files.
-
Page 18: Edit Menu
28/02/2011 17/48 EDIT MENU Click on “edit” menu to access to this sub-menu “edt:line number find find next find previous insert tag go to tag T” Line number This item has 2 functions, the first one show where your line your cursor is currently located and the second will allow you to reach a line. -
Page 19: Braille Keyboard Combinations For Notepad
28/02/2011 18/48 Go To Tag (Alt e; g / F2) Use this option to return to a previously inserted tag. To do so, simply select “go to tag” and your cursor will automatically end up at the tag position. BRAILLE KEYBOARD COMBINATIONS FOR NOTEPAD The Braille keyboard is used to type text in the notepad application. -
Page 20: Notepad Specific Shortcuts
28/02/2011 19/48 1259 Lock selection mode 1245A Escape Unlock selection mode NOTEPAD SPECIFIC SHORTCUTS Description esys <JR Up> Cursor on previous paragraph <JR Down> Cursor on next paragraph <JR Right> Cursor right <JR Left> Cursor left <M Right> Braille line ahead <M Left>... -
Page 21: Diary Menu
28/02/2011 20/48 DIARY MENU The “diary” function in esys allows the user to: Manage appointments which are defined by a specified date, an hour and minute and an object limited to 512 characters; and as well to add a “post-it” to a day which consists of an object without time specification. -
Page 22: Day -View
28/02/2011 21/48 DAY –VIEW This view focus on a single day. It posts each item of the day in the shape of a chronological list. Appointments during one day are posted in the following way: The first line represents the date of the day. The following lines contain “post-it’s”... - Page 23 28/02/2011 22/48 If your cursor is already in an existing appointment or post-it and the “appointment” menu is opened, the following will be displayed: “app:new edit delete T” NOTE: if the appointment menu is opened elsewhere than an existing event (post-it or appointment) only the following will be displayed: “app:new T”.
- Page 24 28/02/2011 23/48 - Search for the next/previous day which contains an appointment using specified search words. By clicking on “go to” the following menu is opened: “got:date next day previous day word in next day T” Date Select “date” in order to open the following menu: “dat:day>02 month>july year>2010 ok cancel”.
-
Page 25: View Menu
28/02/2011 24/48 “del:month year diary” T Allows deleting any event of the day where the cursor is located. Click on “day”, the following will be displayed: info:Do you really want to delete day (wednesday 7 July 2010) yes no T” To delete press “yes”, to exit without deleting press “no”. -
Page 26: Calculator Menu
28/02/2011 25/48 CALCULATOR MENU Using the calculator, it is possible to execute simple mathematical functions as addition, subtraction, multiplication and division. The following is also available: percent, square root, and currency conversion. The calculator has four memory functions. Numbers have the following structure: 8 number positions before the comma, 2 number positions after. -
Page 27: Operators Menu
28/02/2011 26/48 Backspace partial deleting Space or Delete complete deleting Enter equal Below a description of menu items follows. In order to access to items, center-click on the left joystick having the calculator application open. The following will be displayed on the Braille line: “clc:operators memory currency T”. -
Page 28: Currency Menu
28/02/2011 27/48 Sub to memory Use the “sub to memory” function to subtract a value to an already stored number. For instance, the number 10 is stored using the “memorize” function and you want to subtract the result of another operation to this value, click on “sub to memory”... -
Page 29: Calculator Specific Shortcuts
28/02/2011 28/48 CALCULATOR SPECIFIC SHORTCUTS actions Description esys <JR Up> Addition <JR Down> Subtraction <JR Right> Division <JR Left> Multiplication <JL Left > + <JR Up> Percent <JL Left > + <JR Down > <JL Left > + <JR Right > Square root <JL Left >... -
Page 30: Alarm Clock Function
28/02/2011 29/48 ALARM CLOCK FUNCTION esys includes a clock and a ring tone. This will allow you to program an alarm at a given time for each day of the week. This application looks like a line including the date, the time and a button showing you whether or not the alarm is switched on. -
Page 31: Set Date Menu
28/02/2011 30/48 To change the hours, the minutes and seconds, modify the edit boxes (for further information refer to the “edit box” section). Select ok when finished. If no change is needed, press cancel. SET DATE MENU To change the current date, select “set date”. The following menu is displayed: “sdt:day>02 month>july year>2010 ok cancel T”... -
Page 32: Tools Function
28/02/2011 31/48 TOOLS FUNCTION Using the tools application it is possible to customize different features of esys and display useful information to get a first overview of the current status of the device in a support case. In the tools menu, it is possible to check the battery level, change the language settings, update the firmware, test the device, and much more and take the appropriate actions. -
Page 33: Test Menu
This item allows the user to update esys to the latest firmware version. Use a micro-SD card and copy the file Esys.hex which is downloadable from the Eurobraille web site to the root of the card. Insert the micro-SD card in the esys. Click once on “update” to start the process. -
Page 34: Parameters Menu
28/02/2011 33/48 NOTE: Always connect your esys to a power source before updating. Should an error occur during the update and esys does not respond, please contact your local sales representative. PARAMETERS MENU The parameters menu assists the user to activate or deactivate certain features of When this esys. -
Page 35: About Menu
To confirm any changes click on “ok” or select “cancel if you want to cancel the procedure without saving any changes. ABOUT MENU This menu option displays important information concerning esys and the Eurobraille Company. The following will be displayed: “abt:esys eurobraille T”... -
Page 36: Appendix
28/02/2011 35/48 APPENDIX APPENDIX 1: BRAILLE FUNCTIONS - BRAMIGRAPH BRAILLE FUNCTION 123A Home Page up Left Num.5 Right 456A Down Page down 345A Enter 236A Backspace 1245A Escape Function keyboard BRAILLE FUNCTION 1459... - Page 37 28/02/2011 36/48 1249 12459 1259 2459 1239 Navigation keyboard BRAILLE FUNCTION Home Page up Left Right Down Page down 2356A 246A Enter 12349 Start Context...
- Page 38 28/02/2011 37/48 256A 235A Shift Tab Break Ctrl Caps lock Caps unlock 1245A Escape Enter Backspace Space...
-
Page 39: Appendix 2: Talks Functions
Depending on your phone, double click on one of the esys files (visit www.eurobraille.com for a list of supported mobile phones). It is recommended that you chose to install the driver on the external memory card of the phone; you will have to go through a series of dialog boxes to finish the installation procedure. - Page 40 28/02/2011 39/48 Esys Phone keys <JL Up> or <Braille 29> [Talks] <JL Down> or <Braille 59> [Talks] hold. <JL Up>, <JL Up> [Edit] <JL Left> [Menu] <JL Right> + <JR Up> [Call] <JL Right > + <JR Down> [Exit] <JL Right > + <JR Left> <JL Right >...
- Page 41 28/02/2011 40/48 <ML Right> or <MR Right> Next Braille line. <Braille 16> <Braille 126> <Braille 146> <Braille 1456> <Braille 156> <Braille 1246> <Braille 12456> <Braille 1256> <Braille 246> <Braille 3456> <Braille 9> [Clear]...
-
Page 42: Appendix 3: Mobile Speak Functions
28/02/2011 41/48 APPENDIX 3: MOBILE SPEAK FUNCTIONS SETTINGS WITH MOBILE SPEAK Install Mobile Speak on your mobile phone and activate Bluetooth. Go to Bluetooth application in esys main menu and click on it to activate the Bluetooth connection. Pair your mobile phone with your esys. - Page 43 28/02/2011 42/48 Braille Pan Left Right Up Braille Pan Right Right Down, Space + dot6 Previous Character/Grid Item/Tab Sheet Joystick Left, Space + dot3 Next Character/Grid Item/Tab Sheet Joystick Right, Space + dot6 Previous Line/List Item/Menu Item Joystick Up, Left Up, Space + dot1 Next Line/List Item/Menu Item Joystick Down, Left Down, Space + Ddot4 Previous Word...
- Page 44 28/02/2011 43/48 Interrupt/Stop Speech Backspace + dots78 Toggle Command Help Mode Space + dots125(h) Change Braille Input Grade Space + dots1245(g) Toggle Braille Cursor Space + dots123456...
-
Page 45: Appendix 4: Screenreader Settings
Braille keyboard, and make sure to use 8 dot Braille. WARNING: It is necessary to download and run a DLL update from www.eurobraille.com after installing Supernova 11.0 and before configuring esys with the screen reader. - Page 46 28/02/2011 45/48 <ML> : it represents the left wheel. <MD> : it represents the right wheel. <MCL> and <MCR> central wheels left and right (only for esys40). Considering that the 4 wheels have the same function, we will use the symbol <M> when talking about a navigation wheel. When you need to activate simultaneously two different controls on your esys, we will use the «+»...
- Page 47 28/02/2011 46/48 <JL Left> + <M Left> Previous line BraillePriorLine BRL_STATUS7 <JL Left> + <M Middle> BRL_STATUS8 <JL Right> + <JR Up> Task list StartJawsTaskList BRL_NP1 <JL Right> + <JR Down> Notification zone icons ListTaskTrayIcons BRL_NP2 list <JL Right> + <JR Right> Mouse right click RightMouseButton BRL_NP3...
- Page 48 28/02/2011 47/48 pc cursor <JL Down> + <JR Down> Match pc cursor to RoutePCCursorToJaws BRL_KP12 Jaws cursor <JL Up> + <JR Left> Activate pc cursor PCCursor BRL_KP13 <JL Up> + <JR Right> Activate Jaws cursor JAWSCursor BRL_KP14 <JL Down> + <JR Middle> Switch between tree BrailleToggleMode BRL_KP15...
Need help?
Do you have a question about the ESYS Series and is the answer not in the manual?
Questions and answers