Nagra 300 Series Instruction Manual

Nagra 300 Series Instruction Manual

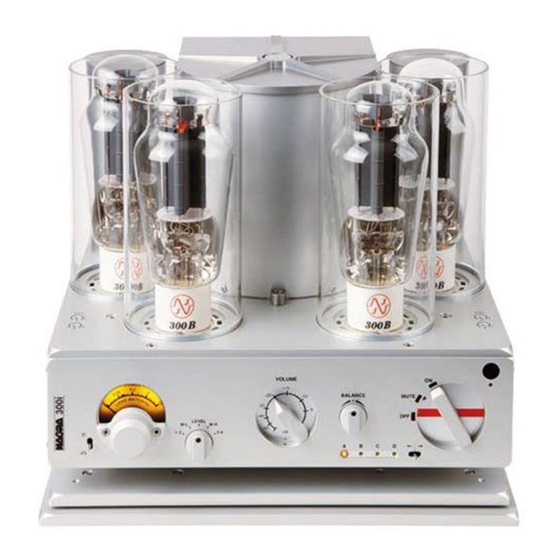
Ultimate 300b amplifiers

Advertisement

Quick Links

Ultimate 300B amplifiers
P/N: 2055023151
300i – 300p
Instruction manual
A
A
l
l
l
l
r
r
i
i
g
g
h
h
t
t
s
s
r
r
e
e
s
s
e
e
r
r
v
v
e
e
d
d
©
©
2
2
0
0
1
1
4
4
r
r
e
e
v
v
1
1

Advertisement

Table of Contents
loading
Need help?

Need help?

Do you have a question about the 300 Series and is the answer not in the manual?

Questions and answers

Subscribe to Our Youtube Channel

Summary of Contents for Nagra 300 Series

  • Page 1 300i – 300p Ultimate 300B amplifiers Instruction manual P/N: 2055023151 – – © ©...
  • Page 2: Table Of Contents

    Installing new tubes ..............15 Adjusting backlight and LED intensity ......... 16 Input selection ................. 17 How to use Nagra remote control (with 300i only) ......18 Load match meter ..............19 Reading the modulometer ............20 Case cleaning ................20 Annex 1 - Troubleshooting ............
  • Page 3: Security Warnings

    • Should you need to ship or transport your amplifier, always use the original packing supplied by Nagra. Warranty AUDIO TECHNOLOGY SWITZERLAND SA, certifies that this instrument was thoroughly inspected and tested prior to leaving its factory and is in accordance with the data given in the accompanying measurement protocol and test sheet.
  • Page 4: Congratulations

    Since its inception in 1951, Nagra builds products that continue to earn a reputation for delivering ultimate sonic performance. Numerous awards have been bestowed upon Nagra for its technical innovation, excellence in design and ®...
  • Page 5: Setting-Up The Amplifier

    Setting-up the amplifier Introduction to set-up It is recommended to wear Nagra gloves to manipulate the amplifier and the accessories. It is mandatory when handling the 300B tubes as hand prints can affect the tube in the long-term. Place the amplifier on the VFS platform on a perfectly flat and stable surface.
  • Page 6: Assembling The Amplifier

    Assembling the amplifier Three guide holes will help you to slide the transformer block into position. These short rods fit into the guide holes. Nagra – 300i / 300p...
  • Page 7 When reaching the base, the transformer connector will need an extra push to be inserted in the base connector, this is perfectly normal. Inserting the block screws Using the screwdriver provided, place the three fixing screws to hold the transformer in place (the set includes two spare screws). Nagra – 300i / 300p...
  • Page 8: Installing The Tubes

    The tube number is written on the back of each tube connector on your amplifier, as well as on the back of each tube base. Spare tubes provided by Nagra can be placed in any position as you will adjust the amplifier’s bias to their specification.
  • Page 9: Placing The Tube Protections

    Place the iron part into the gutter. Tube protections are designed to avoid any contact with the hot tube that could provoke serious injuries. Be careful with the youngest music lovers. Nagra – 300i / 300p...
  • Page 10: Connections

    XLR or asymmetrical on RCA (CINCH). Its maximum input level is 2 V rms. Use the white jumper to select XLR or RCA input. On this picture, the input is on RCA. Nagra – 300i / 300p...
  • Page 11: Loudspeaker Output

    You may now connect your power cable to the IEC plug, just below the mains switch. Ground post Your Nagra dealer may advice you on the opportunity to use the ground post. It is only useful in very specific situations.
  • Page 12: Operating The Amplifier

    Fine left / right level balance Input selection (display on LED A to D) Main selector Remote control receiver and remote LED The 300p front panel is the same except for the preamplifier functions (input selector, volume and balance). Nagra – 300i / 300p...
  • Page 13: Rear Panel

    Ground post Power supply voltage indication (120 V on this picture) Mains connector Fuse holder compartment Mains switch (I) ON, (0) OFF Except for the input block, the 300i and 300p’s rear panels are the same. Nagra – 300i / 300p...
  • Page 14: How To Turn The Amplifier On

    MUTE and after a few seconds to ON. The amplifier needs to warm-up during about fifteen minutes before reaching its nominal working zone. You may however start listening as soon as the amplifier is on. Nagra – 300i / 300p...
  • Page 15: Caution To Use For The First Power On

    Installing new tubes Turn the amplifier OFF using the mains switch on the rear panel, place the new tubes by pair 1-2 and 3-4, please use Nagra gloves to manipulate the tubes. Then, carefully read the section “Bias adjustment” on page 23.
  • Page 16: Adjusting Backlight And Led Intensity

    Adjusting backlight and LED intensity There are 7 levels of intensity for the modulometer backlight and the LED. Pushing the (2) switch down (cloud) will decrease intensity down to extinction; pushing in the opposite direction (sun) will increase intensity. Nagra – 300i / 300p...
  • Page 17: Input Selection

    Here from C to B. Inputs A, B and C accept signals up to 2 V rms. Input D allows signals up to 4.1 V rms, prefer this input if you use high level sources. Nagra – 300i / 300p...
  • Page 18: How To Use Nagra Remote Control (With 300I Only)

    How to use Nagra remote control (with 300i only) The RCU-II remote control requires a 9 V battery. We recommend using alkaline batteries for extended battery life. Hold the remote control upside down. Remove the screw (screwdriver number 3 provided). Slide...
  • Page 19: Load Match Meter

    Poor match Needles movements seem to Try another ouptut not relate to each other, impedance on the specially on bass notes (bass amplifier and adjust it drum for instance) until it is better Nagra – 300i / 300p...
  • Page 20: Reading The Modulometer

    Clean the amplifier casing using a soft, non-fluffy, slightly damp cloth. Do not use any cleaning products which could have a corrosive effect. Do not expose the amplifier, batteries and accessories to humidity, rain or excessive heat (from domestic heating or direct sunlight). Nagra – 300i / 300p...
  • Page 21: Annex 1 - Troubleshooting

    In this situation, the tubes will shut down and a LED will blink on the front panel to report a specific problem. In any case, do not attempt to open the amplifier or the transformer block. If you have any doubt on what to do, contact your Nagra dealer for support. Problem...
  • Page 22 This will occur after 4 consecutives start- not start second ups in a short time, often during bias adjustment Turn the amplifier on again, it will start after a 2 minute warm-up during which the LED will keep blinking Nagra – 300i / 300p...
  • Page 23: Annex 2 - Bias Setting

    Use the provided ceramic screwdriver, it has the advantage of being electrically isolated. The bias is made by means of precision potentiometers built-in the amplifier’s main deck. Tubes 1 and 2 Tubes 3 and 4 Nagra – 300i / 300p...
  • Page 24 15 seconds from start-up. If the amplifier shuts down, you can still move the potentiometer before restarting it. Step 5 potentiometer direction Clockwise – needle moves to the right Anti-clockwise – needle moves to the left Nagra – 300i / 300p...
  • Page 25: Annex 3 - Replacing The Fuse

    Insert a fuse in the fuse holder on the metal contact side. You may place a spare fuse in the left compartment. Always use Nagra original fuse or some of the same type (5x20), depending on the mains voltage, the fuse should be:...
  • Page 26: Technical Specifications

    Technical specifications The following table shows the general specifications for all Nagra 300i and 300p amplifiers. Your personal amplifier’s measurements are provided on the accompanying "measurement protocol" document. Type Class A Tube type 300B triode Output power 20 W rms Input impedance >...
  • Page 27 FABRICANT: AUDIO TECHNOLOGY SWITZERLAND SA, 1032 Romanel, SUISSE MANUFACTURER: AUDIO TECHNOLOGY SWITZERLAND SA, 1032 Romanel, SWITZERLAND APPAREIL : Nagra 300i / Nagra 300p MODEL: Nagra 300i / Nagra 300p NORMES APPLICABLES : APPLICABLE NORMS: Champ électromagnétique rayonné EN 55022 Cl. B Radiated electromagnetic field EN 55022 Cl.

This manual is also suitable for:

300i300p

Table of Contents