Advertisement
Quick Links
WARNING:
Please read all instructions and warnings carefully
before you use
Do not use the unit with gasoline.
For security reasons, do not use the unit to extract or store dangerous chemicals, poison,
acid, alkaloid, or solvents.
Do not use the unit to extract, siphon or store petroleum or other highly inflammable liquids.
Do not throw, drop or mishandle the unit.
Do not disassemble, tamper with or modify the unit for any other purpose than what it was
originally intended for.
Do not store either the unit or suction tubes near or in areas of high temperatures, direct
sunlight, rain or snow.
The unit must be instantly, drained, washed and cleaned after each use.
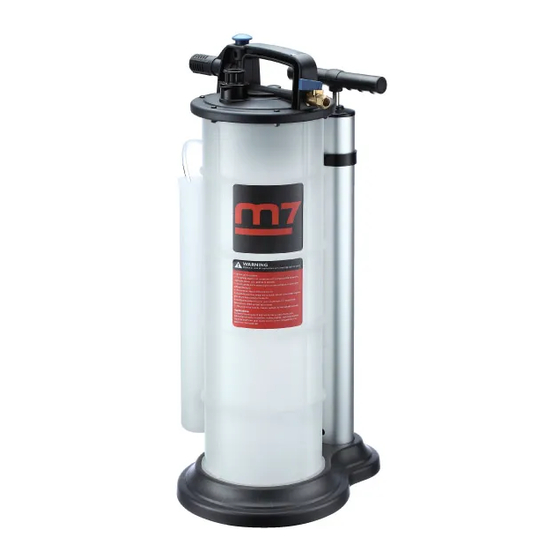
Air inlet : 1/4"
Tank Capacity : 9.0 L
Air Consumption : 5 CFM
Working Pressure : 70-170 PSI
Must perform the following procedures before use:
A. Draw out the Air Nipple (Part 63)
from the quick Coupler (Part 64)
of the Hand Pump (Part 45).
B.Use PTFE thread sealing Tape to seal thread of the Air Nipple (Part 63),
after then fix it into the Air Valve (Part 62) with a Tool.
C.To set up the Tube Storage Unit ( D ) into the two hooks of Reservoir Tank ( C )
1
Advertisement

Summary of Contents for M7 SM-0502
- Page 1 WARNING: Please read all instructions and warnings carefully before you use Do not use the unit with gasoline. For security reasons, do not use the unit to extract or store dangerous chemicals, poison, acid, alkaloid, or solvents. Do not use the unit to extract, siphon or store petroleum or other highly inflammable liquids. Do not throw, drop or mishandle the unit.
- Page 2 All Goods In The Package...
- Page 3 AUTO SHOT OFF 9 LITER MANUAL & PNEUMATIC FLUID EXTRACTOR OPERATING INSTRUCTIONS Notes: When using the Manual & Pneumatic Fluid Extractor unit to extract engine oil, first you need to make sure the vehicle is level, and then run the engine for about 5 minutes to warm the oil and allow any sludge or contamination within the oil to mix.
- Page 4 Trouble shooting: Trouble Cause Trouble shooting When you Turn Air Valve to the “Open” position and press Push Button down, but the Extractor Unit Please to press the blue color won’t start operation. button that is on the "cover You might stand upside down the housing", if you hear the sound body inclines (when it in the no fluid in "...
- Page 5 ATTENTION: Merci de lire attentivement les instructions avant usage. Ne pas utiliser avec de l’essence. Par sécurité, ne pas utiliser l’appareil pour extraire des produits chimiques dangereux, des poisons, acides, ou solvants. Ne pas utiliser pour extraire ou siphonner du pétrole ou autres liquides extrêmement inflammables.
-
Page 6: Instructions D'utilisation
EXTRACTEUR DE FLUIDES MANUEL & PNEUMATIQUE 9 LITRES INSTRUCTIONS D’UTILISATION Notes: Avant l’utilisation de l’extracteur de fluides manuel et pneumatique, assurez vous que le véhicule est à niveau, et faites tourner le moteur pendant 5 minutes pour chauffer l’huile. Instructions d’utilisation: Instructions pour extraction d’huile moteur 1. -
Page 7: Dépannage
Dépannage: Cause de la panne Dépannage Pressez le bouton bleu situé sur le couvercle de l’extracteur. Si vous Vous tournez la valve en position entendez distinctement un « clic », “Ouverte” et pressez le bouton, l’extracteur fonctionne correctement. Si mais l’extracteur ne se met pas non, veuillez incliner l’extracteur (vide) en marche. - Page 8 ADVERTENCIA: Lea atentamente este manual antes de usar el equipo. Guarde el manual en un lugar seguro para futuras consultas. No utilice el SM-901 para extraer o almacenar combustibles (gasolina, diesel o alcohol), solventes ácidos, líquidos tóxicos o inflamables. con gasolina. Mo use la unidad para extraer petróleo u otros líquidos altamente inflamables.
- Page 9 9 MANUALES CORTOS E INSTRUCCIONES DE USO DEL EXTRACTOR DE LÍQUIDOS NEUMÁTICO Notas: Antes de extraer el aceite de motor con el SM-0901, asegúrese que el vehículo se encuentre sobre un lugar plano. Verifique también la temperatura del motor y si estuviera frìo, dejarlo funcionando por unos 5 minutos para calentar el aceite y levantar eventuales partículas de suciedad para que puedan ser extraídas junto con el aceite.
- Page 10 Solución de Problemas Frecuentes: Posibles Problemas Solución Debe oírse un sonido de click cada vez que el botón de accionamiento es presionado. Si eso no ocurriese, intentar lo siguiente: a) Si hubiera líquido en el tanque: incline el equipo hasta unos 45° y balancéelo Al abrir la Válvula de Aire y presionar el algunas veces.
- Page 11 Atenção! Leia atentamente este manual antes de utilizar o equipamento. Guarde-o em local seguro para futuras consultas. Nunca utilize o SM-0901 para extrair ou armazenar combustíveis (gasolina, diesel ou álcool), solventes, ácidos, líquidos tóxicos ou inflamáveis. Transporte o equipamento cuidadosamente, evitando quedas ou batidas que possam danifica-lo.
-
Page 12: Observações Importantes
Instruções para extração do óleo do motor usando ar comprimido. Observações importantes: Antes de extrair o óleo do motor com o SM-0901, certifique- se que o veículo esteja em local plano. Verifique ainda a temperatura do motor. Se ele estiver frio, deixe-o funcio- nando por 5 minutos para aquecer o óleo e levantar eventuais partículas contaminadoras que também serão extraídas em conjunto. - Page 13 Resolução de problemas mais comuns: Problema Solução sugerida Deve-se ouvir um leve estalo (click) sempre que o botão de acionamento for pressionado. Se isso no ocorre, tente o seguinte: a) Se houver liquido no reservatório: incline o equipamento em 45° e Ao abrir a válvula de ar (62) e apertar o balance-o algumas vezes.
- Page 14 Manual & Pneumatic Fluid Extractor ltem No : SM-0901...
- Page 15 SM-0901 INDEX NO. DESCRIPTION QT'Y INDEX NO. DESCRIPTION QT'Y SM-0901P01 Cover Housing SM-0901T37 Screw ψ4x10mm (3 PCS) 1 SET SM-0901P02 Push Button SM-0901T38 Screw M8x16mm (2 PCS) 1 SET SM-0901P03 Spring SM-0901P39 Alum. Tube Base SM-0901P04 Fluid Inlet Coupler SM-0901P40 Hex Nut M8 SM-0901P05 O Ring 25.2xψ2.7mm SM-0901P41 Piston SM-0901P06 Fluid Outlet Housing...
- Page 16 2 LITER SM-0502 PNEUMATIC BRAKE EXTRACTOR & REFILLED KIT EXTRACTEUR PNEUMATIQUE DE LIQUIDE DE FREINS ET KIT DE RECHARGE...
- Page 17 WARNING: Please read all instructions and warnings carefully before you use Always read carefully and understand instructions prior to using this equipment Brake fluid is highly corrosive. Please to wear gloves and approved safety goggles at all times, and prevent contact the fluid with painted surfaces. Do not use the unit to extract highly inflammable liquids or with fluids at temperatures above 175°...
- Page 18 Extractor Unit Components No. Description No. Description A Cover Housing G Fluid Inlet Cover B Push Button H Extract Tube C Muffler Air Valve D Tank Rubber Fitting E Adapter Of Extract Tube K Refilled Kit F Brake Tube...
-
Page 19: Principal Of Operation
PNEUMATIC BRAKE FLUID EXTRACTOR AND REFILLED KIT OPERATING INSTRUCTIONS Principal of Operation This unit is designed for use as a vacuum brake or clutch bleeder. It uses compressed air between 70 psi (4.8 bar) to 170 psi (11.6 bar), for building vacuum in the tank. By attaching the proper adapter (brake tube) to the fluid outlet cover located on the top of the unit, the vacuum can be used to drain brake fluid from a hydraulic system such as the brake or clutch systems on an automobile. - Page 20 Vacuum bleed brake lines and wheel brake cylinders Note: Prior to bleeding, ensure that the master cylinder is full of new manufacture’s recommended brake fluid. An automatic refilled kit is included with the unit to maintain the level of new fluid in the master cylinder during the brake bleeding process. Follow the instructions included with the kit to prevent air from being sucked into the master cylinder pistons, brake lines, and wheel cylinders while the hydraulic system is bled.
- Page 21 Note: It is important to ensure that the Rubber Fitting remains connected to the bleed screw, and the unit is still pulling a vacuum while the bleed screw is closed. This prevents air from being sucked back into the wheel cylinder from around the bleed screw threads, before the bleed screw is tightened and sealed.
- Page 22 1. Properly park the vehicle on the level ground and turn the engine off, then for safe convenient access to the clutch bleed screw located on the slave cylinder. 2. Make sure that the slave cylinder bleed screw is clean. 3.Connect compressed air 70 psi (4.8 bar) to 170 psi (11.6 bar) by the nipple attached to the Air Valve ( I ), located on one end of the Cover Housing ( A ).
- Page 23 Trouble shooting Trouble Cause Trouble shooting Please to press the blue color button that is on the "cover housing", if you hear the sound in " click " obviously, means in the When you Turn Air Valve normal condition. If there’s no voice, it means to the “Open”...
-
Page 24: Principe D'utilisation
WARNING: Veuillez lire attentivement les instructions avant utilisation. Toujours lire attentivement les instructions avant l’utilisation de ce produit. Le liquide de freins est extrêmement corrosif. Veuillez porter des gants et des lunettes de protections à tout moment lors de l’utilisation, et éviter tout contact entre le liquide et les parties peintes. - Page 25 Instruction pour la purge des freins IMPORTANT: Les procédures énoncées ci-dessous doivent servir de lignes directrices pour l'utilisation de cet appareil. En plus de ces instructions, toujours suivre les procédures recommandées par le fabricant lors de l'entretien de chaque véhicule. Retirer le liquide de freins du maitre-cylindre 1.Garer le véhicule sur un terrain plat et couper le moteur.
- Page 26 1. Garer le véhicule sur un terrain plat et couper le moteur, puis s’assurer d’avoir un accès sûr et pratique à la vis de purge de frein, située sur les cylindre de freins de chaque roue. 2. S’assurer que les vis de purges soient propres. 3.
- Page 27 IMPORTANT: Les procédures énoncées ci-dessous doivent servir de lignes directrices pour l'utilisation de cet appareil. En plus de ces instructions, toujours suivre les procédures recommandées par le constructeur lors de l'entretien de chaque véhicule. Retirer le liquide d’embrayage du maître-cylindre. 1.
- Page 28 3. Raccorder l'air comprimé (de 70 psi (4,8 bar) à 170 psi (11,6 bar)) par le raccord fixé à la vanne d'air ( I ), situé sur l’ extrémité du couvercle ( A ). 4. Connecter l'extrémité de l'adaptateur du tube de frein ( F ) au le couvercle d'entrée de fluide (G) situé...
- Page 29 Dépannage: Cause de la panne Dépannage Pressez le bouton bleu situé sur le couvercle de l’extracteur. Si vous entendez distinctement un Vo u s t o u r n e z l a v a l v e « clic », l’extracteur fonctionne en position “Ouverte”...
- Page 30 PNEUMATIC BRAKE FLUID EXTRACTOR ltem No : SM-0502...
- Page 31 SM-0502 INDEX NO. DESCRIPTION QT'Y SM-0502P01 Cover Housing SM-0502P02 Push Button SM-0502P03 Spring SM-0502P04 Vacuum Valve SM-0502P05 O Ring SM-0502P06 O Ring SM-0502P07 Vacuum Body SM-0502P08 Muffler Insert SM-0502P09 Muffler Shell SM-0502P10 O Ring SM-0502P11 O Ring SM-0502P12 Shaft SM-0502P13 O Ring...
- Page 32 REFILLED KIT ltem No : SM-0502 SM-0502 SM-0502 NO. INDEX NO. DESCRIPTION QT'Y SM-0502F01 Bottle SM-0502F02 Lid SM-0502F03 Packing SM-0502F04 Valve SM-0502F05 Lock Nut SM-0502F06 Bracket SM-0502F07 Swivel Socket SM-0502F08 Nozzle SM-0502F09 Knob 10 SM-0502F10 Washer SM-0502F11 Screw 12 SM-0502F12 Plate...
Need help?
Do you have a question about the SM-0502 and is the answer not in the manual?
Questions and answers