Advertisement
QUICKSTART-MANUAL
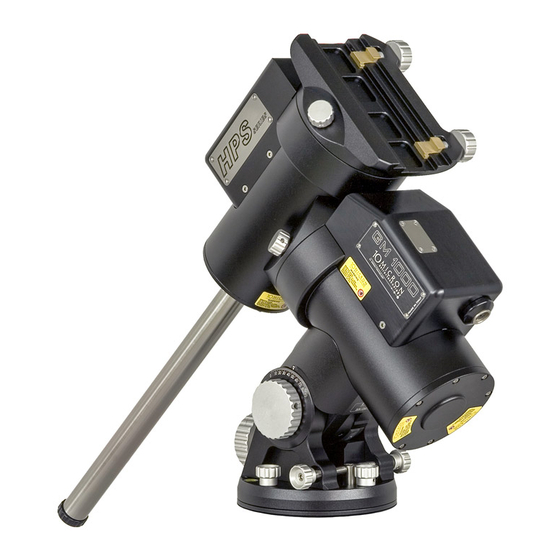
for setting-up 10Micron HPS-Mounts
All functions for setting-up and operating a 10Micron HPS-Mount can be accessed via the Keypad,
you do NOT need a laptop/computer
ESC-key, takes you back
to a higher level in the menu
1. SETUP / PREPARATIONS
1.1 SET UP THE MOUNT
Attach the mount head onto the tripod. Roughly align the mount with a compass in such a way that the
telescope faces north. Set the altitude with the scale at the side to your geographical latitude. Connect
mount and keypad with the control-box. Connect the control-box to the 24V power supply or two optional
Powertanks which are connected together with the special connector cable. Take a crosshair-eyepiece
and do not use a star diagonal, even if looking through the telescope this way is uncomfortable for the
Alignment mentioned in step 2.
1.1 MOUNT AND BALANCE TELESCOPE AND ACCESSORIES
Attach all instruments and accessories to the telescope (incl. camera and finderscope). If you use a reflec-
ting (catadioptic) telescope, make sure that the main mirror is locked; make also sure that the focuser is
locked. Now you can start to balance both axes of the mount precisely. Use the mounts balancing function
to achieve this. Once both axes are in balance, fix them by hand.
Menu > Drive > Balance > Balance RA
Menu > Drive > Balance > Balance Dec
4-line display
Direction Keys North-West-South-East
to move RA and DEC-axes
Scroll keys for the menu lists. During operation,
they can change the motor speed
Confirm inputs or execute functions
Use this key to manually abort Goto-processes
if there is a risk of collisions or disrupted cables.
Menu-key
(if possible, do this during daylight)
1
Advertisement
Table of Contents

Summary of Contents for Baader Planetarium 10Micron HPS Series
- Page 1 QUICKSTART-MANUAL for setting-up 10Micron HPS-Mounts All functions for setting-up and operating a 10Micron HPS-Mount can be accessed via the Keypad, you do NOT need a laptop/computer 4-line display Direction Keys North-West-South-East to move RA and DEC-axes Scroll keys for the menu lists. During operation, they can change the motor speed Confirm inputs or execute functions Use this key to manually abort Goto-processes...
- Page 2 Montierungen High Precision – for your astronomical future Please note: The first three Alignment-Stars should be on the same side of the meridian, so that you 1.3 BASIC SETTINGS OF THE KEYPAD don‘t have to move the mount from east to west over the meridian. The stars should be at least 30° Please enter the current values for the following settings into the keypad exactly in this order: above the horizon and form a very large triangle.
- Page 3 Authorized 10Micron dealer: © Baader Planetarium 2017. All Rights reserved. Products or instructions may change without notice or obligation. Images and illustrations may differ slightly from the original products. We reserve the right of errors. Reproduction of this brochure, complete or...
Need help?
Do you have a question about the 10Micron HPS Series and is the answer not in the manual?
Questions and answers