Table of Contents
Advertisement
Quick Links
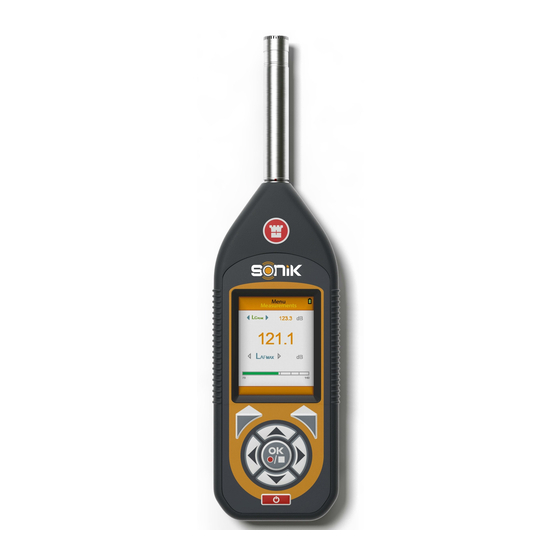
SONIK Sound Level Meter
Operating Manual
Models S and SE
Castle Group Ltd
Salter Road
Scarborough
North Yorkshire
YO11 3UZ, UK
Copyright © Castle Group Ltd 2018
All rights reserved. No part of this publication may be reproduced, stored in a
retrieval system or transmitted, in any form or by any means, electronic, mechanical,
photocopying, recording or otherwise, without the permission of the copyright holder.
HB/0142/030/EL
Rev A
www.castlegroup.co.uk
Advertisement
Table of Contents

Subscribe to Our Youtube Channel
Related Manuals for CASTLE SONIK S


Summary of Contents for CASTLE SONIK S
- Page 1 Scarborough North Yorkshire YO11 3UZ, UK Copyright © Castle Group Ltd 2018 All rights reserved. No part of this publication may be reproduced, stored in a retrieval system or transmitted, in any form or by any means, electronic, mechanical, photocopying, recording or otherwise, without the permission of the copyright holder.
-
Page 2: Table Of Contents
Contents Chapter 1 ..............1 Introduction ........................... 1 Chapter 2 ..............2 Features ............................2 Model SE ..............................2 Template: All Parameters ....................2 Template: Environmental....................2 Template: Noise at Work ....................2 Model S ................................. 2 Microphone and Pre-Amplifier ....................3 Microphone Types ........................... - Page 3 Overload and Under Range ......................10 Chapter 4 ............... 12 Getting Started ........................12 Keypad Layout ............................12 Powering Your SONIK Sound Level Meter ................13 Instrument Icons ........................... 14 Icon Location ..........................15 Chapter 5 ............... 16 Using Your SONIK ........................16 Real Time ..............................
- Page 4 The CastleCloud Gateway ........................23 Logging In ..............................24 Change Account ............................ 25 Connect to SONIK ..........................26 Update Gateway Software ........................ 27 Update Instrument Software ......................27 Chapter 7 ............... 28 Menu Structure ........................28 Menu Navigation & Settings ....................29 Measurement Setup ...........................
- Page 5 Screen Colour ........................43 Auto Dim ..........................43 Date..............................44 Time ..............................44 Information ............................. 45 Bar Levels ............................46 Calibration ..............................47 Cal Value (dB) ..........................47 Chapter 8 ............... 49 Measurement Screens ......................49 Measurements ............................49 Measurements Table .......................... 50 Exposure ..............................
-
Page 6: Chapter 1
Renowned for its simplicity and ease of use, this PC based software is a comprehensive data analysis solution. The SONIK also gives you the option of connecting to The Castle Cloud through a PC app called the Castle Gateway. The CastleCloud is Castle Group’s latest software... -
Page 7: Chapter 2
Chapter 2 Features Model SE Template: All Parameters Measurement 1: , %Dose, %Dose per Hour, Exposure (Pa2h), L , (L EP’d or L Measurement 2: PEAK Template: Environmental Measurement 1: , (L or L Measurement 2: PEAK Template: Noise at Work Measurement 1: , Exposure Points, %Dose, %Dose per Hour, Exposure (Pa2h) EP’d... -
Page 8: Microphone And Pre-Amplifier
Microphone and Pre-Amplifier Measurement microphones by the very nature of their manufacture are precision components that are easily damaged through incorrect use. Great care must be taken when using the instrument to ensure the longevity of the microphone. Microphone Types Three different types of microphone are manufactured, and each is designed for measuring noise in different applications which is out of the scope of this manual. -
Page 9: Microphone Polarisation
Microphone Polarisation Microphones require a polarisation voltage to operate and are manufactured in two ways. Externally Polarised These microphones require an external charge for the microphone to operate which is generally 200V and supplied by the sound level meter. Pre-Polarised These microphones generate the polarisation voltage internally and do not require the externally generated 200V polarisation charge. -
Page 10: Removal Of Microphone
Removal of Microphone The microphone is fitted to the pre-amplifier by screwing the microphone in a clockwise direction ensuring that the pre-amplifier spring pin is located centrally in the microphone. To remove the microphone, unscrew in an anti-clockwise direction. The microphone has a protection grid which can also be unscrewed and removed, great care must be taken to ensure that this is NOT removed. -
Page 11: Microphone Extension Cable
Microphone Extension Cable To attach the microphone extension cable (purchased separately), position the RED orientation key on the extension cable connector with the RED identification mark on the SONIK sound level meter and gently push the extension cable into the connector. To fit the pre-amplifier to the extension cable, see Pre-Amplifier Removal &... -
Page 12: Certifiable Calibration
The calibration process includes the microphone, pre-amplifier and sound level meter. Any change in this measurement chain will require a new calibration certificate. Castle Group Ltd offers a complete calibration service offering either a full UKAS calibration or a standard traceable calibration which can be supplied with or without a test report. -
Page 13: Chapter 3
Chapter 3 Measuring Sound Always calibrate your SONIK sound level meter prior to and after taking measurements using a known sound source, such as the Castle GA607 Sound Level Calibrator. Incidence Angle It is essential that you hold your SONIK sound level meter at the correct angle to the noise source depending on the microphone type supplied with your meter. -
Page 14: Sound Level - General Advice
Sound Level – General Advice In some environments, high levels of noise can occur. The SONIK sound level meter models S & SE have therefore been designed for complete accuracy up to sound levels of 140dB. Before you record measurements, take the time to ensure you have chosen the optimum range for the application. -
Page 15: Overload And Under Range
Overload and Under Range As mentioned in the previous General Advice section, the SONIK will register an overload if the noise level exceeds the current measurement range, and will register under range if the noise levels are too low for the current range. On either of these occasions, the SONIK will display this on your screen. - Page 16 Overload Under Range Overload Under Range Under range on each measurement acts independently and under some conditions may display under range on only one measurement. Overload does not act this way and will display an overload for both ranges. During overload or under range conditions, the bar displayed at the bottom of the measurement home screen will change to grey, indicating that you’re operating outside of the current range.
-
Page 17: Chapter 4
Chapter 4 Getting Started Keypad Layout Soft Key 1 Soft Key 2 OK, Record, Stop Directional Keys: Up, Down, Left, Right Power, Reset or Screen Grab... -
Page 18: Powering Your Sonik Sound Level Meter
Powering Your SONIK Sound Level Meter Your SONIK sound level meter can be powered from four 1.5V AA size batteries, four 1.2V rechargeable batteries or the micro USB connection via a USB port or power supply capable of delivering 0.5A. The battery compartment is located at the rear of your sound meter, remove the battery door and insert the batteries using the correct polarity which is clearly shown where the batteries are located. -
Page 19: Instrument Icons
Instrument Icons Several icons are used on the SONIK sound level meter to easily identify the functionality or useful settings of the instrument: - Low Measuring Range Active Medium Measuring Range Active High Measuring Range Active USB Active Battery Charge Recording Data Active File Review Active... -
Page 20: Icon Location
Icon Location The top dark orange bar on your SONIK instrument displays most of the information icons, the current time, date, measurement range and the current screen selected: - The bottom lighter orange bar will display the Record or File Review symbols in a similar position to the image shown below. -
Page 21: Chapter 5
Chapter 5 Using Your SONIK The SONIK sound level meter has three primary operational modes, these are: - • Real Time • Recording • File Review Each mode can be quickly identified by viewing the bottom bar, Real Time has no icon, Record has a standard red record symbol and File Review shows a green directional arrow. -
Page 22: Recording
Recording Recording data is achieved by pressing the Record key whilst in real time mode. The settings for recording are applied under Measurement Setup, Data Recording. Recording Screen Display The settings made under Data Recording will affect the information and how it’s displayed on your SONIK instrument. -
Page 23: Time History Disabled, Duration Timer Set
Time History Disabled, Duration Timer Set When Time History is disabled for the recording but the Duration Timer is enabled, the bottom bar will only display the elapsed recording time: - Elapsed Recording Time Time History Enabled, Duration Timer Set When both Time History and Duration Timer are enabled for the recording, the bottom bar will display the elapsed recording time and the current interval countdown time: -... -
Page 24: Stopping An Active Recording
Stopping an Active Recording Pressing the Stop key during an active recording will display the available options: - Save Select Yes by pressing Soft Key 2. Don’t Save Select No by pressing Soft Key 1 to return to Real Time mode. -
Page 25: File Review
File Review File Review can be accessed by either manually loading a file under File Manager, or by enabling the Auto Playback function (see below). Recording Start Time Recording Date Use the Up or Down Arrow keys to scroll measurement screens or the Left or Right Arrow keys to scroll measurement parameters. -
Page 26: Auto Playback
Auto Playback Auto Playback is located in the File Manager section of the Main Menu, and can be enabled or disabled by pressing OK. When enabled, after a recording has been saved, your SONIK will automatically enter File Review instead of returning to Real Time mode. -
Page 27: Chapter 6
Further information and details can be found in the dBdataPro manual, located on the USB drive provided with your instrument. The CastleCloud The CastleCloud is the latest software solution developed by Castle Group, and can be accessed by visiting TheCastleCloud.com. The CastleCloud, as its name may suggest, utilises Cloud based software. This means... -
Page 28: The Castlecloud Gateway
The CastleCloud Gateway The Castle Gateway app allows you to upload your recordings via your PC using the included Micro USB Cable and your PC’s internet connection. The Gateway app can be downloaded from TheCastleCloud.com and installed on any computer. -
Page 29: Logging In
Logging In With the Castle Gateway application open, login to your CastleCloud account by clicking on the Login button: - Enter your login details and if required tick Remember Me to save your login details. Click the Login Button to login using the details provided. Once logged in successfully... -
Page 30: Change Account
Change Account If multiple accounts are held then click on the Change Cloud Account button and select the required account: -... -
Page 31: Connect To Sonik
Connect to SONIK Ensure the SONIK sound level meter is switched on and attach the supplied USB cable to the sound meter and your PC. Your PC must also be connected to the internet. Click on Connect to Your Instrument. A list of all files that can be sent to your CastleCloud account will be displayed within the application. -
Page 32: Update Gateway Software
Update Gateway Software Select Update and then Gateway Software: - The current Gateway Software version is displayed: - Click on Check for New Version to check TheCastleCloud.com for updated software and follow on screen prompts as required. Update Instrument Software Select Update and then Instrument Software to check and update your instruments software if available. -
Page 33: Chapter 7
Chapter 7 Menu Structure The complete menu system is conveniently shown below: - • Measurement Setup o Weightings & Range o Data Recording o Exposure o Percentiles (SONIK-SE Only) • File Manager o Load file o Delete File o Delete All Files o Auto Playback •... -
Page 34: Menu Navigation & Settings
Menu Navigation & Settings The Main Menu can be selected using Soft Key 1 when labelled as Menu. On most screens within the SONIK menu system, Soft Key 1 can be used to go back to the previous screen, this will be displayed using the symbol when available. -
Page 35: Measurement Setup
Measurement Setup Select Measurement Setup to change your recording settings and how information is displayed. Scroll the available options using the Up or Down Arrow keys, press OK to choose the highlighted selection. Weightings & Range Select Weightings & Range to change the measurement range and the weightings applied to each measurement. -
Page 36: Range
Range Your SONIK is fitted with three operating ranges named Low, Medium and High. Each range measures linearly, with Low measuring 25dB to 100dB, Medium measuring 45dB to 120dB and High measuring 65dB to 140dB. Frequency Weighting Your SONIK sound level meter simultaneously measures sound on Measurement 1 and Measurement 2, and each have different Frequency Weightings applied. -
Page 37: Osha (Pel)
UK/EU In order to comply with UK or EU legislation, Exchange Rate, Criterion and Threshold should be set as below: - • Exchange Rate = 3 • Criterion = 85 • Threshold = Off OSHA (PEL) In order to comply with OSHA (PEL) legislation, Exchange Rate, Criterion and Threshold should be set as below: - •... -
Page 38: Data Recording
Data Recording Select Data Recording to enable Time History and to choose any time interval periods required. The time periods recorded by the instrument are determined by the Time History settings, the settings made within the Timer Selection or by the user manually stopping the recording. -
Page 39: Time History On - Disabled
Time History On - Disabled If Time History On is disabled, then all data recordings made will not contain any Time History data and the Interval settings become unavailable. In this case, the instrument will record one set of measurements over the total measurement time. -
Page 40: Timer Selection
Timer Selection Choose Timer Selection to set the overall automatic recording length. Press OK to enable the Duration Timer. With the option enabled, use the Left or Right Arrow keys to move and highlight the selection to change. Use the Up or Down Arrow keys to amend the selection. -
Page 41: Percentiles (Sonik Se Only)
Percentiles (SONIK SE Only) Under Percentiles, commonly referred to as LN’s, you can select one user defined LN level that is to be recorded. Highlight the required LN and press the OK key to toggle the LN on. The instrument is capable of measuring 3 Percentiles simultaneously, one user selected from the selection above and L10 and L90 which are fixed. -
Page 42: File Manager
File Manager Select File Manager to load saved files, delete saved files and toggle Auto Playback off/on. Option availability will depend on data files being saved: - No files saved Files saved Scroll the available options using the Up or Down Arrow keys, press OK to choose from the following: - •... -
Page 43: Load File
Load File Scroll the saved data files using the Up or Down Arrow keys, press the OK Key to open the selected file in File Review mode. The file number and total number of data files saved are located at the top left hand side of the list. -
Page 44: Delete File
Delete File Choose Delete File to delete one individual data recording. Scroll the available data files using the Up or Down Arrow keys, press OK to select the file to delete. If multiple files exist, then the Left or Right Arrow keys can be used to scroll the data files by page. -
Page 45: Delete All Files
Delete All Files Choose Delete All Files to delete all data recordings. Press Soft Key 1 to cancel and go back to the previous screen. Press Soft Key 2 labelled Confirm to delete all files. Deleted files are unrecoverable. -
Page 46: Template Manager (Sonik Se Only)
Template Manager (SONIK SE Only) Select Template Manager to change your current Template. Scroll the available options using the Up or Down Arrow keys, press OK to choose the highlighted template. The Template enabled will determine which parameters your instrument will or will not measure: - •... -
Page 47: Instrument Setup
Instrument Setup Instrument Setup is where specific instrument settings are located. Scroll the available options using the Up or Down Arrow keys, press OK to choose from the following: - • Screen • Date • Time • Bar Levels Screen Select Screen to alter the screen colour and access power saving features. -
Page 48: Screen Colour
Screen Colour Use the Left, Right Arrow keys to toggle the screen colour between White or Black: - Auto Dim The Auto Dim feature will automatically dim the screen to after a set period of time to reduce operating power and increase battery run time. Use the Left, Right Arrow keys to adjust the Auto Dim as below: - •... -
Page 49: Date
Date Enter the current date using the date format specific to your region. Use the Up, Down Arrow keys to adjust the value. Use the Left, Right Arrow keys to move forward or back. Press Soft Key 2 labelled Done to accept the date changes. Time Enter the current date using the time zone specific to your region. -
Page 50: Information
Information Select to show instrument specific information. -
Page 51: Bar Levels
Bar Levels Select to adjust the levels at which colour coding of the bar levels appear. Scroll the options using the Up or Down Arrow keys. Use the Left, Right Arrow keys to adjust as follows: - Yellow: 40 to 100dB Red: 80 to 140dB Red values cannot be set lower than Yellow values, and any value below Yellow will be displayed as Green on the display. -
Page 52: Calibration
Select Calibration to acoustically calibrate your SONIK sound level meter. It is recommended that the calibration procedure is undertaken prior to, and after measurements have been taken using either the Castle GA607/GA601 acoustic calibrator, depending on the class of your instrument. - Page 53 If the calibration is successful, then you will be shown the following: - If the calibration is not successful, then you will be shown the following: - Please ensure your calibrator is switched on giving the correct output level and that you have entered the correct Cal Value.
-
Page 54: Chapter 8
Chapter 8 Measurement Screens The SONIK sound level meter can independently and simultaneously record two measurements. Each measurement can have different time weightings and/or frequency weightings. To clearly identify these, they are named Measurement 1 and Measurement 2 throughout the menu system when choosing settings. Percentiles are only ever available for Measurement 1. -
Page 55: Measurements Table
Press Soft Key 2 to swap between the selection of Measurement 1 and Measurement 2. The selected Measurement is identified by having arrow markers on either side of the parameter: - Arrow Markers Use the Left or Right Arrow keys to scroll the available parameters on either Measurement 1 or 2. -
Page 56: Exposure
Exposure The Exposure screen is only available for SONIK sound level meters fitted with this option and can is calculated from Measurement 1 only. See Exposure in Measurement Setup for details on how to change the calculated Measurements. To edit the Exposure Time value, press Soft Key 2 to highlight Time, use the Up/Down Arrow keys to adjust the value, Left/Right to move and Soft Key 2 to confirm: - Percentiles (L... -
Page 57: Chapter 9
Chapter 9 Accessories Item Order Code Kit Case for SONIK & Accessories KA017 Class 1 Dual Level Calibrator GA607 Class 2 Single Level Calibrator GA601 Microphone Extension Cable (1 to 10m) ZL1141-xx USB Cable 1m (A to micro B) ZL1108-01 USB Wall Plug (UK) PSU6 Rubber Protective Sleeve - Blue... -
Page 58: Customer Support
In the event of a fault occurring, during the warranty period, the instrument should be returned to Castle Group Ltd, in its original packaging, or to an authorized agent. Please enclose a clear description of the fault or symptom. -
Page 59: Instrument Disposal
There are various collection systems in place within the EU for the disposal of your product. To find the nearest UK waste recycling point in your area, enter your postcode in the website www.recycle-more.co.uk For more information please contact your local authority, the dealer where you purchased your product or Castle Group Ltd... -
Page 60: Disclaimer
Castle Group Ltd makes no representation or warranties as to the completeness or accuracy of this information. Castle Group Ltd assumes no responsibility or liability for any injury, loss or damage incurred as a result of misinterpreted or inaccurate information.
Need help?
Do you have a question about the SONIK S and is the answer not in the manual?
Questions and answers