
Summary of Contents for Giersch MG20-ZM-L-LN Series
- Page 1 Technical Information • Installation Instructions MG20-ZM-L-LN Issued in June 2020 Subject to tech. modifications to improve the product!
-
Page 2: Table Of Contents
Contents General information ........................3 Checking the scope of delivery and electrical ratings ..............3 Maintenance and customer service ................... 4 Operating instructions ........................ 4 Instruction of operating personnel....................4 Key for code designation ......................4 Technical specifications ......................5 Boiler connection dimensions .................... -
Page 3: General Information
(laundry rooms), dust or corro- sive vapours. The boiler room must be ventilated ac- cordingly with ventilation air. Giersch MG Series gas burners are suitable for combustion of natural gas in accordance with DIN EN 437 and are in compliance with the DIN EN 676 European standard. -
Page 4: Maintenance And Customer Service
Maintenance and customer service 3 Maintenance and customer service The complete system should be checked once a year for proper functioning and leak tightness by an authorised representative of the manufacturer or by another expert. Only qualified personnel may open only for mainte- nance, not during on-going operation. -
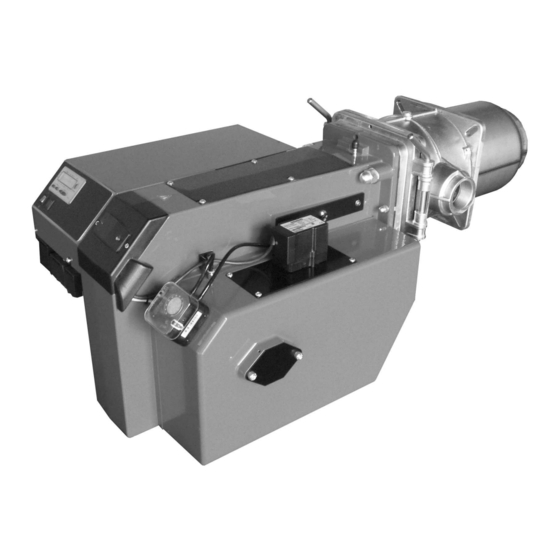
Page 5: Technical Specifications
Technical specifications 7 Technical specifications Burner type Technical specifications MG20/1-ZM-L-LN MG20/2-ZM-L-LN Burner output in kW 224 - 860 247 - 1350 Gas type Natural gas LL + E= "N", liquid gas 3B/P = "F" Mode of operation Progressive two-stage or modulating Voltage 3 / PE ~50 Hz 400 V / T16 A Max. -
Page 6: Mounting The Burner Housing On The Gas Jacket (Service Position)
Mounting the burner housing on the gas jacket (service position) 10 Mounting the burner housing on the gas jacket (service position) Position the burner housing in the gas-jacket hinge and secure it with a rod. The burner is now in the service position. -
Page 7: Terminal Diagram Connector Pin Assignments
Terminal diagram - connector pin assignments 11 Terminal diagram - connector pin assignments If the male connector has already been wired: check the connections according to the connection diagram! The electrical connection of the burner must be made in the male connector included according to the connection diagram, taking account of the local regulations. -
Page 8: Electrical Connection
Electrical connection 12 Electrical connection Cover De-energise the burner when carrying out connection work and removing electrical parts! The burner must be connected to the electricity sup- ply in accordance with the wiring diagram. This work must be performed by trained, qualified electricians. The supply cable to the burner must be of the flexi- ble type. -
Page 9: Air Flap Positioning Motor
Air flap positioning motor 13 Air flap positioning motor The air flap positioning motor is designed for air flap adjustment on progressive two-stage burners or modulating burners. The motor is activated electron- ically via the microprocessor-controlled control box. Do not open the air flap actuator while it is under voltage. -
Page 10: Gas Pressure Monitor
Gas pressure monitor 15 Gas pressure monitor 15.1 Gas pressure switch min. The gas pressure switch MIN at the gas fitting ser- ves to monitor the gas inlet pressure. If the minimum gas inlet pressure is not reached (factory setting), the burner is switched off. -
Page 11: Adjusting The Ignition Electrode
Set the electrodes 16 Set the electrodes Ignition electrode The electrodes are preset at the factory. Ionisation electrodes 17 Flame monitor with ionisation control If an AC current is applied between the burner and the ionisation rod, a DC current flows due to the rec- tifying effect of the flame. -
Page 12: Adjusting The Mixer Head
Adjustment of the mixer head 18 Adjustment of the mixer head Set the position of the mixer head according to burn- er output in accordance with the table on page 23ff. 19 Connection diagram LMV27/37 (continuous load) 12/32 03.06.20, Subject to alterations... -
Page 13: Operating Instructions And Equipment Description Lmv
Operating instructions and equipment description LMV 20 Operating instructions and equipment description LMV 20.2 Meaning of symbols on the display Fault status message Flame present Valve controlled Ignition controlled Fan motor controlled Oil preheater on Heat request from controllers Parameter setting mode Info mode Service mode h min s... -
Page 14: Start-Up And Calibration
Start-up and calibration 21 Start-up and calibration Determine the burner output according to the table on page 23 ff. P0 = Start stage, P1 = 1st stage / min. output, P9 = 2nd stage / max. output. Normally, P0 = P1. For the condensing boiler, P0 must be set higher than P1. The setting is dependent on the boiler. - Page 15 Start-up and calibration Switch on the burner Continuous heat requirement is necessary for further start-up! LMV programmed Action button Display Description /reset When the firing machine is programmed, run is displayed. i/reset skips the next steps an continues at the section Start heat settings with curve point P1 /reset Small load.
- Page 16 Start-up and calibration High load preset Action button Display Description Set the high load air flap. Hold down button A and set the value with the - or + button. Move to the next curve point. Start identifier for curve programming - Calibration with flame Action button Display Description...
- Page 17 Start-up and calibration Action button Display Description Driving in ignition position Start heat setting Action button Display Description The ignition position P0 cannot be set until the symbols disappear. Hold down A button a set the value with the - or + button.
- Page 18 Start-up and calibration Action button Display Description Use the - button to select curve point P1. In curve point P1, set the excess air for the high load at the gas train using the adjusting screw "N" or "small flame" . The CO2 value should be 9-10% for natural gas.
- Page 19 Start-up and calibration LMV phase display Display Description Ph00 Fault phase Ph01 Safety phase Ph10 Go home Ph12 Standby (stationary) Ph22 Blower start-up time (blower motor = ON, safety valve = ON) Ph24 Run in pre-air position Ph30 Pre-air time Ph36 Run in ignition position Ph38...
-
Page 20: Gas Burner With Gas Train Kev Ii 1
Gas burner with gas train 22 Gas burner with gas train Installation of the gas train Installation position only in horizontal line, not tilted. Minimum distance to masonry 20 mm The nipple for the compressed air connection P must be screwed in at the top of the gas jacket (see 9. Mounting the gas jacket at the boiler). - Page 21 Gas burner with gas train KEV 300 1" (MBC-300-VEF) Measurement connection for nozzle pressure p Inlet flow pressure p Gas pressure switch (gas inlet pressure leakage check) Furnace pressure p "AIR" air pressure connection p Setting screw V (Max. output 2nd setting) Setting screw N (Min.
-
Page 22: Calculation Principles For Gas Burner Adjustment
Calculation principles for gas burner adjustment 23 Calculation principles for gas burner adjustment The values given in the tables are setting values for start-up. The necessary system adjustment must be newly determined in each case. General: The calorific value (H ) of fuel gases is generally specified for the normal state (0°C, 1013 mbar). -
Page 23: Adjustment Tables
The values given in the tables are only setting values for start-up. The necessary system adjustment must be newly determined in the case of deviating data such as boiler output, calorific value and altitude. A correction is required in any case. The maximal burner output can only be achieved in mixing head position 0. - Page 24 MG20/2-ZM-L-LN MG20/2-ZM-L-LN Natural gas LL Natural gas E Hi,n = 9.3 [kWh/m = 10.4 [kWh/m = 25.89 [kWh/m Burner output Boiler output Air flap Mixer head Gas nozzle pres- Gas flow rate Gas nozzle pres- Gas flow rate Gas nozzle pres- Gas flow rate position position...
-
Page 25: Error Code List Lmv
Error code list LMV 25 Error code list LMV Description Measure loc.C: loc.d: No communication between basic unit Check wiring for interruptions/loose contacts LMV27... and AZL2… 1 - 4 No flame at the end of the safety time 0 - 84 Compressed air fault No compressed air 0 - 86... - Page 26 Error code list LMV Description Measure loc.C: loc.d: Error group air drive Referencing of fuel drive not successful. Unable to reach reference point. 1. Check whether the drives have been exchanged 2. Check whether the drive is blocked or over- loaded 0 - 1 Error group fuel drive...
-
Page 27: Adjustments Log
Adjustments log 26 Adjustments log Please enter the measured values into the Adjust- ments log. Boiler type Gas fitting Measured values min. max. Date P0 (start point) P1 (min load) P9 (max load) Flue gas temperature °C Carbon dioxide (CO level) content CO level... -
Page 28: Exploded View / Spare Parts List
Exploded view drawing / spare parts list 27 Exploded view drawing / spare parts list 28/32 03.06.20, Subject to alterations... - Page 29 Exploded view drawing / spare parts list Position Designation Art. no. Burner tube MG20/1-LN, 271 mm long 47-90-24880 Burner tube MG20/1-LN, 371 mm long (100 mm extended) 47-90-25260 Burner tube MG20/1-LN, 471 mm long (200 mm extended) 47-90-25261 Burner tube MG20/2-LN, 271 mm long 47-90-24878 Burner tube MG20/2-LN, 371 mm long (100 mm extended) 47-90-25258...
-
Page 30: Declaration Of Conformity For Gas Burners
Declaration of Conformity for Gas Burners 28 Declaration of Conformity for Gas Burners Declaration of Conformity for Gas Burners We, Enertech GmbH, Adjutantenkamp 18 in D-58675 Hemer declare under our responsibility that gas burner type MG20/.. is conform with the regulations of these directives MD2006/42/EG EMC2014/30/EU GAD 2016/426/EU... - Page 31 Declaration of Conformity for Gas Burners Subject to alterations, 03.06.20 31/32...
-
Page 32: Overall Dimensions
Subject to alterations. Enertech GmbH • Brenner und Heizsysteme Postfach 3063 • D-58662 Hemer • Telephone 02372/965-0 • Telefax 02372/61240 E-Mail: info@giersch.de • Internet: http://www.giersch.de...
Need help?
Do you have a question about the MG20-ZM-L-LN Series and is the answer not in the manual?
Questions and answers