Table of Contents
Advertisement
Advertisement
Table of Contents

Summary of Contents for Fluid Management HARBIL 5G
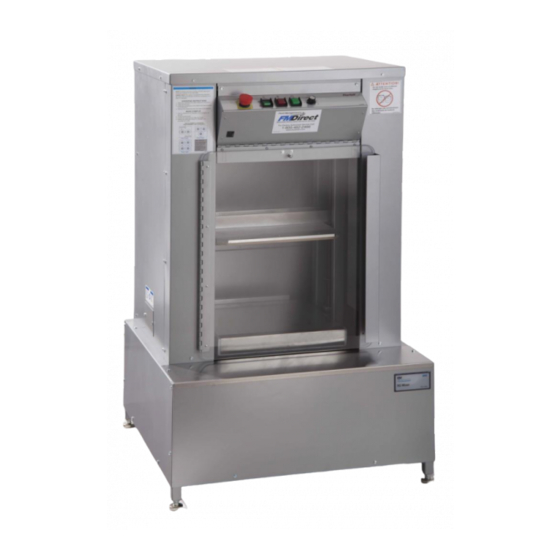
- Page 1 HARBIL 5G High Speed Paint Mixer with 8 - M i n u t e T i m e r End User Guide...
- Page 3 The combination of leading edge technology, excellent service and support, and a company prepared for the future’s ever-changing business environment makes Fluid Management an ideal partner to assist in providing solutions to your business needs. Thank you for putting your trust in Fluid Management products and making...
- Page 4 Fluid Management, FMDirect, ColorPro, DVX, Harbil, Blendorama, Accutinter, Duraflow, Fast & Fluid Management, GyroDispenser, Infina, MicroTint, TintMaster, V1, and VR1 are trademarks of Fluid Management, registered in the U.S. and/or other countries.
-
Page 5: Table Of Contents
F F l l u u i i d d M M a a n n a a g g e e m m e e n n t t C C u u s s t t o o m m e e r r S S e e r r v v i i c c e e 1 1 . . 8 8 0 0 0 0 . . 4 4 6 6 2 2 . . 2 2 4 4 6 6 6 6 Harbil 5G Mixer | 3... -
Page 6: Safety Information
Please read all warning labels that are on the mixer. Keep them clean so they are easy to read. If the warning labels become damaged or unreadable, new labels can be purchased from Fluid Management. See the parts list in the back of the manual for ordering information. - Page 7 See the affixed labeling on the machine for safety and regulatory compliance information. ETL Listed, conforms to UL STD 1450. Certified to CAN/CSA STD C22.2 No.68 (120 V model only). Fluid Management Customer Service 1.800.462.2466 Harbil 5G Mixer | 5...
-
Page 8: Introduction
Introduction The Harbil 5G High Speed Paint Mixer is a versatile, automatic mixer designed with Introduction concern for safety, reliability and ease of use. Its features include: • Heavy-duty, high-capacity components and a durable finish for long wear. • Vibration-free mixing for blending and conditioning paint. -
Page 9: Equipment Maintenance Log
Introduction Introduction EQUIPMENT MAINTENANCE LOG RECORD MODEL NUMBER HERE: RECORD SERI NUMBERHERE: SERVICED SERVJCE DESCRIPTION PARTS REl'LACED & DATE · A'ff! (!Nfll?tl \\' A ll.¥1.A., - a'V) Fluid Management Customer Service 1.800.462.2466 Harbil 5G Mixer |... -
Page 10: Spare Parts Order
Ship via: ________________________________ Collect ___________ Prepaid_______________ Taxable: Y_______ Tax Exempt: Y____________(Fax copy of exemption certificate) PART UNIT QllANIITY OESCRIPTI01' NUMBER PRICE > Comments: _____________________________________________________ _____________________________________________________ ______________________________ ____________ Signature Date Fluid Management Customer Service 1.800.462.2466 Harbil 5G Mixer | 8... -
Page 11: Inspect The Crate For Damage
(Fluid Management). Unpacking and Setup Refer to the Unpacking and Setup Instructions affixed to the shipping carton in a mailing pouch. Fluid Management Customer Service 1.800.462.2466 Harbil 5G Mixer | 9... -
Page 12: Grounding
DO NOT modify the plug provided. If it will not fit into the outlet, have the proper outlet installed by a qualified electrician. Fluid Management Customer Service 1.800.462.2466 10 | Harbil 5G Mixer... -
Page 13: Aligning And Leveling Mixer
WARNING Level the mixer by adjusting the 4 feet as necessary. Lock the feet into place by tightening the lock nut to the frame insert. Fluid Management Customer Service 1.800.462.2466 Harbil 5G Mixer | 11... -
Page 14: Remove Shipping Inserts
Be sure that you save the plywood and the foam rubber discs. These will be used with 5-gallon pails. Before performing an operational test, read the following information Getting To Know Your Mixer. Fluid Management Customer Service 1.800.462.2466 12 | Harbil 5G Mixer... -
Page 15: Getting To Know Your Paint Mixer
ADJUSTABLE FEET – The leveling feet adjust in order to level the mixer. Control Panel Safety Label Safety Label Door Safety Switch Hinge Door Handle Door Adjustable Foot Adjustable Foot Figure 1. General Locations Fluid Management Customer Service 1.800.462.2466 Harbil 5G Mixer | 13... -
Page 16: Control Panel
Getting to Know Your Paint Mixer Control Panel • EMERGENCY STOP button for quickly stopping the mixer. • POWER rocker switch for applying power to the machine. • UP button for raising the top pressure plate. • START button for activating the mixer. TIMER for setting the desired mix time from 30 seconds to 8 minutes. - Page 17 Getting to Know Your Paint Mixer Fluid Management Customer Service 1.800.462.2466 14 | Harbil 5G Mixer...
-
Page 18: Important Information
View” on page 17. • On 5-gallon plastic containers, use the foam discs for the recessed tops around the bung hole. Do not use the flake board disc on plastic containers. Fluid Management Customer Service 1.800.462.2466 Harbil 5G Mixer | 15... -
Page 19: Basic Operation
Cans must be removed from cardboard case before mixing. 2 Gallon Cans Lead Screw Centerline 3 Gallon Cans Lead Screw Centerline 4 Gallon Cans Lead Screw Centerline Figure 3. Gallon Can Placement Fluid Management Customer Service 1.800.462.2466 16 | Harbil 5G Mixer... -
Page 20: Basic Operation Procedure
ON position. If the button does not turn, then it is already in the ON position. To stop the paint mixer, depress the EMERGENCY STOP button. Fluid Management Customer Service 1.800.462.2466 Harbil 5G Mixer | 17... - Page 21 The paint mixer will raise the top plate about 2 inches. Allow a few seconds for the top plate to raise. Remove the paint container when the mixer is completely stopped. Fluid Management Customer Service 1.800.462.2466 18 | Harbil 5G Mixer...
-
Page 22: Operational Test
Your high speed paint mixer is now ready for operation. Please read the next two sections to familiarize yourself with the machine and how to operate it safely. Fluid Management Customer Service 1.800.462.2466 Harbil 5G Mixer | 19... -
Page 23: Maintenance Procedures
• Apply oil to the Super-Strut pins so that the oil will flow down the bushing. • Lubricate the struts on the both sides of the mixer. EVERY 6 MONTHS Grease flange bearings. Fluid Management Customer Service 1.800.462.2466 20 | Harbil 5G Mixer... -
Page 24: Super-Struts Lubrication
Maintenance Procedures Super-Struts Lubrication Use the table below to record your maintenance on the Super-Struts every three months. LUBRICATION RECORD Date Fluid Management Customer Service 1.800.462.2466 Harbil 5G Mixer | 21... -
Page 25: Troubleshooting
• Using voltmeter, measure voltage at DC motor or call Customer Service. • Replace DC motor. may be a problem with printed circuit • Call Customer Service. board. • Replace printed circuit board. Fluid Management Customer Service 1.800.462.2466 22 | Harbil 5G Mixer... - Page 26 The shake motor has voltage and dedicated line. hums, but it will not run. V-belt tension. • Correct tension. motor capacitor. • Replace motor capacitor. shake motor. • Replace shake motor. Fluid Management Customer Service 1.800.462.2466 Harbil 5G Mixer | 23...
- Page 27 • Replace the shake motor. shake motor V-belt tension. • Adjust the shake motor V-belt The mixer starts slowly and then tension. increases to normal speed in a few seconds. Fluid Management Customer Service 1.800.462.2466 24 | Harbil 5G Mixer...
- Page 28 broken wire in DC motor cabling. • Replace DC motor cable. clamping force may be out of • Adjust clamping force as required The mixer crushes or throws cans. adjustment. Fluid Management Customer Service 1.800.462.2466 Harbil 5G Mixer | 25...
-
Page 29: Servicing And Repair
If you do not feel confident about disassembling the paint mixer or replacing a part, DO NOT ATTEMPT THE PROCEDURE. Should problems or questions arise, contact Customer Service at Fluid Management. Carefully read all of the instructions before you begin. For component identification and location, refer to the Parts Section of this manual. -
Page 30: Opening Mixer
Remove the remaining front sheet metal covering. Carefully prop the front piece (two front columns with control box assembly) to the side of the machine, being careful to not damage the cords. Fluid Management Customer Service 1.800.462.2466 Harbil 5G Mixer | 27... -
Page 31: Removing Shake Frame
Some service procedures involve removing the shake frame. Read all of the following instructions. If you have any doubt about performing these procedures, Shake Frame please contact Customer Service at Fluid Management. For component identification and location, refer to the Parts Section of this manual. Removing Shake Frame Procedure Remove the sheet metal covers (see OPENING THE MIXER, page 27). - Page 32 Follow the cable to the strain relief, located on the inside of the hole where the cable goes through the shake frame. Unscrew the strain relief and pull the cable through the hole into the enclosure. Figure 7. Removing the Shake Frame Fluid Management Customer Service 1.800.462.2466 Harbil 5G Mixer | 29...
-
Page 33: Remove The Counterweights
With two 3/4” wrenches or a ratchet and a 3/4” wrench, loosen BUT DO NOT REMOVE the 4 screws securing the flange bearings to the shake frame. Remove the 4 nuts. Figure 8. Flange Bearings Fluid Management Customer Service 1.800.462.2466 30 | Harbil 5G Mixer... - Page 34 2 nuts and screws holding the fiberglass spring to the inner frame. With the assistance of another person, lift up and pull out the complete shake frame. Fluid Management Customer Service 1.800.462.2466 Harbil 5G Mixer | 31...
-
Page 35: Testing Shake Motor
If the shake motor does not run, it has to be replaced. Unplug and remove the jumper cord from the shake motor. Reassemble the mixer by returning the motor cover and lower panel to their correct positions. Fluid Management Customer Service 1.800.462.2466 32 | Harbil 5G Mixer... -
Page 36: Changing Shake Motor
Changing Shake Motor Read all of the following instructions. If you have any doubt about performing these Changing procedures, please contact Customer Service at Fluid Management. Shake Motor Turn to the Parts Section of this manual for component identification and location. -
Page 37: Changing The V-Belt
Changing the V-Belt Changing Read all of the following instructions. If you have any doubt about performing these procedures, please contact Customer Service at Fluid Management. the V-Belt Refer to the Parts Section for component identification and location. Changing the V-Belt Procedure Unplug the electrical cord. -
Page 38: Removing Circuit Board
Removing Circuit Board Read all of the following instructions. If you have any doubt about performing these Removing procedures, please contact Customer Service at Fluid Management. Circuit Board Turn to the Parts Section for component identification and location. ELECTRICAL HAZARD The mixer must be unplugged before attempting this procedure. -
Page 39: Installing Rubber Pads
Installing Rubber Pads Installing Read all of the following instructions. If you have any doubt about performing these procedures, please contact Customer Service at Fluid Management. Rubber Pads For component identification and location, consult the Parts Section of this manual. - Page 40 Allow the adhesive to dry overnight. After the adhesive has dried, open the mixer, remove the cans and test as appropriate. At this point, the mixer should be ready for normal operation. Fluid Management Customer Service 1.800.462.2466 Harbil 5G Mixer | 37...
-
Page 41: Replacing/Adjusting Dc Motor
/ Adjusting Read all of the following instructions. If you have any doubt about performing these DC Motor procedures, please contact Customer Service at Fluid Management. DC Clamping Motor Replacement/Adjustment Make sure that the power is off. Remove the top cover. -
Page 42: Adjusting Clamping Force
(P/N 24041) also comes with the same instructions. Read all of the following instructions. If you have any doubt about performing these procedures, please contact Customer Service at Fluid Management. Refer to the Parts Section for component identification and location. - Page 43 Press the START button. The top plate will clamp the gauge without going into the shaking cycle. • If wire was not removed in step #3, the mixer will shake, possibly causing damage or injury. WARNING Fluid Management Customer Service 1.800.462.2466 40 | Harbil 5G Mixer...
- Page 44 Place the wire back on the upper left terminal on the shake relay. Close the control box and insert the screws. Plug the power cord into the electrical outlet. At this point, the mixer is ready for normal operation. Fluid Management Customer Service 1.800.462.2466 Harbil 5G Mixer | 41...
-
Page 45: Reversing Door
Using two 3/8” wrenches, relocate the stud at the top of the door to the hole at the bottom of the door. Note: If the stud is not relocated properly, the mixer will not operate. Fluid Management Customer Service 1.800.462.2466 42 | Harbil 5G Mixer... -
Page 46: Reversing Door Procedure
You should hear a clicking sound as the door is opened and closed. Side- to-side adjustments are done with a slotted screw driver. Figure 15. Safety Switch Adjustment Fluid Management Customer Service 1.800.462.2466 Harbil 5G Mixer | 43... -
Page 47: Replacing Super-Struts
Removing the Super-Struts Locate the 4 Super-Struts to be replaced. You will be replacing the struts on one side at a time. Strut Strut Figure 16. Locating the Struts Fluid Management Customer Service 1.800.462.2466 44 | Harbil 5G Mixer... - Page 48 Beginning on the right side, use a box end or adjustable wrench to remove the top nuts, washers, and rubber grommets on both struts. Remove the hex wrench from the hole in the strut pin. Fluid Management Customer Service 1.800.462.2466 Harbil 5G Mixer | 45...
- Page 49 Have a second person place three 2” x 4” blocks under the front and rear inner frame for support as shown below. Remove both strut pins, bodies, and springs from the frame. Fluid Management Customer Service 1.800.462.2466 46 | Harbil 5G Mixer...
- Page 50 Figure 20, “Replacing the Front Strut” on page 49. Hand tighten until snug. Fluid Management Customer Service 1.800.462.2466 Harbil 5G Mixer | 47...
- Page 51 Lift the inner frame again with the 2” x 4’ board as a lever. This will allow you to align and insert the strut pins into the strut bodies. Note: Use care when installing the pins in order to prevent damage to the inner bushing. Fluid Management Customer Service 1.800.462.2466 48 | Harbil 5G Mixer...
- Page 52 Replacing Super-Struts Make sure that the springs are centered. Push with your thumb to click them into place. Strut Grommet Strut Pin Figure 21. Replacing the Strut Shafts Beginning with the FRONT strut, tighten the top nut to 37 Ft-lbs of torque. Tighten the BOTTOM screw to 37 Ft-lbs of torque.
Need help?
Do you have a question about the HARBIL 5G and is the answer not in the manual?
Questions and answers
I have a harbil 5g-hd mixer, it clamps the bucket down but won't mix. When I push the up button it won't raise.
The issue could be a loose set screw in one of the DC motor couplings or a loose key and set screw on the timing gears. These problems can cause the DC motor to run without moving the top plate.
This answer is automatically generated