Advertisement
What should be in your box
•
1
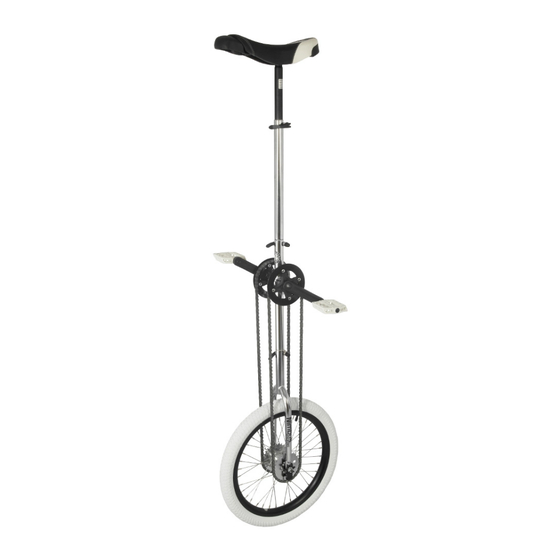
Saddle
with Seatpost
•
3
Straight Frame - x2
•
4
Pedals
•
Centre Frame (With cranks)
•
6
Quick Releases - x4
•
7
Wheel Forks
•
8
Wheel
•
9
Pair of short chains
•
Pair of long chains
10
•
Pedal Wrench
You are going to need a bicycle
pump, (Car Valve) a 15mm
Wrench and 4mm Allen Key.
1
2
3
4
5
6
3
7
9
10
8
7ft Mode
INS-NIM-005-UK
2
Your Nimbus gira e is designed as a dual height compact performer's gira e. With practice it can be assembled
and disassembled in minutes to be packed way into a suitcase or box for transporting.
What you need to put your unicycle together, 10mm wrench, Pedal wrench, 5mm and 4mm allan key and
5
bicycle pump (Schrader Valve).
The Nimbus Performer Gira e as supplied can be assembled as a 5 foot or 7 foot mode. These instructions will
detail assembly of both heights. Nimbus Unicycles can supply additional sections and chains so you can build
the
Assembling your Nimbus Performer Gira e
Your unicycle comes in kit form and should only take 15 minutes to assemble. First, determine that you
A.
have all the components. If there are any parts missing, contact your dealer immediately.
B.
Fit one quick release lever through the lugs provided on the ends of the straight, wheel frame sections
& centre section.
Assemble the frame:
C.
For a 5 foot gira e assemble the frame section in the following order; straight section, centre
section (with cranks) and wheel fork section.
For a 7 foot gira e assemble the frame section in the following order; straight section, centre
section (with cranks) and wheel fork section.
D.
Insert the seat with seatpost into the frame. Set and tighten all the quick-releases by lifting the lever
and hold it vertical, then tighten the thumb screw on the opposite side until it is nger tight. Pull the
quick-release lever down to lock them in position. If it is too hard to pull the lever down slacken the
thumb screw a little; if it does not hold the seat solid - release the lever and tighten the thumb screw
more and then repeat the process.
Prepare the wheel for assembly. Loosen the 15mm nuts on the wheel until they are near the end of
E.
their threads. Loosen the bolts on the chain tensioners until they are near the end of their adjustment.
5ft Mode
1 of 2
Invert the frame so that the seat is on the oor and the wheel fork
F.
section is pointing upwards.Now slide the wheel into the forks. The
chain tensioners and wheel nuts should be on the outside of the
forks. Allow it to slide to the bottom of the slots (not stopped by the
tensioners).
Select the appropriate chains for height the of unicycle you are
G.
building and place them over the chain-rings and sprockets.
H.
Pull the wheel upwards and slide the tensioners over the end of the
frame. Be careful to keep both chains on the chain-rings and
sprockets and making sure the wheel is straight. Then tighten the
15mm wheel nuts by hand.
Using the allen key provided tighten the bolts on the chain tension-
I.
ers. Work on tensioning both chains at the same time; tighten each
bolt a couple of turns at a time. The chains are tensioned when both
chains have about ½" movement in them when you press them in
their centre. Spin the wheel to check that there are no tight spots on
the chains and that it rotates freely.
When assembling your unicycle for the rst time you may nd that
J.
the chains are unevenly tensioned from front to rear. The Nimbus
design allows for ne chain adjustment. Loosen the 6 bolts on each
of the chain-rings by a couple of turns while the chain is under
tension. Rotate the wheel a couple of times then re-tighten. Should
this not alleviate any uneven tension in the chain contact your dealer.
Then tighten the 15mm wheel nuts using the spanner provided.
Fit the pedals onto their correct cranks by matching the letter on the
K.
cranks with those on the pedals. Tighten VERY rmly using your
15mm spanner (the left hand crank has a reverse thread).
L.
Pump your tyre up, remember you will be putting all your weight on
this single wheel, so pump it up more than you would your bike.
www.nimbusunicycles.com | Copyright © 2015 Nimbus Unicycles
Advertisement
Table of Contents

Summary of Contents for Nimbus Water Systems Giraffe
- Page 1 What should be in your box • Saddle with Seatpost • Straight Frame - x2 Your Nimbus gira e is designed as a dual height compact performer’s gira e. With practice it can be assembled and disassembled in minutes to be packed way into a suitcase or box for transporting. •...
- Page 2 Things that can go wrong Gira e Unicycles are pretty durable, but they do need maintaining. Here are things to look out for: Loose pedals; normally found when riding or by holding the pedal and wiggling it. Tighten immediately! Check that the saddle is the •...
Need help?
Do you have a question about the Giraffe and is the answer not in the manual?
Questions and answers