
Related Manuals for Topaz Systems A-TSL1-1


Summary of Contents for Topaz Systems A-TSL1-1
- Page 1 Tilt Stand Mounting Guide T-L460, T-LBK460, & TM-LBK460 Models Copyright © Topaz Systems Inc. All rights reserved. For Topaz Systems, Inc. trademarks and patents, visit www.topazsystems.com/legal.
- Page 2 Tilt Stand Mounting Guide (T-L460, T-LBK460, TM-LBK460) Table of Contents Overview ........................... 3 List of Included Parts ......................3 Pad Mounting Instructions ..................... 4 Surface Mounting Instructions ....................9 www.topazsystems.com Back to Top...
-
Page 3: Overview
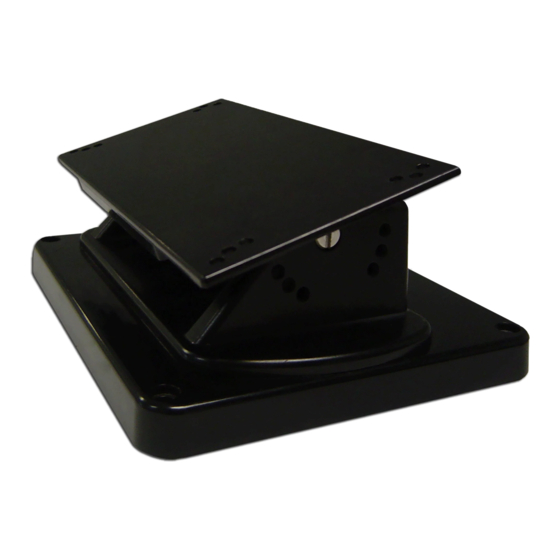
Tilt Stand Mounting Guide (T-L460, T-LBK460, TM-LBK460) Overview The Topaz Tilt Stand (A-TSL1-1) is designed to hold Topaz LCD signature pads. If desired, the stand can be securely mounted on either the counter or the wall. With the tilt stand’s 360 degree rotation and up-to-45 degree tilt, your signature pad can be easily positioned during the signing process. -
Page 4: Pad Mounting Instructions
Tilt Stand Mounting Guide (T-L460, T-LBK460, TM-LBK460) Pad Mounting Instructions 1) The following instructions are for use with the specific signature pad models listed below: T-L460-HSB-R T-LBK460-B-R T-LBK460-HSB-R TM-LBK460-HSB-R T-LBK460-BSB-R TM-LBK460-BSB-R T-L460-B-R If you have a different model number listed on the back of your signature pad (see Page 3 for compatible model series), visit www.topazsystems.com/tsguides for all... - Page 5 Tilt Stand Mounting Guide (T-L460, T-LBK460, TM-LBK460) 3) Remove the two rubber feet from the back of the pad circled in red below to reveal the screws underneath. The rubber feet are attached to the pad with a light adhesive, so use something thin to pry them off.
- Page 6 Tilt Stand Mounting Guide (T-L460, T-LBK460, TM-LBK460) 5) Lay the signature pad on the top of the tilt stand as it would be if in use. Then, flip both the signature pad and tilt stand over, resting it on a flat surface so you are looking at the bottom of the tilt stand.
- Page 7 Tilt Stand Mounting Guide (T-L460, T-LBK460, TM-LBK460) 7) Use the two small silver screws (removed in Step 4 on Page 5) and two medium plastite screws included in the hardware kit (see Page 3 for picture). Begin on the right side, as seen below: Top of signature pad Put 1 small silver screw...
- Page 8 Tilt Stand Mounting Guide (T-L460, T-LBK460, TM-LBK460) 8) Continue with the left side. Top of signature pad Put 1 small silver screw (removed in Step 4) in middle hole #2 and tighten. Put 1 medium plastite screw in middle hole #2 and tighten. 9) Your signature pad is now mounted on the tilt stand.
-
Page 9: Surface Mounting Instructions
Tilt Stand Mounting Guide (T-L460, T-LBK460, TM-LBK460) Surface Mounting Instructions 1) Using a 3/16-in drill bit (not included), drill holes into the surface on which you want to mount the tilt stand (see diagram below). 2) Remove the four rubber feet from the bottom of the tilt stand. The rubber feet are attached to the tilt stand with a light adhesive, so use a thin item to pry them off.
Need help?
Do you have a question about the A-TSL1-1 and is the answer not in the manual?
Questions and answers