
Summary of Contents for Med-Fit Med-Fit 1
- Page 1 Med-fit-1-instuctionmanual.qxp_Layout 1 24/07/2020 09:43 Page cov1 Med-Fit 1 Instruction Manual Betriebsanleitung Manuel d’instruction...
- Page 2 Med-fit-1-instuctionmanual.qxp_Layout 1 24/07/2020 09:43 Page cov2 Skin Preparation Before Application of Self-Adhesive Electrodes For best results please wash the area to be treated with a solution of warm salt water (mix one tablespoon of salt in warm water) and rub the area with the salt solution.
-
Page 3: Table Of Contents
Med-fit-1-instuctionmanual.qxp_Layout 1 24/07/2020 09:43 Page cov3 INDEX Chapter Contents Page 1. General Description ............1 2. Warnings & Precautions ..........2 3. Control Layout ..............3 ..........4 5. Accessories ..............5 6. Graphic Symbols ............6 7. Parameter Controls ............6 8. Attachment of Electrodes Lead Wires ......9 9. -
Page 4: General Description
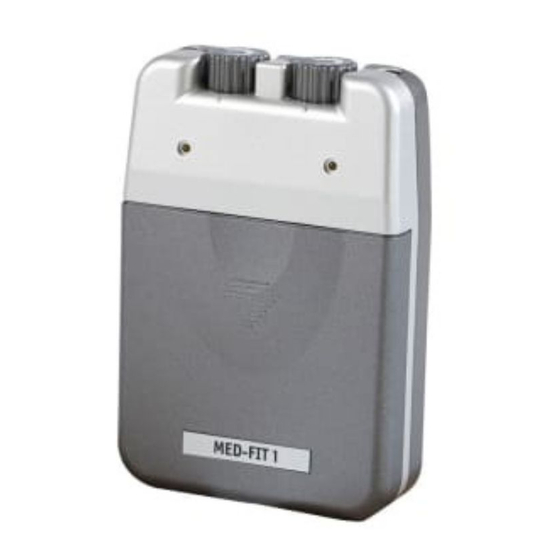
Med-fit-1-instuctionmanual.qxp_Layout 1 24/07/2020 09:43 Page 1 Chapter 1 : GENERAL DESCRIPTION The MED-FIT 1 is a battery operated pulse generator that sends electrical impulses to the body by means of electrodes attached to the skin. The device has two independently controllable channels. A pair of electrodes can be connected to each channel. - Page 5 Med-fit-1-instuctionmanual.qxp_Layout 1 24/07/2020 09:43 Page 2 Tens is unsuitable and should not be used in the following situations. • Persons suffering from conditions where the circulation is impaired. • Epilepsy, Heart Condition or any form of Malignancy. • Patients with poor skin sensation and non-compliant patients who are emotionally disturbed or have dementia.
-
Page 6: Control Layout
Med-fit-1-instuctionmanual.qxp_Layout 1 24/07/2020 09:43 Page 3 Chapter 3 : CONTROL LAYOUT... - Page 7 Med-fit-1-instuctionmanual.qxp_Layout 1 24/07/2020 09:43 Page 4 Chapter 4 : TECHNICAL SPECIFICATIONS MECHANISM TECHICAL DESCRIPTION 01 Channel Dual, isolated between channels 02 Pulse Amplitude Adjustable 0-80mA, Max output 80mA peak to peak (15.8mA rms) into 500ohm load each channel. 03 Output Voltage Adjustable 0-40V, Max output 40V peak to peak (7.9V rms) into 500ohm load each channel.
-
Page 8: Accessories
Med-fit-1-instuctionmanual.qxp_Layout 1 24/07/2020 09:43 Page 5 Chapter 5 : ACCESSORIES Each set MED-FIT 1 are completed with standard accessories and standard label as given below I. Accessories REF. NO. DESCRIPTION Q’TY 1. SA 10 50 X 50 mm Adhesive Electrodes... -
Page 9: Graphic Symbols
Med-fit-1-instuctionmanual.qxp_Layout 1 24/07/2020 09:43 Page 6 Chapter 6 : GRAPHIC SYMBOLS Note Operating Instructions Degree of Electrical Protection BF Do not insert the plug into AC power supply socket. Direct Current (DC power source) Consult Instructions for use Manufacturer Serial Number... - Page 10 Med-fit-1-instuctionmanual.qxp_Layout 1 24/07/2020 09:43 Page 7 PULSE RATE The Pulse Rate (frequency, pulses per second or Hertz) is thought to determine whether the spinal gating mechanism or the endorphin release mechanism is activated. As a rough guide the higher frequencies, those above 70Hz, will activate the spinal gating mechanism.
- Page 11 Med-fit-1-instuctionmanual.qxp_Layout 1 24/07/2020 09:43 Page 8 INTENSITY Each patient responds differently to different levels of intensity, due to varying degrees of tissue resistance, innnervation, skin thickness, etc. Intensity instructions are therefore limited to the following settings: Perception - The intensity is increased so that the patient can feel the stimulation, but there is no muscular contraction.
-
Page 12: Attachment Of Electrodes Lead Wires
Med-fit-1-instuctionmanual.qxp_Layout 1 24/07/2020 09:43 Page 9 Chapter 8 : ATTACHMENT OF ELECTRODE LEAD WIRES The wires provided with the system insert into the jack sockets located on top of the device. Holding the insulated portion of the connector, push the plug into one of the jacks (see drawing); one or two sets of wires may be used. -
Page 13: Preparation For Use
Med-fit-1-instuctionmanual.qxp_Layout 1 24/07/2020 09:43 Page 10 Chapter 9 : PREPARATION FOR USE It is recommended that for persons with sensitive skin, the area is prepared prior to the application of the self adhesive electrodes by cleaning using soap and water or alcohol wipes and then drying thoroughly. -
Page 14: Adjusting The Controls
Med-fit-1-instuctionmanual.qxp_Layout 1 24/07/2020 09:43 Page 11 Important 1. Do not apply to broken skin. 2. The electrodes should be discarded when they no longer adhere. 3. The electrodes are intended for single patient use only. 4. If irritation occurs, discontinue use and consult your clinician. - Page 15 Med-fit-1-instuctionmanual.qxp_Layout 1 24/07/2020 09:43 Page 12 3.On/Off Switch and Intensity Control : The unit is switched on by turning the appropriate channel control clockwise. The LED will illuminate as described above. The output intensity increases as the control is turned further clockwise. To reduce the output intensity and/or switch off the unit the control is turned anti-clockwise.
- Page 16 Med-fit-1-instuctionmanual.qxp_Layout 1 24/07/2020 09:43 Page 13 5. Mode Control Expose the controls by sliding front cover down. This switch has 3 positions: B for Burst stimulation, N for Constant stimulation, and M for modulated stimulation. Push the Mode Selector to the desired position.
-
Page 17: Battery Information
Med-fit-1-instuctionmanual.qxp_Layout 1 24/07/2020 09:43 Page 14 8.Check/Replace the Battery: Over time, in order to ensure the functional safety of TENS, changing the battery is necessary. 1. Make sure that both intensity controls are in the off position 2. Slide the battery compartment cover and remove. - Page 18 Med-fit-1-instuctionmanual.qxp_Layout 1 24/07/2020 09:43 Page 15 BATTERY CHARGING (1) Plug the charger into any working 110 or 220/240v mains electrical outlet.The use of any attachment not supplied with the charger tric shock, or injury to persons. (2) Follow the battery manufacturer's instructions for charging time.
-
Page 19: Maintenance Transportation And Storage
°C 20% ~ 95%, Atmosphere pressure 500hPa ~ 1060hPa. Chapter 14 : SAFETY-TECHNICAL CONTROLS For safety reasons, check your MED-FIT 1 each week based on the following checklist. 1. Check the device for external damage. - deformation of the housing. -
Page 20: Conformity To Safety Standards
EN 60601-1-2:2001 and EN 60601-1:1990+A1:1993+A2:1995 +A13:1996 safety standards. Chapter 16 : WARRANTY All MED-FIT 1 models carry a warranty of one year from the date of delivery. The warranty applies to the stimulator only and covers both parts and labour relating thereto. - Page 21 Med-fit-1-instuctionmanual.qxp_Layout 1 24/07/2020 09:43 Page 18...
- Page 22 Med-fit-1-instuctionmanual.qxp_Layout 1 24/07/2020 09:43 Page 19 Kapitel 1 Vorwort Der akute Schmerz hat meist eine einfache Ursache (Unfall, Entzündung) und ist daher in der Regel leicht zu behandeln. Mit seinen vielfältigen Entste- hungs- und Erscheinungsformen stellt der chronische Schmerz dagegen für den behandelnden Arzt eine schwierige Herausforderung dar.
- Page 23 Med-fit-1-instuctionmanual.qxp_Layout 1 24/07/2020 09:43 Page 20 Kapitel 2 Sicherheitshinweise 1. Vor Inbetriebnahme Gebrauchsanweisung lesen! 2. Sollte TENS nicht den gewünschten Effekt erzielen, oder die Stimulation unangenehm sein, beziehungsweise eine Schmerzverstärkung hervorrufen, wenden Sie sich bitte an Ihren Arzt. 3. Das TENS Gerät soll niemals in Verbindung mit dem Führen einer Maschine oder eines Fahrzeuges angewendet werden.
- Page 24 Med-fit-1-instuctionmanual.qxp_Layout 1 24/07/2020 09:43 Page 21 Kapitel 3 1. Ungeklärte Schmerzursache. 2. Bei implantierten elektronischen Geräten (z.B. Herzschrittmacher). 3. Schwere Herzrhythmusstörungen. 4. Aversion gegen Elektrizität. 6. Während der ersten drei Schwangerschaftsmonate. 7. Psychische Leiden, Epilepsien. 8. Stimulation über der Halsschlagader.
- Page 25 Med-fit-1-instuctionmanual.qxp_Layout 1 24/07/2020 09:43 Page 22 Kapitel 5 Gerätebeschreibung (1) Anschlussbuchse (2) Intensitätsregler (Ein-/Ausschalter) (3) Betriebsanzeige (4) Impulsweiteneinstellung (5) Betriebsarteneinstellung (6) Frequenzeinstellung (7) Batterieband (8) Batteriefach...
- Page 26 Med-fit-1-instuctionmanual.qxp_Layout 1 24/07/2020 09:43 Page 23 Kapitel 6 Bildzeichen Bedienungsanweisung beachten Schutzgrad BF Stecker nicht in 220 / 380 V Netz Steckdose stecken Frequenz Impulsweite Geschutzt gegen feste Fremdkorper groser als 12 mm und gegen Tropfwasser mit einem Auftreffwinkel zur senkrechten von 15°.
- Page 27 Med-fit-1-instuctionmanual.qxp_Layout 1 24/07/2020 09:43 Page 24 Kapitel 7 Technische Daten PARAMETER TECHNISCHE BESCHREIBUNG 01. Kanäle zwei 02. Intensität Stufenlos regelbar, von 0 bis 80 mA bei einen Widerstand von 500 Ohm pro Kanal 03. Impulsform Asymmetrisch, biphasisch, rechteckig (gleichstromfrei) 04. Spannung konstant 05.
- Page 28 Med-fit-1-instuctionmanual.qxp_Layout 1 24/07/2020 09:43 Page 25 Kapitel 8 Lieferumfang Das N601 wird serienmäßig in folgender Ausstattung geliefert; Ausstattung: BEST. Nr. BESCHREIBUNG MENGE 1. ZE102 50 X 50 mm selbstklebenden Elektroden 4 Stück 2. ZE401 Elektroden Kabel 2 Stück 3. ZE601 9 V Batterie, alkaline 1 Stück...
- Page 29 Med-fit-1-instuctionmanual.qxp_Layout 1 24/07/2020 09:43 Page 26 Eine längere Impulsdauer ist am besten dazu geeignet das motorische Nervensystem zu stimulieren. Eine kürzere Impulsdauer stimuliert das sen- sorische Nervensystem. Die Wahl der Impulsdauer geschieht in Abhängigkeit von der gewählten Be- triebsart. Frequenz (Hz) Die Wahl der Frequenz ist davon abhängig, ob eine schnell einsetzende oder...
- Page 30 Med-fit-1-instuctionmanual.qxp_Layout 1 24/07/2020 09:43 Page 27 Intensität tensitätsregler im Uhrzeigersinn wird der betreffende Kanal eingeschaltet und in der Stärke reguliert. Einstellung Intensität bei höheren Frequenzen Reizstärke deutlich unter der Schmerzschwelle liegen sollte. Einstellung Intensität bei niedrigen Frequenzen Der Patient sollte hierbei leichte Muskelzuckungen verspüren.
- Page 31 Med-fit-1-instuctionmanual.qxp_Layout 1 24/07/2020 09:43 Page 28 Elektrodenkabel Anschlussbuchse Elektroden Nachdem die Elektrodenkabel mit dem Gerät verbunden worden sind, können Sie die Kabel mit den Elektroden verbinden. Vorsicht t ä ü Steckdose. Kapitel 12 Reinigen Sie die Kabel mit einem feuchten Tuch, anschließend reiben Sie die Kabel mit etwas Talkum ein, was die Lebensdauer verlängert und die Hand-...
- Page 32 Med-fit-1-instuctionmanual.qxp_Layout 1 24/07/2020 09:43 Page 29 Die Elektroden sollten aus hygienischen Gründen nur von einer Person ange- wandt werden. Es wird empfohlen die Hautstellen vor Aufbringen der Elektroden mit Wasser und Seife zu reinigen und die Stelle anschließend zu trocknen.
- Page 33 Med-fit-1-instuctionmanual.qxp_Layout 1 24/07/2020 09:43 Page 30 Einschalten A u s s - Intensitätsregler 3. Anschlussbuchsen Bevor Sie die Elektrodenkabel mit dem Gerät verbinden, stellen Sie sicher, das dieses ausgeschaltet ist. Die Elektrodenkabel werden nun in die Nachdem die Elektrodenkabel mit dem Gerät verbunden wurden, können...
- Page 34 Med-fit-1-instuctionmanual.qxp_Layout 1 24/07/2020 09:43 Page 31 5. Frequenzeinstellung Die Frequenz (Impulse pro Sekunde) ist von 2 Hz bis 150 Hz. stufenlos einstellbar. Die eingestellte Frequenz ist für beide Kanäle gleich. A. Frequenzeinstellung erhöhen Durch Drehen im Uhrzeigersinn des Knopfes nimmt die Frequenz k o n - tinuierlich zu.
- Page 35 Med-fit-1-instuctionmanual.qxp_Layout 1 24/07/2020 09:43 Page 32 A Impulsbreiteneinstellung erhöhen Durch Drehen im Uhrzeigersinn des Knopfes nimmt die Impulsbreite kontinuierlich zu. B Impulsbreiteneinstellung herabsetzen Durch Drehen gegen dem Uhrzeigersinn des Knopfes nimmt die Impulsbreite kontinuierlich ab. 8. Prüfen und Ersetzen der Batterie Nach längerem Gebrauch sollte die Batterie...
- Page 36 Med-fit-1-instuctionmanual.qxp_Layout 1 24/07/2020 09:43 Page 33 Kapitel 15 Batterieinformationen 6F22 betrieben werden. Wenn Sie einen Akku verwenden, beachten Sie bitte folgende Anweisungen: Akkubetrieb: Bevor ein neuer Akku eingesetzt wird, laden Sie Ihn bitte nach den Vorschrift- en des Herstellers. Bevor Sie ein Ladegerät benutzen, beachten Sie bitte die Batteriekennzeichnung und die Vorschriften des Herstellers, sowie dessen Bedienungsanleitung.
- Page 37 Med-fit-1-instuctionmanual.qxp_Layout 1 24/07/2020 09:43 Page 34 (b) Lagern Sie nur geladene Akkus. Wenn ein Akku entladen ist, laden Sie ihn so schnell wie möglich. Lagert ein Akku mehr als 60 Tage, muss er geladen werden. Schließen Sie die Pole des Akkus niemals kurz. Dabei kann der Akku heiß und zerstört werden.
- Page 38 Med-fit-1-instuctionmanual.qxp_Layout 1 24/07/2020 09:43 Page 35 Kapitel 17 Wartung , Transport und Lagerung des Gerätes 1. Für die Reinigung des Gerätes eignet sich Alkohol. Beachten Sie: Während des Umgangs mit leicht entzündlichen Flüssigkeiten nicht rauchen und kein offenes Licht verwenden.
- Page 39 Med-fit-1-instuctionmanual.qxp_Layout 1 24/07/2020 09:43 Page 36 Bitte wenden Sie sich an Ihren Händler, falls Sie Probleme mit dem Gerät oder dem Zubehör haben. Die Lebensdauer des N601 ist auf 10 Jahre begrenzt, danach sollte eine Generalüberholung durchgeführt werden. Die Sicherheit- stechnische Kontrolle gemäß...
- Page 40 Med-fit-1-instuctionmanual.qxp_Layout 1 24/07/2020 09:43 Page 37 Kapitel 20 Konformitätserklärung Das N601 TENS Gerät entspricht den grundlegenden Anforderungen gemäß Anhang 1 – I der Richtlinie 93/42/EWG. Kapitel 21 Garantie Die Garantie für ein N601 TENS Gerät beträgt vom Tage der Lieferung an 2 Jahre.
- Page 41 Med-fit-1-instuctionmanual.qxp_Layout 1 24/07/2020 09:43 Page 38 INDEX Contenu du chapitre ......Page Description générale ......39 Avertissements et précautions .
- Page 42 Med-fit-1-instuctionmanual.qxp_Layout 1 24/07/2020 09:43 Page 39 Chapitre 1 : DESCRIPTION GÉNÉRALE Le MED-FIT 1 est un générateur d'impulsions fonctionnant avec des piles envoyant des impulsions électriques au corps par le biais d'électrodes collées sur la peau. L'appareil possède deux canaux contrôlables de façon indépendante.
- Page 43 Med-fit-1-instuctionmanual.qxp_Layout 1 24/07/2020 09:43 Page 40 Les appareils Tens ne conviennent pas et ne doivent pas être utilisés dans les situations suivantes. • Condition médicale causant une altération de la circulation sanguine. • Épilepsie, problèmes cardiaques et toute forme de malignité.
- Page 44 Med-fit-1-instuctionmanual.qxp_Layout 1 24/07/2020 09:43 Page 41 Chapitre 3 : DISPOSITION DES COMMANDES (1) CONNECTEUR CÂBLE (2) COMMANDE INTENSITÉ (INTERRUPTEUR MARCHE/ARRÊT) (3) PILOTE (4) COMMANDE LONGUEUR IMPULSION (5) COMMANDE MODE (6) COMMANDE FRÉQUENCE IMPULSION (7) BANDE PILE (8) BOÎTIER PILE...
- Page 45 Med-fit-1-instuctionmanual.qxp_Layout 1 24/07/2020 09:43 Page 42 Chapitre 4 : SPÉCIFICATIONS TECHNIQUES Les spécifications techniques du MED-FIT 1 sont les suivantes M" u t i A A j e i t r c % e t $ r c % f f f...
- Page 46 Med-fit-1-instuctionmanual.qxp_Layout 1 24/07/2020 09:43 Page 43 Chapitre 5 : ACCESSOIRES Chaque MED-FIT 1 est proposé avec des accessoires et étiquettes standard, comme indiqué ci-dessous I. Accessoires NO. RÉF. DESCRIPTION .....QTÉ...
- Page 47 Med-fit-1-instuctionmanual.qxp_Layout 1 24/07/2020 09:43 Page 44 Chapitre 6 : SYMBOLES GRAPHIQUES Remarque sur les instructions d'utilisation Degré de protection électrique BF N'insérez pas la fiche dans la prise d'alimentation secteur. Courant continu (source d'alimentation CC) Consultez les instructions d'utilisation Fabricant Numéro de série...
- Page 48 Med-fit-1-instuctionmanual.qxp_Layout 1 24/07/2020 09:43 Page 45 FRÉQUENCE DES IMPULSIONS La fréquence des impulsions (fréquence, impulsions par seconde ou Hertz) sert à déterminer si le mécanisme d'atténuation spinale ou de diffusion d'endorphine est activé. Pour donner une idée, les hautes fréquences, celles au-dessus de 70 Hz activeront le mécanisme d'atténuation spinale.
- Page 49 Med-fit-1-instuctionmanual.qxp_Layout 1 24/07/2020 09:43 Page 46 INTENSITÉ Chaque patient répond différemment aux différents niveaux d'intensité, en raison des différents degrés de résistance des tissus, de l'innervation, de l'épaisseur de la peau... Les instructions d'intensité sont donc restreintes aux réglages suivants : Perception - L'intensité...
- Page 50 Med-fit-1-instuctionmanual.qxp_Layout 1 24/07/2020 09:43 Page 47 En général, le soulagement de la douleur diminuera sous 30 minutes après la fin de la stimulation. Le soulagement de la douleur obtenu avec des TENS à basse fréquence peut durer plus longtemps. Chapitre 8 : BRANCHEMENT DES FILS CONDUCTEURS DES ÉLECTRODES...
- Page 51 Med-fit-1-instuctionmanual.qxp_Layout 1 24/07/2020 09:43 Page 48 Chapitre 9 : PRÉPARATION POUR UTILISATION Il est conseillé aux personnes ayant la peau sensible de préparer la zone d’application avant d'utiliser les électrodes auto-adhésives en la nettoyant avec du savon et de l'eau ou des lingettes désinfectantes, puis de la sécher complètement.
- Page 52 Med-fit-1-instuctionmanual.qxp_Layout 1 24/07/2020 09:43 Page 49 IMPORTANT 1. N'appliquez pas sur les peaux abimées. 2. Les électrodes doivent être jetées lorsqu'elles n'adhèrent plus. 3. Les électrodes sont conçues pour une utilisation par un seul patient. 4. En cas d'irritation, cessez l'utilisation et consultez votre médecin.
- Page 53 Med-fit-1-instuctionmanual.qxp_Layout 1 24/07/2020 09:43 Page 50 3. Interrupteur marche/arrêt et contrôle de l'intensité : L'appareil s'allume en faisant tourner la commande de canal adéquate dans le sens horaire. La DEL s'éclairera comme décrit ci-dessus. L'intensité de la sortie augmente lorsque la commande est tournée davantage dans le sens horaire.
- Page 54 Med-fit-1-instuctionmanual.qxp_Layout 1 24/07/2020 09:43 Page 51 5. Commande de mode Accédez aux commandes en faisant coulisser le couvercle avant vers le bas. Cet interrupteur possède 3 positions : B pour stimulation par décharge, N pour stimulation constante et M pour stimulation modulée.
- Page 55 Med-fit-1-instuctionmanual.qxp_Layout 1 24/07/2020 09:43 Page 52 8. Vérifier/remplacer la pile : Avec le temps, pour assurer la sécurité fonctionnelle de l'appareil TENS, il est nécessaire de changer la pile. 1. Vérifiez que les deux commandes d'intensité sont en position arrêt.
- Page 56 Med-fit-1-instuctionmanual.qxp_Layout 1 24/07/2020 09:43 Page 53 Les piles peuvent se décharger lorsqu'elles sont stockées pendant 60 jours ou plus. Après de longues périodes de stockage, rechargez la pile avant utilisation. RECHARGER LES PILES (1) Branchez le chargeur sur toute prise électrique de 110 ou 220/240 V.
- Page 57 20 à 95 % et une pression atmosphérique de 500 à 1 060 hPa. Chapitre 14 : CONTRÔLES TECHNIQUES DE SÉCURITÉ Pour des raisons de sécurité, vérifiez votre MED-FIT 1 de façon hebdomadaire en vous basant sur les points suivants. 1. Vérifiez la présence de dégâts extérieurs sur l'appareil : - déformation du boîtier.
- Page 58 EN 60601-1-2:2001 et EN 60601-1:1990+A1:1993+A2:1995 Chapitre 16 : GARANTIE Tous les modèles MED-FIT 1 disposent d'une garantie d'un an à compter de la date de livraison. La garantie s'applique au stimulateur uniquement et couvre les pièces et la main d'œuvre concernant l’appareil.
- Page 59 Med-fit-1-instuctionmanual.qxp_Layout 1 24/07/2020 09:43 Page 56...
- Page 60 Med-fit-1-instuctionmanual.qxp_Layout 1 24/07/2020 09:43 Page cov4 Med-fit Ltd Unit 8, Martel Court, S. Park Business Park Hamilton Road, Stockport, SK1 2AF Tel: 0161 429 7330 Web: www.med-fit.co.uk...
Need help?
Do you have a question about the Med-Fit 1 and is the answer not in the manual?
Questions and answers
How long do you leave the pads on your skin