Table of Contents
Advertisement
Advertisement
Table of Contents

Summary of Contents for Rego RG-MLP80B
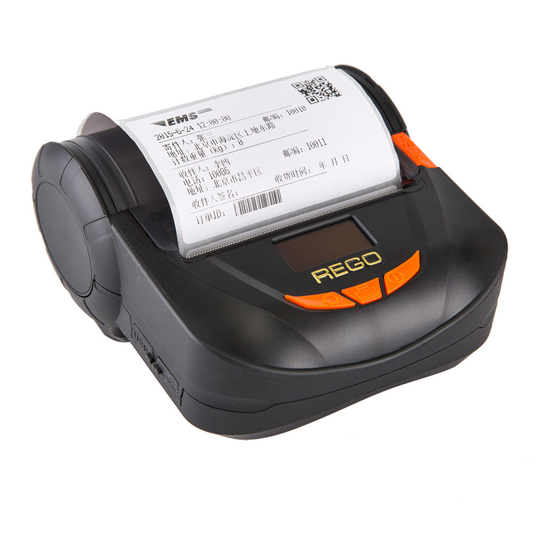
- Page 1 RG-MLP80B Mobile Label Printer User Manual V1.00...
-
Page 2: Table Of Contents
Content Precautions ..........Ⅰ 6.Settings ..............8 Safety Precautions ........Ⅱ 6.1Basic Settings............ 8 Operation Precautions ......Ⅲ 6.2Self-test............10 Storage Precautions ........ Ⅳ 6.3Self-test Information........11 7. Interface Connection ..........12 用 1. Accessories ......... 1 7.1USB Connection ..........12 7.2Serial Connection .......... - Page 3 We thank you for your use of RG-MLP80B mobile label printer. Below is the introduction for all the manuals for RG-MLP80B, so that you will know how to use and develop it . 1.《RG-MLP80B User Manual》: Provide detailed hardware/physical/technical information for the printer.
-
Page 4: Safety Precautions
Safety Precautions Be sure to use the specified battery and power supply provided by our company. Otherwise it may cause fire, explosion or damage printer, meanwhile, the battery also may be damaged. Don’t put battery into the fire, don’t disassemble or heat the battery, don’t be short circuit, it may cause fire, explosion or damage printer. -
Page 5: Operation Precautions
Operation Precautions Water or other liquid should not be spilled into the printer, also the printer should not be appeared in the rain, or else may cause printer damage. Please do not open the paper case cover when it is printing, otherwise the printer may work improperly. ... -
Page 6: Storage Precautions
It would be better use up the power of the battery before charge up it, as it can ensure the using life of the battery. Usually the life the battery is: it only has 80% capacity after charge and discharge 500 times. The battery performance will be decreased with the increase of the charge and discharge times. -
Page 7: Accessories
1. Accessories Paper Roll Battery Carry case (Optional) RG-MLP80B Printer Power Convertor USB Cable... -
Page 8: Printer Part List
2. Printer Parts List ①Paper Case Cover ②Paper Slot-out ③USB ④RS232 ⑤Setup Button ⑥Feeding Button ⑦Power Button ⑧OLED Display ⑨Power ⑩Paper Cover Switch... -
Page 9: Oled Display
Notice:The display content will be different from Work normal customer’s different settings. Below is the meaning for www.regotek.com each symbol: B : printer model RG-MLP80B N: normal thermal paper : battery power level U: upper black mark paper : Bluetooth connection... -
Page 10: Preparation Before Use
4. Preparation Before Use 4.1Battery Installation ① Make sure to place the battery into the battery housing in the direction of the 2 arrows ② Close the battery cover. 4.2 Battery Charge Plug the USB cable with power convertor into the USB outlet of the printer. In power off status, the printer's display screen will display the charging situation, when the battery logo at upper right corner of the display disappeared, means the completion of charging. -
Page 11: Paper Installation
4.3 Paper Installation 1.Press “PUSH” button, open paper case cover, and slide the two parts in the direction of arrows. 2.Pull out a part of paper and put them in the middle of the paper housing and close the paper case cover. Paper Direction... -
Page 12: Basic Operation
5. Basic Operation 5.1Power On Don’t release Power button about 1 second until the printer beeps 1 time, the printer is powered on. 5.2 Power Off Under power on status, don’t release Power button about 1 second until the printer beeps 2 times, the printer is powered off. 5.3 Feeding Paper SETUP FEED... -
Page 13: Settings
6. Settings 6.1 Basic Settings Setup description:Long press SETUP button to make the printer enters into setup mode, choose“√ ”(SETUP button)means “ok”, choose “ ”(FEED button) means “Next” , choose“X”(POWER button) means exit setup mode and save settings. 1.Display language: 2.Printing language:... - Page 14 3.Font: 4.Density: The method to set paper type, restore factory setting, paper width, auto power off, upgrade mode, Bluetooth MAC address and firmware version is same as above.
-
Page 15: Self-Test
6.2 Self-test After receiving the printer, user can check its current settings and status at anytime. Do self-test as below: in power off, hold down FEED button then press POWER button. Release FEED and POWER button when you hear the printer beeps, and the current settings and status will be printed out automatically. -
Page 16: Self-Test Information
Main Firmware:80B-100-1.10 PrintFont:12*24 BuzzerEnable:Error ON Interface:RS232,USB,BT BlackMark:ON PaperSensor:Medium Serial Parameter: PrintDirection:Normal Baud Rate:115200 Command System:CPCL+ESC/POS Parity:None CodePage:CP437 Handshaking: RTS/CTS PrintDensity:10 Bluetooth Parameter: ShutDownMode:Never Bluetooth Ver:Dual Mode ExtRAMCapacity:32MB Software Ver:5.2.6 ……. Device Name:RG-MLP80B Printer information and print sample Password:1234 MAC Address:00:02:5B:00:04:A8... -
Page 17: Interface Connection
7. Interface Connection 7.1 USB Connection The USB socket for RG-MLP80B is the standard MICRO USB-B type, follow the USB printer class protocol. 7.2 Serial Connection RG-MLP80B serial interface is compatible with RS232C. Support RTS/CTS and XON/XOFF handshaking protocol, socket model is MICRO USB-B. - Page 18 In serial connection, user can set baud rate and data structures by “RG- SetTools”. Default setting is 9600bps, 8 bits of data, data structure is no parity, and 1 stop bit. There are 2 types of handshaking optional. 1. Hardware control, 2.X-ON / X-OFF protocol. The description of two type handshaking is as follows table: Handshaking Data direction...
-
Page 19: Bluetooth Connection
10m. The Bluetooth of the printer belongs to the slave device. The initial name of the printer is RG-MLP80B, the initial password is ‘1234’; users can change the printer name and password by using RG- SetTools. -
Page 20: Wi-Ficonnection
The devices, such as hand-held device, laptop and other handheld data terminal with Bluetooth can drive RG-MLP80B to print by WI-FI. The WI-FI for RG-MLP80B supports AP, STA and AP+STA all in one three modes, which is much convenient to connect with other devices via net. -
Page 21: Specification And Features
8. Specification and Features 8.1 Printing Printing Method Thermal line Paper Type Continuous thermal paper, black mark paper, label paper. Paper Width 44~83mm Paper diameter ≤50mm Valid Printing Width ≤72mm Resolution 8dot/mm(203dpi) Dot/line ≤576dots Printing Speed ≤60mm/S... - Page 22 Paper Thickness 60~140μm Chinese:GB18030-2000 和 BIG5Chinese characters(16*16 and 24*24) Western:ASCII characters, Codepages, user-defined characters(12*24 and 9*17) Printing Content 1D barcode:UPCA, UPCE, EAN13, EAN8, CODE39, ITF25, CODABAR, CODE93, CODE128 2D barcode:PDF417, QR CODE, DATA Matrix 8.2 Power Supply Power Supply DC5V, 1A power adapter or 7.4V, 2000mAh rechargeable polymer lithium battery 8.3 Interface Interface RS-232, USB, 4.0 Bluetooth, WI-FI...
- Page 23 8.4 Physical Parameters Dimension 131(L)×124(W)×66(H)mm Weight 360g(excluding battery and paper) 8.5 Environment Parameters Operation 0℃~50℃ Temperature Operation Humidity 20%~85% Storage -25℃~70℃ Temperature Storage Humidity 10%~95%...
- Page 24 Support When paper is out, there’s notice displayed on the screen and the Paper Out Detection printer beeps and stop printing. Support ESC/POS and CPCL(Please refer to《REGO Thermal Printer Control Command Technical Manual》) Power Volume When battery power is low, it will display on the screen of the printer.
-
Page 25: Wi-Fi Wireless Module Setting And User Guide
WI-FI Wireless Module Setting and User guide 9.1 Web Management Page Description In the first use of WI-FI interface of RG-MLP80B, users need to set the WI-FI module. Users can connect PC with AP interface of RG-MLP80B, and set it by WEB management. - Page 26 "OK." Pic. 5-1 Open management page Then pop-up RG-MLP80B management web interface. This management web interface can support Chinese and English optional. Menu includes 9 pages, like SYSTEM INFORMATION, MODE SELECTION, STA SETTINGS, AP SETTINGS, OTHER SETTINGS, ACCOUNT MANAGEMENT, SOFTWARE UPGRADE, MODULE RESET, and RESTORE FACTORY...
- Page 27 9.1.2 System Information Page In this page, the user can obtain the important information of current device including device serial number, firmware version, wireless networking information and related parameter settings. Also can read wireless signal strength instruction in STA mode. Pic.
- Page 28 9.1.3 Work Mode Selection Page WF-FI modules of RG-MLP80B can be used as a wireless access point (AP mode) , convenient for users to configure. It can also be used as a wireless information terminal (STA mode) by connection fortune server via a wireless router. It can also be configured AP + STA mode, convenient for the user to form a flexible networking.
- Page 29 9.1.4 STA Settings Page In this page, users can click on [search] button to automatically search for nearby wireless access points and connect it by setting the network parameters. It can be connected only when encrypted information is consistent with the corresponding wireless access point.
- Page 30 9.1.5 AP Settings Page When select the printer working in AP or AP + STA mode, users need to set up wireless and network parameters on this page. Most systems support DHCP to automatically obtain IP. It is recommended to set the LAN DHCP parameter type as "Server", otherwise STA need to manually enter the appropriate network parameters Pic.
- Page 31 9.1.6 Other Setting Page RG-MLP80B printers WI-FI modules: Connect the module and the printer via the serial port, the serial port parameters can not be altered, otherwise, it can not work properly. In this page, Users simply set the device to communicate with the TCP layer protocol parameters fortune.
- Page 32 9.1.7 Account Management Page This page is used to set the user-device Web Server user name and password Pic. 5-8 Account management page...
- Page 33 9.1.8 Software Upgrade Page Users can update the firmware file on the local computer to upload the WI-FI modules firmware. Please consult our technical staff for detailed upload methods. If not really need to upgrade firmware, please do not arbitrarily set, or it may damage the module.
- Page 34 9.1.9 Module Reset Page After the restart, newly saved configuration parameters will be used. Pic. 5-10 Module reset page...
- Page 35 9.1.10 Restore Factory Default Settings After restore the factory settings, the user's former configuration will be deleted. Users can reconfigure at http://192.168.1.1, username and password are admin. And the system will automatically turn off STA mode wireless. Pic.. 5-11 Restore factory default settings...
- Page 36 9.2 WI-FI Interface Usage Instructions 9.2.1 Software Debugging Tools You can use the following general procedure as a debugging tool for WI-FI interface (Users can also use other debugging tools) Network debugging tool: TCPUDPDbg 9.2.2 Net work Connection There are 2 kinds of connection when debugging. Users can be tested in accordance with the actual application. Use STA interface, printer and PC connected to a wireless AP respectively, shown as below: Pic.
- Page 37 Use AP interface, PC connected with printer AP interface, shown as below: Pic. 5-13 AP interface connection debugging 9.2.3 The Initial Parameters Printer default SSID: RG-MLP80B Printer default encryption: open, none Printer default network parameters: TCP,Server,9000,192.168.1.1; Printer default IP address: DHCP,0.0.0.0,0.0.0.0,0.0.0.0;...
- Page 38 9.2.4 Printer Test Connection shown above to open TCPUDPDbg program in PC2, create a new connection. If printer works in Server mode, users should create a client connection, or create a server mode connection. Pic. 5-14“TCPUDPDbg” Create connection...
- Page 39 Then configure TCP/UDP connection parameter, default parameter shown as below Pic. 5-15“TCPUDPDbg” configuration...
- Page 40 Well-configuration, click “Create” Pic. 5-16“TCPUDPDbg” connection...
- Page 41 Then click connection button, after well-connected, users can send data via TCPUDPDbg to printer to control the printer for printing operation. Pic. 5-17“TCPUDPDbg”connection succeed...
-
Page 42: Appendix
10. Appendix 10.1 Description of Black Mark Pre-print If user use pre-print black mark to locate the receipt, please be sure to abide by the following black mark pre-print regulation when print the black mark paper, if not ,it will cause that the printer can not identify the black mark. Te black mark pre-print regulations are as below: Printing Position: As the picture above, the black mark should be printed on the right or left edge of the side of words. - Page 43 Label space:≤10mm 10.3 Technical Manual 《REGO Thermal Printer Technical Manual》is used to support the developers to develop the application with RG-MLP80B. 10.4 Printer Parameter Settings User can use RG-SetTools by PC to setup the printer’s parameters, such as language, font, print density, default codepage,...
- Page 44 www.regotek.com...
Need help?
Do you have a question about the RG-MLP80B and is the answer not in the manual?
Questions and answers