Table of Contents
Advertisement
Quick Links
Advertisement
Table of Contents

Related Manuals for ECOWITT WH0310


Summary of Contents for ECOWITT WH0310
- Page 1 Wireless Weather Station with Multi-channel Temperature Sensor Model: WH0310...
-
Page 2: Table Of Contents
Table of Contents 1 Introduction............4 2 Getting Started...........4 2.1 Parts List............ 5 2.2 Recommend Tools........5 2.3 Thermometer Sensor Set Up....5 2.4 Display Console Set Up......7 2.4.1 Display Console Layout....12 2.4.2 Sensor Operation Verification..13 3 Wireless Sensor Installation......14 3.1 Mounting with Zip Tie...... - Page 3 4.7.2 Check history High / Low record..22 4.8 Best Practices for Wireless Communication..........22 5 Specifications...........25 5.1 Wireless Specifications......25 5.2 Measurement Specifications....26 5.3 Power Consumption.......26 6 Warranty Information........27...
-
Page 4: Introduction
Introduction Thank you for your purchase of this WH0310 Wireless Weather Station with Multi-channel Temperature Sensor. This device measures indoor temperature, humidity and barometric pressure. Also supports to add max three temperature sensors (additional two sensors sold separately) to monitor multi places. -
Page 5: Parts List
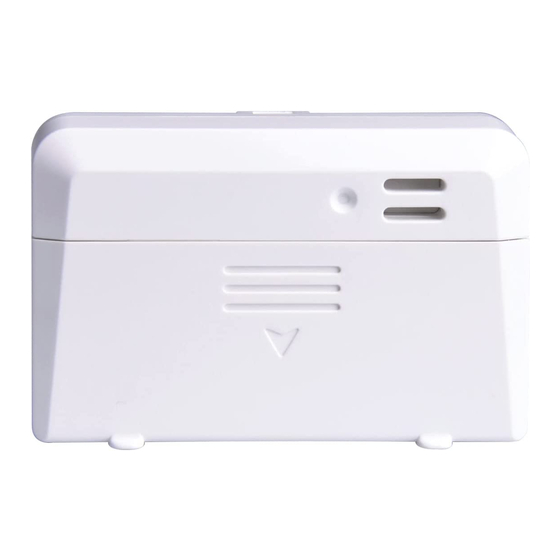
2.1 Parts List Item Display Console Multi-channel Thermometer sensor User Manual 2.2 Recommend Tools Hammer hanging remote thermometer transmitter. 2.3 Thermometer Sensor Set Up We recommend fresh alkaline batteries for 140 °F(-20℃ - 60℃) and fresh lithium batteries outdoor temperature ranges between -4 °F and and 140 °F(-40℃... - Page 6 1. Remove the battery door on the back of the sensor by sliding the compartment door down, as shown in Figure 1 . Figure 1 Wireless transmitter LED 1, 2, 3 RF Channels AA Battery Battery Compartment Cover...
-
Page 7: Display Console Set Up
2. Set RF sensor channel. 3. Insert one AA battery. 4. After inserting the battery, the remote sensor LED indicator will light for 4 seconds, and then flash once per 60 seconds thereafter. Each time it flashes, the sensor is transmitting data. - Page 8 display, as shown in Figure 2. Insert one AA (alkaline or lithium, rechargeable) battery in the back of the display console. Figure 2...
- Page 9 Number Button Function Switch between display of 24H/7 days barometer graph (press once); also functions as a “+” “increase” button while in setup mode Enable disable Cycle Mode(press once); Cycle between display of RF channels sensor data LIGHT Enable/disable the screen backlight(press once) ;...
- Page 10 Switch between display of history and last 24h High / Low record(press once); also functions as a “-” or “decrease” button while in setup mode MODE Switch between ABS/REL barometer (press once); Used enter setup mode(hold for 2s); also functions as a “next” button in setup mode All of the LCD segments will light up for a few seconds to verify all segments are operating...
- Page 11 temperature humidity. remote temperature will update on the display within a few minutes. While in the search mode, the reception search icon flash. If the remote does not update, please contact the customer service.
-
Page 12: Display Console Layout
2.4.1 Display Console Layout Figure 3... -
Page 13: Sensor Operation Verification
Indoor temperature Weather forecast Barometric pressure changing trend Outdoor/multi-channel temperature Indoor humidity ABS/REL barometric pressure Pressure tendency indicator 24H/7days history graph barometric pressure Cycle Mode icon/ RF channel number Outdoor/multi-channel temperature 24H high/low record 2.4.2 Sensor Operation Verification Verify the indoor and outdoor temperature match closely with the console and sensor in the same location (about 5 to 10’... -
Page 14: Wireless Sensor Installation
Wireless Sensor Installation It is recommended you mount the remote sensor in a shaded area. Direct sunlight and radiant heat sources will result in inaccurate temperature readings. Although the sensor is weather resistant, it is best to mount in a well-protected area, such as under an eve. -
Page 15: Console Operation
Console Operation Note: The console has five buttons for easy operation: + and CH button (on the left); - and MODE button (on the right); LIGHT button (on the top). Any program mode can be exited at any time by either pressing the LIGHT button, or waiting for the 30-second time-out to take effect. - Page 16 Note: To calibrate the barometric pressure, we recommend you to go to this link to check the operation: http://www.ecowitt.com/news/102.html Use the MODE button to move to the next settings. Press the + or - button to change the settings for the selected item.
-
Page 17: Pressure Tendency Indicator
4.3 Pressure Tendency Indicator Pressure change tendency (updating every 60 second) is reflected by the scale indicator located under pressure display digits. Usually this is an indicator of weather change: when pressure is going in upward direction, it normally mean weather is getting better. -
Page 18: 7Days History Graph
24H/7days History Graph Figure: Last 24H graph Figure: Last 7days graph... -
Page 19: Weather Forecast Algorithm
With different time scale selected, the pressure history graph can be used to display past 24h or 7 days pressure change (updating every 60 second). 4.5 Weather Forecast Algorithm Weather Forecast: comparison between past 24 hour average against past 30 day average pressure. -
Page 20: Rf Channels Setting And Sensor Resynchronization
4.6 RF channels setting and sensor resynchronization The default display mode for the outdoor/multi channel sensor(s) data is Cycle Mode. In cycle mode, indicated by an arrow icon with the channel number, different channel sensor(s) data will be toggled for display on LCD. Press CH button once can exit the cycle mode and display the current channel sensor data all the time. -
Page 21: High Low Record
In non-cycle mode, hold the CH button for 2 seconds will re-register the current channel sensor. While in the search mode, the reception search icon will flash. Note: If you only purchased one multi channel temperature sensor, the other two channels will display --‘--. -
Page 22: Check History High / Low Record
4.7.2 Check history High / Low record In normal mode, press the - button (the icon will disappear) to check the history high/low records for outdoor/multi-channel temperature since power on or last clear. In cycle mode, hold the - button for 2s can clear the high/low record for all the channels sensors . - Page 23 interference, distance, walls and metal barriers. We recommend the following best practices for trouble free wireless communication. 1. Electro-Magnetic Interference (EMI). Keep the console several feet away from computer monitors and TVs. 2. Radio Frequency Interference (RFI). If you have other devices communication is intermittent, try turning off...
- Page 24 siding. If you have metal siding, align the remote and console through a window to get a clear line of sight. The following is a table of reception loss vs. the transmission medium. Each “wall” or obstruction decreases the transmission range by the factor shown below.
-
Page 25: Specifications
Specifications 5.1 Wireless Specifications Line of sight wireless transmission (in open areas): 300 feet, 100 feet under most conditions. Frequency: 433 MHz Sensor Update Rate: 60 seconds Weather forecast update rate: 10 minutes(based on the barometric pressure changing) ... -
Page 26: Measurement Specifications
5.2 Measurement Specifications The following table provides specifications for the measured parameters. Measurement Range Accuracy Resolution Indoor 32 to ± 1 °F/℃ 0.1 °F/℃ Temperature 122 °F/0 to 50℃ Indoor 10-99% ±5% Humidity Outdoor -40 to ± 1 °F/℃ 0.1 °F/℃ Temperature 140 °F/-40 to 60℃... -
Page 27: Warranty Information
with one sensor and excellent reception. Intermittent reception and multiple sensors may reduce the battery life. Minimum 12 months for thermometer sensor (use lithium batteries in cold weather climates less than -4 °F) 6 Warranty Information We disclaim any responsibility for any technical error or printing error, or their consequences. - Page 28 and only to the original purchaser of this product. To receive warranty service, the purchaser must contact us for problem determination and service procedures. This warranty covers only actual defects within the product itself, and does not cover the cost of installation or removal from a fixed installation, normal set-up or adjustments, claims based on misrepresentation by the seller or performance...
Need help?
Do you have a question about the WH0310 and is the answer not in the manual?
Questions and answers