Table of Contents
Advertisement
Quick Links
Important safety information
Explanation of symbols used in this manual and on the product:
This symbol is intended to alert the user to the presence of uninsulated
dangerous voltages within the enclosure of sufficient magnitude to
cause electric shock.
This symbol is intended to alert the user to the presence of important
maintenance and servicing information in the instruction and service
manuals.
CAUTION
TO REDUCE THE RISK OF ELECTRIC SHOCK DO NOT REMOVE THE COVER.
NO USER SERVICEABLE PARTS INSIDE.
REFER SERVICING TO QUALIFIED SERVICE PERSONNEL.
WARNING: SHOCK HAZARD. DO NOT OPEN.
AVIS: RISQUE DE CHOC ELECTRIQUE. NE PAS OUVRIR.
CAUTION: REPLACE FUSE WITH SAME TYPE AND RATING.
ATTENTION: UTILISER UN FUSIBLE DE RECHANGE DE MÊME TYPE.
DISCONNECT SUPPLY CORD BEFORE CHANGING FUSE.
ATTENTION: DEBRANCHER AVANT DE REMPLACER LE FUSIBLE.
WARNING
TO REDUCE THE RISK OF FIRE OR ELECTRIC SHOCK DO NOT EXPOSE THIS
APPLIANCE TO RAIN OR MOISTURE.
MAINS PLUGS
This appliance is supplied with a non-rewireable mains plug for the intended
country.
Replacement mains leads can be obtained from your Linn retailer.
Should you need to change the plug please dispose of it carefully.
A plug with bared conductors is dangerous if engaged in a live socket.
The Brown wire must be connected to the Live (Line) supply pin.
The Blue wire must be connected to the Neutral supply pin.
The Green/Yellow wire must be connected to the Earth (Ground) supply pin.
Please contact your retailer or a competent electrician if you are in any doubt.
GENERAL SAFETY INSTRUCTIONS
1.
Read instructions. Read the safety and operating instructions before operating the
appliance.
2.
Retain instructions. Retain the safety and operating instructions for future reference.
3.
Heed warnings. Observe all warnings on the appliance and in the operating instructions.
4.
Follow instructions. Follow all operating and use instructions.
5.
Water and moisture. Do not use the appliance near water, for example near a bathtub,
washbowl, kitchen sink, laundry tub, in a wet basement, or near a swimming pool and
the like.
6.
Carts and stands. Use only with a cart or stand that is recommended by the manufacturer.
6a. An appliance and cart combination should be used with care. Quick stops, excessive
force, and uneven surfaces may cause the appliance and cart combination to overturn.
7.
Wall or ceiling mounting. Mount to a wall or ceiling only as recommended by the
manufacturer.
8.
Ventilation. Site the appliance so that its location or position does not interfere with its
proper ventilation. For example, the appliance should not be situated on a bed, sofa,
rug, or similar surface that may block the ventilation openings, or placed in a built-in
installation such as a bookcase or cabinet that may impede the flow of air through the
ventilation openings.
9.
Heat. Site the appliance away from heat sources such as radiators, heaters, stoves, or
other appliances (including amplifiers) that produce heat.
10. Power sources. Connect the appliance to a power supply only of the type described in
the operating instructions or marked on the appliance.
11. Grounding or polarisation. Do not defeat the safety purpose of the polarised or
grounding type plug. A polarised plug has two blades with one wider than the other. A
grounding type plug has two blades and a third grounding prong. The wide blade or
the third prong are provided for your safety. When the provided plug does not fit into
your outlet, consult an electrician for replacement of the obsolete outlet.
12. Power cord protection. Route power cords so that they are not likely to be walked on or
pinched by items placed upon or against them, paying particular attention to cords at
plugs, power sockets, and at the point where they exit from the appliance.
13. Protective attachment plug. As a safety feature the product is equipped with an
attachment plug containing overload protection. See the instruction manual about
resetting or replacing the plug. Should the plug need replacing ensure that a
replacement is used which has the same overload protection as the original.
14. Cleaning. The product should be cleaned only as recommended by the manufacturer.
15. Power lines. An outdoor antenna should be located away from power lines.
16. Outdoor antenna grounding. If an outdoor antenna is connected to the tuner/receiver
ensure that the antenna system is grounded to provide some protection against voltage
surges and static build up.
In the USA see article 810 of the National Electrical Code ANSI/NFPA 70 concerning
installation requirements.
17. Unplug this apparatus during lightning storms or when unused for long periods of time.
18. Objects and liquid entry. Take care not to let objects or liquids fall into the product.
19. Damage requiring service. The product should be serviced by qualified personnel if:
a)
The power cord or plug has been damaged.
b) Objects or liquid have fallen into the product.
c)
The product has been exposed to rain.
d) The product does not appear to operate normally or exhibits a marked change in
operation.
e)
The product has been dropped or the enclosure damaged.
20. Servicing. Don't attempt to service the product beyond that described in the operating
instructions. All other servicing should be referred to qualified service personnel.
i
Advertisement
Table of Contents

Related Manuals for Linn KIVOR LINNK

Summary of Contents for Linn KIVOR LINNK
- Page 1 In the USA see article 810 of the National Electrical Code ANSI/NFPA 70 concerning installation requirements. Replacement mains leads can be obtained from your Linn retailer. 17. Unplug this apparatus during lightning storms or when unused for long periods of time.
- Page 2 Insulation requirements Should your mains plug need replacing and you are competent to do this Fault conditions proceed as follows. If you are in doubt contact your Linn retailer or a competent Mechanical strength electrician. Parts connected to the mains supply Components a) Disconnect the plug from the mains supply.
- Page 3 Procurez-vous des cordons de secteur de remplacement auprès de votre 17. Périodes de non-utilisation. Débranchez le cordon d’alimentation de la prise murale si vous revendeur Linn. avez l’intention de ne pas utiliser l’appareil pendant une longue période. Si vous devez remplacer la fiche, manipulez-la avec soin.
- Page 4 INSTRUCTIONS DE SECURITE À L’INTENTION DES UTILISATEURS CE DÉCLARATION DE CONFORMITÉ RÉSIDANT AU ROYAUME-UNI Linn Products Ltd certifie que ce produit est conforme à la directive 73/23/EEC Remplacement du fusible concernant la basse tension et à la directive 89/336/EEC concernant la compatibilité...
- Page 5 XiVA ™ At the heart of the KIVOR LINNK is state of the art XiVA application software, developed by Immerge Ltd. XiVA™ revolutionises audio and video by using hard disk technology to play back music and high quality video in virtually limitless ways.
- Page 6 CONSERVEZ dans un endroit sûr les CD que vous avez mis en mémoire Imprimé au Royaume-Uni. dans votre KIVOR KIVOR LINNK et KIVOR TUNBOKS sont des marques de Linn Products CONSERVEZ une liste de votre collection de CD et notez lesquels vous avez Limited.
-
Page 8: Table Of Contents
Anschluss des KIVOR LINNK ..... 6 Using the KIVOR LINNK......7 Utilisation de votre KIVOR LINNK . - Page 9 Het aansluiten van de KIVOR LINNK....6 Utilizzo di KIVOR LINNK......7 Cómo utilizar su KIVOR LINNK .
-
Page 13: Key Features
Key features Caractéristiques clés Die wichtigsten Merkmale ❑ ❑ ❑ Allows any RCU to control the Kivor Tunboks in a Knekt system Permet de contrôler le Kivor Tunboks faisant partie d'un système Kivor Tunboks kann innerhalb eines Knekt-Systems mit beliebiger Knekt à... -
Page 14: Características Principales
Caratteristiche principali Características principales Belangrijkste eigenschappen ❑ ❑ ❑ Consente a qualsiasi RCU di controllare Kivor Tunboks in un Controle el Kivor Tunboks en un sistema Knekt con cualquier RCU De Kivor Tunboks van het Knekt-systeem kunnen door elke RCU sistema Knekt worden afgeregeld ❑... -
Page 15: Setting Up The Kivor Linnk
Setting Up the Linn KIVOR LINNK Assemblage du Linn KIVOR LINNK Einrichtung des Linn KIVOR LINNK Installazione di Linn KIVOR LINNK Instalación del Linn KIVOR LINNK Gebruiksklaar maken van de Linn KIVOR LINNK... -
Page 16: Check You Have
KIVOR LINNK Mains lead (a,b or c) RS 232 cable Warranty card. Complete the warranty card and Check you have return it to Linn or your Linn retailer. Français Français Français Français KIVOR LINNK Câble de branchement secteur (a, b ou Câble RS 232... -
Page 17: Caution
Schakel alle apparatuur uit als u De aansluitkabel dient altijd op een Vervang zelf nooit zekeringen. Indien aansluitingen aanpast. contactdoos met randaarde te worden zich storingen voordoen, dient u aangesloten. contact op te nemen met een erkende Belangrijk dealer KIVOR LINNK... -
Page 18: Connecting The Kivor Linnk
IN de l'INTERSEKT Deutsch Deutsch Deutsch Deutsch Den KIVOR TUNBOKS mit Ihrem Der KIVOR LINNK kann an eine der Den KIVOR LINNK an das KNEKT INTERSEKT OUT an Remote Ihres KIVOR LINNK an das KNEKT TUNBOKS RS232-Buchsen System anschließen, indem von KIVOR LINNK anschließen. -
Page 19: Using The Kivor Linnk
Switching On and Off. Connect mains lead to earthed power Locate power switch on the back Press power switch Using your KIVOR LINNK outlet. panel of your KIVOR LINNK. Français Français Français Français Le brancher et le débrancher. Identifiez l'interrupteur situé sur le Utilisation de votre KIVOR Branchez le câble secteur dans une... -
Page 21: Room Control Unit
Display e comandi volume destro sinistro Control de Where What On/Off Silenciamiento Tiempo Pregunta Tecla Tecla volumen programable programable Visualizador y controles derecha izquierda Display en bedieningsorganen Volumeregeling Where What Aan/Uit Mute Tijd Question Soft Rechts Soft Links KIVOR LINNK... -
Page 22: Selecting The Source
English English English English Up to 16 sources of sound can be Sources are numbered 1 - 16, however Press the WHAT key to view source Selecting the source selected from a KIVOR TUNBOKS. sources can be named by installer. list and select it Français Français... -
Page 23: Playmode
Druk de toets SOFT links in om de een track afspelen, pauzeren of toets SOFT rechts in. rechts in terwijl de track loopt. Druk track te stoppen. stoppen. SOFT rechts wederom in om het Play afspelen te hervatten. KIVOR LINNK... -
Page 24: Playlist Selection
English English English English When in PLAYMODE press the DO Playlists are displayed in alphanumeric Press SOFT key left or right to view To search for playlist alphanumerically key. Display will show either DSC LIST, order. ie, 0,1,2..A, B, C playlist and select. - Page 25 NONE FOUND. Houd de toets DO ingedrukt om het toets DO in om een letter te kiezen. programma te verlaten. KIVOR LINNK...
-
Page 26: Track Selection
English English English English To select track to play, press the DO A numbered list is displayed. Use right Track plays automatically when user Press and hold DO key in TRACK key until TRACK appears on the RCU. and left SOFT keys to increment stops incrementing. -
Page 27: Searching
Laat de toets los ingedrukt om het TRACK menu in te los om de track vanaf het gewenste om de track vanaf het gewenste schakelen. Zoeken moment af te spelen. moment af te spelen. KIVOR LINNK... -
Page 28: Select Mode
English English English English Press and hold the DO key in Press the DO key repeatedly to select LISTMODE - select Mode of music RANDOM- switch Random mode on or PLAYMODE to gain access options from the following options. selection. off. -
Page 29: Changing Playlist
Playmode ingedrukt. keuze. ART LIST : per ARTIST Druk de toets Do in om een andere GNR LIST : per GENRE kieswijze voor de playlist te selecteren. U beschikt over vier verschillende Wijzigen van de playlist keuze playlist keuzemogelijkheden KIVOR LINNK... - Page 30 English English English English Changing Playlist Selection Press the DO key to enter REPEAT Press and Hold the DO key to return to (Continued) mode. (If Listmode is unchanged) PLAYMODE. Français Français Français Français Changer de méthode de Appuyez sur la touche DO pour Appuyez sur la touche DO et sélection du programme sélectionner le mode REPEAT (si...
-
Page 31: Using The Repeat Function
Druk de toets DO meermaals in tot Druk de toets SOFT rechts in om de ingedrukt. weergegeven en opgevolgd door de REPEAT op de RCU verschijnt. herhaalfunctie in te schakelen. Inschakeling van de REPEAT (De herhaalfunctie herhaalt de gehele huidige playlist functie. functie playlist). KIVOR LINNK... - Page 32 English English English English Using The Repeat function. The REPEAT mode is on when an X REPEAT mode is off when a Tick is Press the DO key to enter RANDOM Press and Hold the DO key to return to (Continued) is displayed on the RCU displayed on the RCU.
-
Page 33: Using The Random Function
Druk de toets SOFT rechts in om de ingedrukt. vertoond, gevolgd door de huidige Random op de RCU verschijnt. RANDOM in te schakelen. Het gebruik van de RANDOM (Random functie speelt tracks af in playlist functie. functie willekeurige volgorde). KIVOR LINNK... - Page 34 English English English English Using The RANDOM function. The RANDOM mode is on when an X RANDOM mode is off when a Tick is Press the DO key to enter INTRO Press and Hold the DO key to return to (Continued) is displayed on the RCU displayed on the RCU.
-
Page 35: Using The Intro Function
Druk de toets Soft rechts in om de ingedrukt. weergegeven, gevolgd door de huidige INTRO op de RCU wordt INTRO functie in te schakelen. Het gebruik van de INTRO (De Intro functie speelt de eerste vijf playlist functie. weergegeven. functie seconden van elke track). KIVOR LINNK... - Page 36 English English English English The INTRO mode is on when an X is INTRO mode is off when a Tick is Press the DO key to enter LISTMODE. Press and Hold the DO key to return to Using The INTRO function. displayed on the RCU.
-
Page 37: The Question Key
Zowel de titel van de track als de naam Naam van de Playlist Tijdsduur van de track (in search) drukken krijgt u nadere informatie, van de artiest kan worden gerelateerd aan de functie die op dat weergegeven De toets QUESTION moment is ingeschakeld. KIVOR LINNK... -
Page 38: Servicing And Cleaning
English Always use an authorised dealer for Switch off unit before cleaning. Remove dust and finger marks with a Avoid using domestic cleaning Servicing and Cleaning any servicing of your KIVOR LINNK. soft damp cloth. products. Français Français Français Français Faites toujours appel à... -
Page 39: Technical Support And Information
Prière de contacter le détaillant le plus proche ou les bureaux mentionnés ci-dessous pour tout support technique, informations concer- nant les produits et autres renseignements. Les détails complets de votre distributeur local se trouvent à l'adresse : www.linn.co.uk/buy_linn/find_retailer.cfm Technische Beratung und Information Für technische Beratung, Produktanfragen und Information wenden Sie sich bitte an Ihren Händler vor Ort oder an die Adresse unten. -
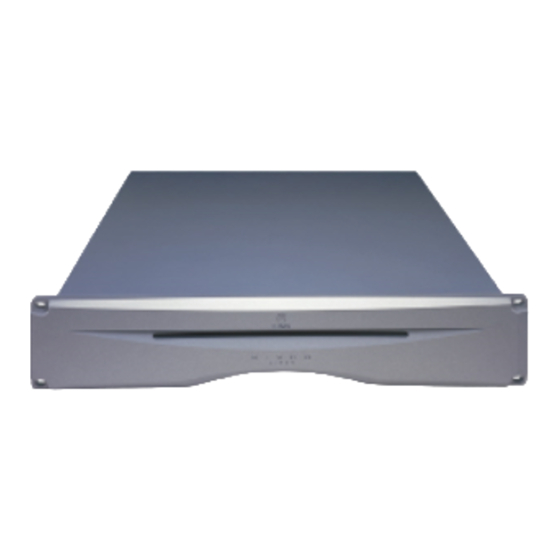
Page 40: Kivor Linnk Specifications
Linn KIVOR LINNK Spécifications du Linn KIVOR Technische Daten des Linn Specifications LINNK KIVOR LINNK General Généralités Allgemein Introduced: 2001 Lancement : 2001 Eingeführt: 2001 Dimensions 88.9mm x 482.6mm W x 355mm D Dimensions 88,9mm x 482,6mm L x 355mm P... - Page 41 Specifiche di Linn KIVOR LINNK Especificaciones Linn KIVOR Linn KIVOR LINNK Specificaties LINNK Generali Algemeen General Anno di 2001 Geintroduceerd: 2001 distribuzione: Presentado: 2001 Afmetingen 88.9mm x 482.6mm x 355mm (HxBxD) Dimensioni: 88,9mm A x 482,6mm L x 355mm P...
- Page 42 TRACK DSC LIST USR LIST ART LIST GNR LIST Select Playlist Select Track Select Playlist Select Playlist Select Playlist FIND abc FIND abc FIND abc FIND abc SEARCH Select Position Find Playlist Find Playlist Find Playlist Find Playlist KIVOR LINNK...
- Page 43 DO maintenu enfoncé DO maintenu enfoncé DO maintenu enfoncé DO Hold DO maintenu enfoncé PLAYMODE LISTMODE REPEAT RANDOM INTRO Basculer en mode Play,pause,stop Choisir Listmode Basculer en mode Basculer en mode sélection aléatoire Si ListMode n'a pas changé répétition Intro Si ListMode a changé...
- Page 44 DSC LIST USR LIST ART LIST GNR LIST TRACK Spielliste wählen Spielliste wählen Spielliste wählen Spielliste wählen Select Track FIND abc FIND abc FIND abc FIND abc SEARCH Spielliste finden Spielliste finden Spielliste finden Spielliste finden Select Position Deutsch KIVOR LINNK...
- Page 45 Tener premuto Tener premuto Tener premuto Tener premuto PLAYMODE Tener premuto DO LISTMODE REPEAT RANDOM INTRO Riproduzione,pause,st Selezione Listmode Abilitazione/disabilit Abilitazione/disabilit Abilitazione/disabilit azione Repeat azione Random azione Intro Se Listmode è invariato Se Listmode è cambiato Se Listmode è Disc Se Listmode è...
- Page 46 Mantener DO Mantener DO Mantener DO Mantener DO PLAYMODE LISTMODE REPEAT RANDOM INTRO Mantener DO Reproducir,pausa, parada Seleccionar Listmode Conmutar Repetición Conmutar aleatorio Conmutar Intro Si no ha cambiado ListMode Si ha cambiado ListMode Si ListMode es disco Si ListMode es usuario Si ListMode es artista If ListMode is género DSC LIST...
- Page 47 USR LIST ART LIST : GNR LIST : TRACK Track selecteren Playlist selecteren Playlist selecteren Playlist selecteren Playlist selecteren FIND abc FIND abc FIND abc FIND abc SEARCH Positie selecteren Playlist zoeken Playlist zoeken Playlist zoeken Playlist zoeken Nederlands KIVOR LINNK...
- Page 48 PACK535rev10...
Need help?
Do you have a question about the KIVOR LINNK and is the answer not in the manual?
Questions and answers