
Summary of Contents for Alien Flier Zip Series
- Page 1 Alien Flier Zip Line Products Installation/Owner’s Manual © Copyright 2012 Alien Flier LLC. All Rights Reserved...
-
Page 2: Table Of Contents
Table of Contents SAFETY – PLEASE READ CAREFULLY ....................4 Constructing your Zip Line Xtreme Models ..................6 Installing your Alien Flier Trolley on an Existing Zip Line ................11 Preparing the Flexi-Seat ........................... 13 Final Assembly ............................14 Recommendations for Launching Reaching the Top ................15 Trolleys without a seat A word of caution .................... - Page 3 © Copyright 2012 Alien Flier LLC. All Rights Reserved...
-
Page 4: Safety - Please Read Carefully
Zip line construction and use can be dangerous. Ensure you know what you are doing before building or using your Alien Flier Zip Line kit or other Alien Flier LLC products. Alien Flier LLC takes no responsibility for the installation, servicing, maintenance, tree issues, and periodic inspection, related components or of any installed zip line using our products. - Page 5 © Copyright 2012 Alien Flier LLC. All Rights Reserved...
-
Page 6: Constructing Your Zip Line Xtreme Models
Up to (18) 3/16” to 7/16” WIRE ROPE CLAMPS, as appropriate to your wire rope diameter. Up to (6) 3/16 TO 7/16 THIMBLES, as appropriate to your wire rope diameter. 7x19 GALVANIZED WIRE ROPE 3/16 TO 7/16 DIAMETER WIRE ROPE © Copyright 2012 Alien Flier LLC. All Rights Reserved... - Page 7 Clamps should be approximately 3 inches apart. This will be the high end of the zip line. NOTE: Use black electrical tape to keep the cable from fraying on the end © Copyright 2012 Alien Flier LLC. All Rights Reserved...
- Page 8 5. Determine a length for the lower anchor sling. Cut a piece of extra cable and install a loop on each end. Make one loop slightly bigger than the other. Be sure to use 3 cable camps and a thimble on each loop. (see step 1) © Copyright 2012 Alien Flier LLC. All Rights Reserved...
- Page 9 Slip the end of the cable through the loop and pull the cable snug around the blocks c. Take the end of the cable and run it through the loop on the zip line making a connecting loop. Clamp the loop together as in step 2. © Copyright 2012 Alien Flier LLC. All Rights Reserved...
- Page 10 If later adjustments are made to the zip line always readjust the safety link as well. NEVER use your zip line if this link is not tight. © Copyright 2012 Alien Flier LLC. All Rights Reserved...
-
Page 11: Installing Your Alien Flier Trolley On An Existing Zip Line
Installing your Alien Flier Trolley on an Existing Zip Line Tools needed: 5/32 Allen wrench 7/16 wrench Philips screw driver 1. Remove the (4) lower screws, nuts and spacers using a 5/32 Allen wrench for the screw head, 7/16 wrench for the nuts. - Page 12 3. Re-install the (4) lower screws, nuts and spacers using a 5/32 Allen wrench for the screw head, 7/16 wrench for the nuts. Replace the trigger bolt using Philips screwdriver (units with brakes only). © Copyright 2012 Alien Flier LLC. All Rights Reserved...
-
Page 13: Preparing The Flexi-Seat
Preparing the Flexi-Seat Thread the webbing through the seat as show. Be sure to have 2 equal lengths when you are done. © Copyright 2012 Alien Flier LLC. All Rights Reserved... -
Page 14: Final Assembly
1. Thread the seat kit webbing ends through the trolley and plastic tri glide buckles as shown. 2. Tie the towrope to the spacer as shown above. 3. Slide the T-bar though the trolley then slide the foam grip onto the T-bar end. © Copyright 2012 Alien Flier LLC. All Rights Reserved... -
Page 15: Recommendations For Launching Reaching The Top
TAKE EXTREME CARE in the line design so that if the rider does lose grip that the fall is but a few feet. PLEASE READ OUR ASSUMPTION OF RISK STATEMENT. © Copyright 2012 Alien Flier LLC. All Rights Reserved... -
Page 16: Installing A Stop Block
These are very inexpensive, safe and tensions can be adjusted for different size riders. (top view) © Copyright 2012 Alien Flier LLC. All Rights Reserved... -
Page 17: Replacing The Brake Pad
1. Remove long bolt on trigger. 2. Remove brake from above. 3. Use screwdriver to pop out old pad. 4. Slip new pad in. 5. Replace brake unit. 6. Replace long bolt. © Copyright 2012 Alien Flier LLC. All Rights Reserved... -
Page 18: Setting Up A Zip Line With Turnbuckle Tensioner All Explorer T, Td And S Models
We highly recommend the following: Install a Stop Block at the termination point of all zip lines. Install a Safety Link from the lower tree to the looped end of the cable. © Copyright 2012 Alien Flier LLC. All Rights Reserved... -
Page 19: Setting Up A Zip Line With Ratcheting Harness Tensioner Explorer P-100
Install a Stop Block at the termination point of all zip lines. Install a Safety Link from the lower tree to the looped end of the cable. Maximum height for this type of line is 10ft. © Copyright 2012 Alien Flier LLC. All Rights Reserved... - Page 20 Enjoy Your Zip Line SAFELY! For parts and accessories please visit our Website www.AlienFlier.com © Copyright 2012 Alien Flier LLC. All Rights Reserved...
-
Page 21: Replacement Parts
REPLACEMENT PARTS © Copyright 2012 Alien Flier LLC. All Rights Reserved... -
Page 22: Parts List - Brake Assembly
Number Description Part Number Quantity Brake Pad Holder 30200000 Brake Pad 30150000 Trigger Screw 30950000 Trigger / Spacer 31100000 30800000 Brake Return O-Ring 30250000 Grooveless Retainer 31370000 Brake Assembly (1-7) 21000000 © Copyright 2012 Alien Flier LLC. All Rights Reserved... -
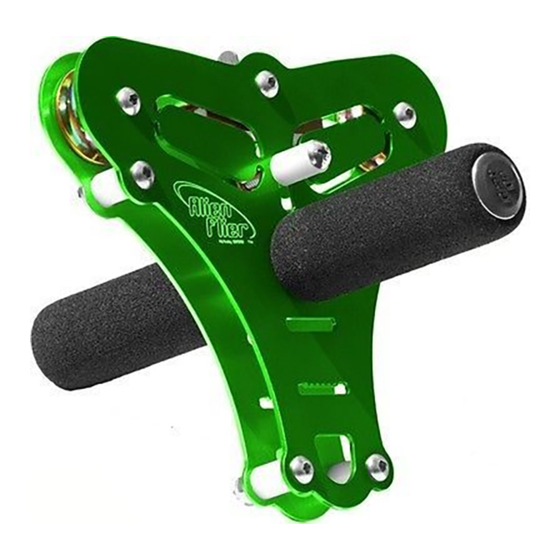
Page 23: Parts List - Trolley
Frame Nut 30800000 Sheave Assembly 24000000 Tow Rope Assembly 21260000 30300000 (discontinued) Handle 30700000 Handle End Cap 31350000 Foam Grip 30400000 Handle Assembly (8-10) 24250000 Brake Assembly 21000000 Frame Spacer 31100000 © Copyright 2012 Alien Flier LLC. All Rights Reserved... -
Page 24: Flexible Seat Assembly
FLEXIBLE SEAT ASSEMBLY Number Description Part Number Quantity Seat, Yellow 30060000 Webbing, 8 Ft. 31400000 Tri Glide, 1 In. 31300000 Flexible Seat Assembly (1-3) 22500000 © Copyright 2012 Alien Flier LLC. All Rights Reserved... -
Page 25: Parts List - Sheave Replacement Kit
PARTS LIST - SHEAVE REPLACEMENT KIT Number Description Part Number Quantity Sheave, .040 Wide 31000000 Bearing Spacer 31150000 Bearing, R4 30100000 24000000 Sheave Assembly (1-3) © Copyright 2012 Alien Flier LLC. All Rights Reserved... -
Page 26: Parts List - Trolley W/Disc Seat
PARTS LIST – TROLLEY W/DISC SEAT © Copyright 2012 Alien Flier LLC. All Rights Reserved... -
Page 27: Parts List - Af Original - Continued
21000000 Tow Rope Assembly 21260000 30300000 (discontinued) Blue Disc Seat 30350000 Handle 30700000 Foam Grip 30400000 Handle End Cap 31350000 Handle Assembly (11-13) 24250000 Decal 30010000 (discontinued) Washer 31620000 Webbing 31450000 © Copyright 2012 Alien Flier LLC. All Rights Reserved... -
Page 28: Parts List - Xtreme, Explorer S & Cable-Free
PARTS LIST – XTREME, EXPLORER S & CABLE-FREE Front frame plate cut away & one nut not shown for clarity © Copyright 2012 Alien Flier LLC. All Rights Reserved... -
Page 29: Parts List - Xtreme, Explorer S & Cable-Free - Continued
Brake Assembly 21000000 Tow Rope Assembly 21260000 30300000 (discontinued) Flexible Seat Assembly 22500000 Handle 30700000 Foam Grip 30400000 Handle End Cap 31350000 Handle Assembly (11-13) 24250000 Decal 30010000 (discontinued) Webbing 31400000 © Copyright 2012 Alien Flier LLC. All Rights Reserved...
Need help?
Do you have a question about the Zip Series and is the answer not in the manual?
Questions and answers