
Summary of Contents for AirLabs AirHavn Pro
-
Page 1: Table Of Contents
USER GUIDE User guide Before You Start Introduction to the AirHAVN PRO Important Safety Warnings Environmental Performance Installation and operation Components Installation Operation Service and maintenance Information Troubleshooting Warranty Information Return and Warranty Policy Technical Specifications Legal Simplified EU Declaration of Conformity www.airlabs.com... -
Page 2: Before You Start
BEFORE YOU START INTRODUCTION TO THE AIRHAVN PRO Thank you very much for purchasing the AirHavn Pro. Nearly all of us are affected by poor air quality caused by airborne pollution and contamination: in traffic, in cities, outdoors, indoors, and inside the car. -
Page 3: Important Safety Warnings
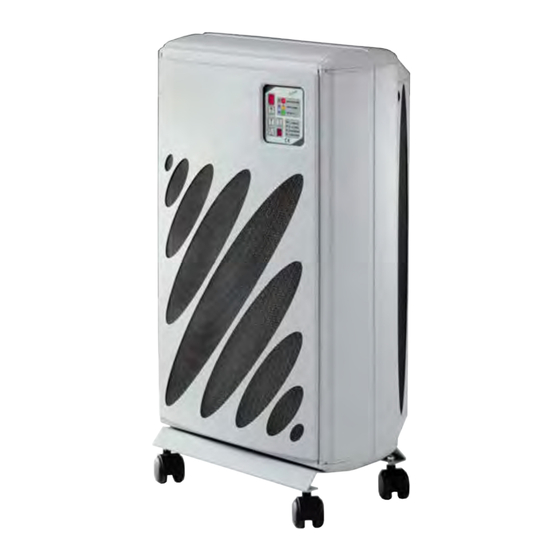
IMPORTANT SAFETY WARNINGS Your AirHavn Pro should only be installed and used as described in this User Guide. In addition to this, the following safety directions must be followed. • Position the AirHavn Pro on a stable, level floor, making sure all 4 wheels are supporting the weight of the unit. -
Page 4: Environmental
ENVIRONMENTAL The AirHavn Pro and packaging consists of a cardboard outer box internally lined with polystyrene to protect the unit from any damage in transit. Please observe the local regulations regarding the disposal of packaging materials. You can dispose of your engineered nano-carbon filter in your regular household or commercial waste. -
Page 5: Installation And Operation
INSTALLATION AND OPERATION COMPONENTS The following contents are included in the box. 1. AirHavn Pro main unit and filters 2. Mains power cable and plug 3. User Guide www.airlabs.com ©2020 AirLabs... -
Page 6: Installation
During operation, air is drawn into the front of the AirHavn Pro and through the filter system. Clean air is delivered into and around the room from the two outlet vents on the sides of the unit and from the outlet vent on the top. -
Page 7: Operation
On/Off To switch on the AirHavn Pro, just plug it in and the unit will power on in Standby mode with the speed setting showing 0. To switch the AirHavn Pro off, just unplug it. The AirHavn Pro uses very little power while in Standby mode, but we still recommend unplugging it when not in use to save energy. - Page 8 The RESET button is used to turn off the ALARM signal if the circuit protection device has tripped within the electrostatic cells. If the alarm persists after resetting, contact the service centre. For further details on the ALARM function – see Operation and Filter Status. www.airlabs.com ©2020 AirLabs...
- Page 9 The ENC filter should be replaced at the same time. - PRE-ALARM (yellow): The ESP filter is in need of cleaning but is still operating correctly. - FILTER OK (green): The ESP filter is operating correctly. www.airlabs.com ©2020 AirLabs...
-
Page 10: Service And Maintenance Information
AirLabs support for the replacement of this component. The AirHavn Pro uses 3 stages of filter systems to provide clean air within an indoor space. The 3 filters used in these stages are defined below and require periodic cleaning and replacement. The control panel of the unit will indicate when the filter system needs servicing –... - Page 11 The ESP filter is fully insulated from the rest of the unit by high-quality ceramic insulators and connects to the power supply with a contact terminal strip when the unit is inserted correctly into the seating location. www.airlabs.com ©2020 AirLabs...
- Page 12 To carry out maintenance of the filter systems it is necessary to remove all the filter units from the main body of the AirHavn Pro. When removing the filter systems from the unit the user should wear proper personal protective equipment (PPE) including grade N95 dust mask, goggles over the eyes, and gloves.
- Page 13 Prepare the stage 1 tray with warm water (max 45°C). Dilute the detergent in the proportions indicated on the label of the detergent itself. Prepare the stage 2 tray with water and vinegar diluted at a ratio of 1 litre of acetic acid for every 20 litres of water. www.airlabs.com ©2020 AirLabs...
- Page 14 Immerse the filter cell in the stage 1 tray with the detergent and soak until the dirt is dissolved. Remove the electrostatic cell and rinse thoroughly with running water, taking care not to break the ionisation wires. www.airlabs.com ©2020 AirLabs...
- Page 15 Immerse the pre-filter in the stage 1 tray containing the detergent diluted in warm water and leave to soak for about half an hour. Remove the pre-filter from the tray and rinse thoroughly with water. Leave to dry in a warm ventilated environment. www.airlabs.com ©2020 AirLabs...
- Page 16 The ENC filter is located behind the ESP filter and is removed from the unit by sliding out the metal holding frame. The filter retaining bars can be removed to provide access to the filter material for replacement. The new filter material should be placed in the frame and the retainng bars reassembled. www.airlabs.com ©2020 AirLabs...
- Page 17 Filter Inspection The condition of the filters must be inspected every time they are washed so as to ensure correct operation and performance of the AirHavn Pro. Filter Inspection Fault Operation Damage to the frame or Replace the filter. Please Metal frame and filter mesh.
- Page 18 There is a thermal fuse inside the unit that will cut the power supply if a short circuit occurs within the power system. Blown fuses must be replaced with the correct rated fuse and must be carried out by the AirLabs authorised service team.
-
Page 19: Troubleshooting
Make sure the power cable is connected to the unit. Make sure the fuse in the plug has not blown. If the AirHavn Pro still does not turn on, please contact support via the www.airlabs.com website. A sparking sound can be... - Page 20 ALARM the plates letter F on the display Ionisation wires dirty or oxidised Clean the wires with a cloth soaked in alcohol; if the problem persists, the wires must be replaced www.airlabs.com ©2020 AirLabs...
-
Page 21: Warranty Information
RETURN AND WARRANTY POLICY The AirHavn Pro has a warranty period of 2 years from the original purchase date applicable to any defects in the materials or running of the product. In such cases, you are entitled to a repair or replacement, depending on the defect found. - Page 22 The label provides the identification and technical data of the unit. www.airlabs.com ©2020 AirLabs...
-
Page 23: Technical Specifications
30kg LEGAL SIMPLIFIED EU DECLARATION OF CONFORMITY Hereby, AirLabs Limited declares that this product is in compliance with Directives 2006/42/EC, 2004/108/EC and 2006/95/EC. The full text of the EU declaration of conformity is available on request. AirLabs Limited 88 Baker Street London, W1U 6TQ www.airlabs.com...
Need help?
Do you have a question about the AirHavn Pro and is the answer not in the manual?
Questions and answers