
Summary of Contents for F.Bertazzoni REF18WCPIXL
- Page 1 Built-in Columns Wine Cabinets User manual Cave à Vins Mode d’emploi REF18WCPIXL REF18WCPIXR REF18WCPRL REF18WCPRR REF24WCPIXL REF24WCPIXR REF24WCPRL REF24WCPRR...
-
Page 3: Table Of Contents
INDEX IMPORTANT DIRECTIONS OF SAFETY AND THE ENVIRONMENT For your safety................................. Important information when using the appliance....................Caring for the environment............................INSTALLATION Installation..................................Connection to electrical power............................ BEFORE STARTING Know your appliance..............................Main components................................Electronic control................................Main control panel................................APPLIANCE SWITCHING ON AND OFF Switching on and off............................... -
Page 4: For Your Safety
1. IMPORTANT INSTRUCTIONS FOR SAFETY AND THE ENVIRONMENT customer service or a similarly qualified person 1.1 For your safety only. > Plug into a grounded 3 prong outlet. > If this appliance is replacing an existing > Do not remove ground prong. appliance which must be removed or disposed of, >... -
Page 5: Caring For The Environment
Warning Symbols used in the Guide: To avoid contamination of food, please respect the following instructions: Note Recommendations for correct use of the > Opening the door for long periods can appliance cause a significant increase of the tempe- rature in the compartments of the applian- Important Directions for avoiding appliance damage >... -
Page 6: Installation
2. INSTALLATION 2.1 Installation Make sure that installation is performed correct- ly, adhering to all of the instructions in the specif- ic installation guide provided with the appliance. 2.2 Connection to electrical power supply The appliance operates at 115 V AC, 60 Hz and is equipped with a power supply cord with a 3-prong grounded plug, which must be connected to a cor- responding 3-prong (15 Amp) grounding-type wall... -
Page 7: Before Starting
3. BEFORE STARTING Important 3.1 Know your appliance Before calling, write down the model type and serial number which are avail- Congratulations for having purchased your new ap- able on the warranty certificate and on pliance: from now on you can use our innovative the rating plate located on the bottom conservation system, which will allow you to keep left-hand corner of the appliance, behind... -
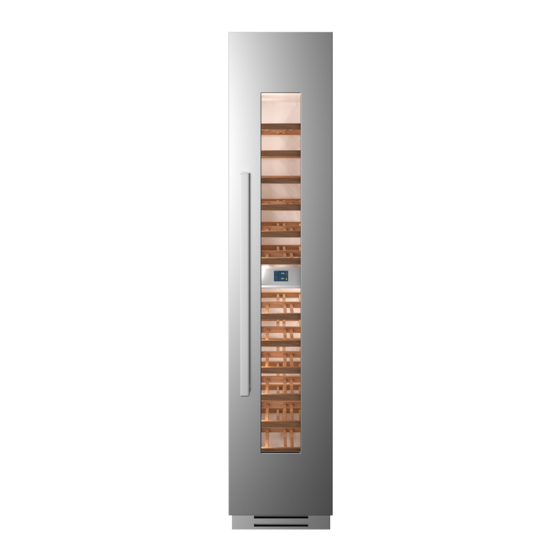
Page 8: Main Components
3. BEFORE STARTING 3.2 main components 1 Structure in stainless steel with aluminium trim. 2 Interactive control panel. 3 Upper Compartment. 4 Sliding bottle shelfs, mounted on wheels for easy extraction. 5 Lower compartment. -
Page 9: Electronic Control
3.3 Electronic Control The innovative electronic control system designed by Bertazzoni maintains constant temperature on the 2 temperature zones and visualizes it on the control panel display. It also allows user interaction making it possible to personalize settings of the various functions and to receive sound and/or visual messages should any malfunction occur in the appliance. -
Page 10: Appliance Switching On And Off
4. APPLIANCE SWITCHING ON AND OFF 4.1 Switching on and off Are you sure you want to power off this unit? First time starting the unit 2) Touch the icon Touch the button . The display shows the Yes to swich on. following launch screens: Are you sure? 1) Bertazzoni Logo. - Page 11 Are you sure? Are you sure? 4) Touch the icon 4) Touch the yes Yes for confirming icon for confir- the deactivation. ming. Functions 5) On the home Functions 5) Turn on again screen appears the Functions °C °C the lower °C icon off, which...
-
Page 12: How To Adjust The Temperature For Different Requirements
4. APPLIANCE SWITCHING ON AND OFF Modify the temperatures compartment 4.2 How to adjust the temperature for Example: How to modify the upper compartment different requirements. temperature. Each model has been carefully tested before leav- ing the factory and is adjusted in such a way to ensure high performance and low consumption. -
Page 13: Information Signals Of Warning Messages On The Display
Padlock icon. 4.3 Information signals of warning messages on the display. The padlock icon shows up when the temperatu- res are set up. The padlock open/close shows that it is or isn’t An integrated control system will give informa- possible to modify the compartment’s tempera- tion through bright texual signals messages you tures anymore. -
Page 14: Wine Cellar Temperatures
4. APPLIANCE SWITCHING ON AND OFF 4.4 Wine Cellar temperatures. Most red wines are best stored a slightly warmer °C temperatures. Red Wine. from +10°C to +18°C (from 50° F to 64° F). °C White Wine. Bordeaux from +4°C to +9°C Burgundy (from 39°... -
Page 15: Functions And Settings
5. FUNCTIONS AND SETTINGS INFORMATION FOR USING THE DISPLAY. 1) Humidity Control. This function enables to set the humidity of the up- It is possible to personalize the operation of your per and lower compartments. The default setting is unit in order to adapt it to the different ways you set to “Medium”. -
Page 16: Settings
5. FUNCTIONS AND SETTINGS 2) Interior light for 12 h. 5.2 Settings. This function enables to set the timing of the inte- rior light and it stays on 12 hours when the wine It is possible to personalize the settings of your cellar door is closed, in order to see the inner part wine cellar or adapting it to the different ways lighted up, through the glass. - Page 17 2) Time 1) Date The display shows the hours and minutes in the The display will show the date in the format format hh:mm. (day:month:year). By touching the display you can modify the set- This function selects the display at 12 or 24 h. tings.
- Page 18 5. FUNCTIONS AND SETTINGS 3) SET °C/°F 4) Language This function permits visualizing the temperature To set the language of the fridge, simply touch in Centigrade or Fahrenheit degrees. Normally, the the settings button on the display. appliance is set for visualization in centigrade de- grees.
- Page 19 6) Sabbath Mode 7) Reset The function makes it possible to comply to certain It gives the possibility to restore the base settings religious observances requiring that the operation that were set in the factory, cancelling all the of the appliance is not affected by the opening or changes that has been made from there onward.
- Page 20 5. CUSTOMIZE FUNCTIONS AND SETTINGS. 8) Demo Mode 9) Maintenance (through alarm sign). It is possible to simulate the functioning of the For the entire to function as designed, it is impor- fridge, for showroom display or for trade shows. tant to periodically clean the access toe-kick cover and the condenser.
- Page 21 11) Info System Clean Condenser C) If you want to The function Info System shows the data of the pro- enable the ducts for example the software's code, serial num- Next reminder… warning, touch Left 180 days ber amd the factory's codes of the wine cellar. the icon reset.
-
Page 22: Internal Layout
6. INTERNAL LAYOUT 7. LIGHTING 6.1 Internal Layout 7.1 Interior lighting (positioning, adjustment, removal) To provide optimum interior lighting, LED strips Wine shelf illuminate both compartments from the top and The shelves can be easily removed for cleaning. sets of LED lights directly illuminate different Remove the bottles, completely extract the shelf, areas of both zones. -
Page 23: Wine Storage
8. WINE STORAGE a very precise manner and ensures the utmost 8.1 General directions care and attention over time of your most prized Wine can stored for extended periods of time, es- bottles. When the upper compartment is set be- pecially under the following conditions: low +12°... -
Page 24: Time Of Conservation
8. WINE STORAGE 8.3 Time of conservation Improvement of wine over time and its duration usually depends on the character of the variety and its type. The following chart shows the best period of conservation and aging for various types in ideal con- servation conditions offered by your appliance. -
Page 25: Consumption Temperature
Red wines 8.4 Consumption temperature Since they contain more tannin and are less acid- ic, red wines are normally served at higher tem- peratures. As a general rule, white wines should be served Younger wines with less tannin are normally at a temperature between 10 and 12°... -
Page 26: Position Of Bottles
8. WINE STORAGE 9. CARE AND CLEANING 9.1 Care and Cleaning 8.5 Position of bottles To clean the parts made of steel use a microfib- The sliding shelves are made of fine wood and contoured so as to hold bottles of the most clas- er cloth and the sponge provided in the kit with the appliance. -
Page 27: Cleaning Of The Toe Kick Cover And Condenser
Lower condenser. 9.2 Cleaning of the toe kick cover, filter and condenser. For cleaning the condenser follow the instructions: The unit requires, for a correct operation, the cleaning of the ventilation grille, filter and > Switch off the appliance by pressing the Unit condenser. -
Page 28: Internal Cleaning
10. TROUBLESHOOTING GUIDE 9. CARE AND CLEANING 9.3 Internal cleaning 10.1 Troubleshooting guide If you notice malfunctions in your appliance, use Clean the internal and removable parts by wash- this guide before calling Service. This guide may ing them with a solution of lukewarm water and a help you resolve the problem yourself or could small amount of dishwashing detergent. - Page 29 Condensation forms both inside and out If the climate is very humid, the formation of con- densation is normal. Opening the door or draw- ers for prolonged periods of time can contribute to the formation of condensation. In any case, make sure that the doors are always perfectly closed.
-
Page 30: Malfunction Indications Appearing Of The Display
10. TROUBLESHOOTING GUIDE 10.2 Malfunction indications appearing on the display Display message Malfunction description Prolonged interruption of electrical power Power Failure The appliance starts up again automatically and indicates the highest recorded temperatures. Door open Door open this message appears few minutes from the door opening Upper or lower zone See the troubleshooting guide too warm... -
Page 31: Warranty
11. WARRANTY in the US http://us.bertazzoni.com/care-service 11.1 Warranty in Canada https://ca.bertazzoni.com/more/support Phone: Please kindly register on our web site www.bertaz- ENGLISH 866 905 0010 - FRANCAIS 800 561 7265 zoni.com to validate your new product warranty and help us to assist you better in case of any in- convenience. - Page 32 11. WARRANTY delivery of the product to the nearest authorized service center or for the displacement costs of a certified trained technician. Bertazzoni does not assume any responsibility for incidental or consequential damages. Some states do not allow the exclusion or limita- tion of incidental or consequential damages, so the above limitation or exclusion may not apply to you.
- Page 33 SOMMAIRE INDICATIONS IMPORTANTES CONCERNANT LA SÉCURITÉ Consignes de sécurité et risque potentiel........................ Dans l’utilisation quotidienne............................Respect de l’environnement............................INSTALLATION Installation..................................Branchement au réseau électrique..........................3 AVANT L’UTILISATION Pour bien connaître l’appareil..........................Composants principaux..............................Contrôle électronique..............................Panneau de commande principal..........................MISE EN MARCHE DE L’APPAREIL Mise en marche et arrêt..............................
-
Page 34: Indications Importantes Concernant La Sécurité
1. INDICATIONS IMPORTANTES CONCERNANT LA SÉCURITÉ responsable de leur sécurité. Les enfants devraient 1.1 Pour votre sécurité être contrôlé afin d’éviter qu’ils ne jouent avec l’ap- pareil. > Si cet appareil remplace un autre appareil déjà > N’endommagez pas les tubes du circuit réfri- existant qui doit être mis de côté... -
Page 35: Respect De L'environnement
ser des irritations aux yeux. > Les compartiments une, deux et trois étoiles ne sont pas indiqués pour la > Ne pas utiliser de manière inappropriée le socle, congélation d’aliments frais. les tiroirs extractibles, les portes etc. en tant que point d’appui ou comme support. -
Page 36: Installation
2. INSTALLATION 2.1 Installation Veillez à ce que l’installation soit correctement ef fectuée, en respectant toutes les indications re- portées dans la notice d’installation fournie avec l’appareil. 2.2 Branchement au réseau électrique L’appareil est doté d’une fiche de type Schuko de 16A et doit être branché... -
Page 37: Avant L'utilisation
3. AVANT L’UTILISATION Important 3.1 Know your appliance Avant d’appeler prenez note du numéro série de l’appareil, reporté sur le Congratulations pour avoir acheté votre nouveau certificat de garantie et sur la plaque appareil: vous pourrez maintenant utiliser notre signalétique qui se trouve dans le com- innovant système de conservation, qui vous per- partiment Réfri gérateur et des éventuels mettra de préserver au mieux tous les aliments que... -
Page 38: Composants Principaux
3. AVANT L’UTILISATION 3.2 Composants principaux 1) Structure en acier inox avec finitions en alum- nium. 2) Panneau de comman- des. 3) Compartiment supérieur. 4) Étagères porte bouteil- les coulissantes sur roulet tes et facilement amovi bles. 5) Compartiment inférieur. -
Page 39: Contrôle Électronique
3.3 Contrôle électronique L’innovant système de contrôle électronique conçu par Bertazzoni maintient une température con- stante dans les trois compartiments et l’affiche sur l’écran du panneau de contrôle. Il assure également l’interaction de l’utilisateur permettant de personnaliser les configurations des différentes fonctions et de recevoir des messages sonores et/ou visuels en cas de dysfonctionnement de l’appareil. -
Page 40: Mise En Marche De L'appareil
4. MISE EN MARCHE DE L’ A PPAREIL 4.1 Mise en marche et arrêt Procéder à l’arrêt? First time starting the unit 2) Touchez l’icône Touchez l’icône . . À l’écran s’affichent les Oui pour proceder. pages-écrans de lancement suivantes: Voulez-vous continuer? 1) Logo Bertazzoni. - Page 41 Voulez-vous continuer? Voulez-vous continuer? 4) Touchez l’icône 4) Touchez l’icône Oui pour confirmer Oui pour confir- la désactivation. mer. Fonctions 5) Sur la page Fonctions 5) Le comparti- d’accueil s’affiche Fonctions °C °C ment inférieur est °C l’icône d’arrêt, Réglages à...
-
Page 42: Comment Régler La Température Pour Différentes Exigences
4. MISE EN MARCHE DE L’ A PPAREIL Modifier la température des compartiments 4.2 Comment régler la température Example: Comment modifier la température du pour différentes exigences. compartiment supérieur. Chaque modèle a été soigneusement testé avant de quitter l’usine et réglé de manière à assurer des performances élevées et de faibles consommations. -
Page 43: Signaux D'information D'anomalies À L'écran
Icône Cadenas. 4.3 Signaux d’information d’anomalies à l’écran. L’icône cadenas apparaît quand les température sont définies. L’icône cadenas ouvert/fermé indique qu’il est Un système de contrôle intégré fournit des possible ou impossible de modifier ultérieure- informations à travers des messages textuels ment les températures des compartiments. - Page 44 4. MISE EN MARCHE DE L’APPAREIL 4.4 Températures Cave à vin. Pour une meilleure conservation les vins rouges °C ont besoin d’une température plus élevée. Vins Rouges. de +10° C à +18° C (de 50° F à 64° F) °C Vins Blancs.
-
Page 45: Personnalisation Des Fonctions Et Des Configurations
5. PERSONNALISATION DES FONCTIONS ET DES CONFIGURATIONS INFORMATIONS POUR L’UTILISATION DE 1) Humidity Control. L’ÉCRAN. This function enables to set the humidity of the up- Vous pouvez personnaliser le fonctionnement de per and lower compartments. The default setting is votre appareil afin de l’adapter aux différentes set to “Medium”. -
Page 46: Réglages
5. PERSONNALISATION DES FONCTIONS ET DES CONFIGURATIONS 2) Lumière 12 h 5.2 Réglages. Cette fonction vous permet de configurer la durée de l’éclairage interne, qui peut rester allumé pour Vous pouvez personnaliser les configurations 1 à 12 h après la fermeture de la porte de la cave à de votre cave à... - Page 47 2) Heure 1) Date Sur l’écran s’affiche l’heure dans le format hh:mm. Sur l’écran s’affiche la date dans le format (jour:mois:année). Cette fonction permet de sélectionner l’affichage suer 12 ou 24 h. Vous pouvez modifier les configuration simple- ment en touchant l’écran. Fonctions Fonctions °C...
- Page 48 5. PERSONNALISATION DES FONCTIONS ET DES CONFIGURATIONS 3) Configurer °C/°F 4) Langue Cette fonction permet de choisir l’affichage de la Pour choisir la langue des messages du réfri- température en degrés Centigrades ou Fahrenheit. gérateur, touchez simplement la touche de con- Normalement, l’appareil configuré...
- Page 49 6) Mode Sabbath 7) Rétablissement Cette fonction permet de respecter l’observance Cette fonction vous permet de rétablir les confi- de certaines règles religieuses qui demandent gurations de base définies en usine, en effaçant que l’appareil ne soit pas affecté par l’ouverture toutes les modifications apportées successive- ou la fermeture des portes (le contrôle thermo- ment.
- Page 50 5. CUSTOMIZE FUNCTIONS AND SETTINGS. 8) Mode Démo 9) Entretien (à travers un signal d’alarme). Vous pouvez simuler le fonctionnement du réfri- Pour garantir le bon fonctionnement de l’appareil il gérateur, en cas d’exposition de l’appareil, dans est nécessaire d’effectuer le nettoyage de la grille des salons professionnels ou point de vente/ma- de ventilation, du filtre et du condenseur.
- Page 51 11) Système Info Nettoyage du condenseur C) Pour activer l’a- La fonction Système Info permet d’afficher les vis, touchez l’icône données des différents appareils, comme par Notice suivante… Réinitialiser. Restants 365 jours exemple le code du logiciel, le numéro de série et les codes d’usine de la cave à...
-
Page 52: Équipement Interne
6. ÉQUIPEMENT INTERNE 7. ÉCLAIRAGE 6.1 Équipement interne (positionne- 7.1 Éclairage ment, réglage, retrait) Afin de permettre une vision interne optimale Étagères pour Vins est prévue un système à LED qui illumine direct- Les étagères peuvent être facilement retirées ement les deux compartiments. pour le nettoyage. -
Page 53: Conservation Des Vins
8. CONSERVATION DES VINS est contrôlé thermostatiquement et de manière 8.1 Indications générales extrêmement raffiné et garantit un soin et une Évidemment, les vins peuvent être conservés attention maximum dans le temps des bouteilles dans le temps, si maintenus dans un lieu adéquat de haute qualité. -
Page 54: Temps De Conservation
8.CONSERVATION DES VINS 8.3 Temps de conservation L’amélioration du vin dans le temps et sa durée en général dépendent des caractéristiques de la variété et de la typologie d’appartenance. Ci-dessous est indiqué la période optimale de conservation et de vieil- lissement pour les différentes typologies dans les conditions idéales de conservation offertes par votre appareil. -
Page 55: Température De Dégustation
Vins Rouges 8.4 Température de dégustation Ayant par nature une tannicité plus élevée et une acidité plus basse, les vins rouges sont en général servis à des températures plus hautes. En général, on considère pour les blancs une Les jeunes plus pauvres en tannin se servent en température de service optimale comprise entre général entre 14°... -
Page 56: Positionnement Des Bouteilles
8. CONSERVATION DES VINS 9. ENTRETIEN ET NETTOYAGE 9.1 Entretien et Nettoyage 8.5 Positionnement des bouteilles Pour le nettoyage des parties en acier, utiliser Les étagères coulissantes sont réalisées en bois et galbées de manière à accueillir les bouteilles le chiffon en microfibres et la petite éponge pré- vue à... -
Page 57: Nettoyage De La Grille De Ventilation, Du Filtre Et Du Condenseur
Condenseur inférieur. 9.2 Nettoyage de la grille de ventilation, du filtre et du condenseur. Pour le nettoyage du condenseur suivez les in- structions suivantes: Pour garantir le bon fonctionnement de l’appareil, il est nécessaire d’effectuer le nettoyage de la grille >... - Page 58 9. ENTRETIEN ET NETTOYAGE 9.3 Nettoyage interne 10.1 Guide des solutions aux pro- blèmes Laver les parties internes et les parties amovi- bles une solution d’eau tiède, très peu de déter- En cas d’anomalies de fonctionnement de gent à vaisselle. l’appareil, utiliser ce guide avant d’appeler le service d’assistance: celui-ci aidera à...
-
Page 59: Guide Des Solutions Aux Problèmes
10. GUIDE DES SOLUTIONS AUX PROBLÈMES presseurs ou durant la phase de dégivrage. Le bruit peut également être plus accentué en fonction du positionnement de l’appareil et de l’espace environnant. De la condensation se forme à l’intérieur et à l’extérieur Si le climat est très humide, l’apparition d’un peu de condensation est normale. -
Page 60: Indications D'anomalie Pouvant Apparaître Sur L'écran
10. GUIDE DES SOLUTIONS AUX PROBLÈMES 10.2 Indications d’anomalie pouvant apparaître sur l’écran Message sur l’écran Description de l’Anomalie Interruption prolongée de l’énergie électrique PanneElectrique! l’appareil se remet en marche automatiquement en signalant les températures enregistrées les plus chaudes. Porte de la cave à vins ouverte Unité... -
Page 61: Garantie
11. GARANTIE in USA http://us.bertazzoni.com/care-service in Canada https://ca.bertazzoni.com/more/support 11.1 Garantie Téléphone: ANGLAIS 866 905 0010 FRANCAIS 800 561 7265 Nous Vous prions de bien vouloir vous enregistrer sur notre site web www.bertazzoni.com pour valider Il faut conserver la preuve d’achat ou l’origine de votre garantie du nouveau produit et nous aider à... - Page 62 11. GARANTIE technicien qualifié certifié Bertazzoni exclut toute responsabilité pour les dommages accidentels ou indirects. Certains pays n’autorisent pas l’exclusion ou la limitation des dommages accidentels ou indirects, la limitation indiquée plus haute peut donc ne pas s’appliquer à vous. Cette garantie vous offer des droits spécifiques et vous pouvez bénéficier d’autres droits qui peuvent varier d’un Etat à...
Need help?
Do you have a question about the REF18WCPIXL and is the answer not in the manual?
Questions and answers