
Subscribe to Our Youtube Channel
Summary of Contents for Elite Platinum EFP-7730A
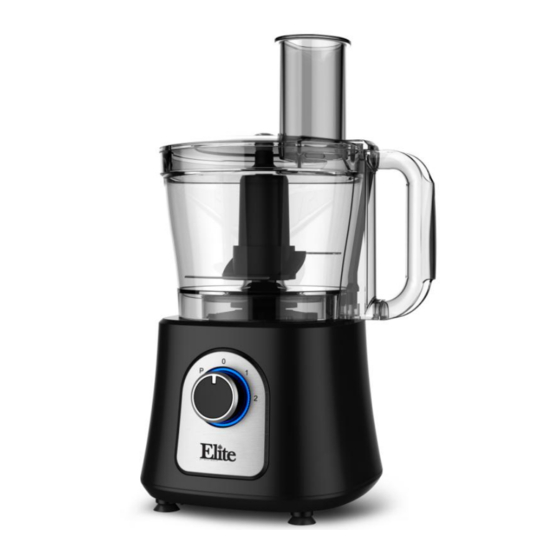
- Page 1 12 CUP FOOD PROCESSOR Model: EFP-7730A INSTRUCTION MANUAL Before operating your new appliance, please read all instructions carefully and keep for future reference.
- Page 2 IMPORTANT SAFEGUARDS When using electrical appliances, basic safety precautions should always be followed, including the following: Read all instructions. To protect against risk of electrical shock do not immerse cord, plugs or appliance in water or other liquid. Close supervision is necessary when any appliance is used by or near children. Unplug from outlet when not in use, before putting on or taking off parts and before cleaning.
- Page 3 IMPORTANT SAFEGUARDS (CONT.) 27. This appliance is not intended for use by persons (including children) with reduced physical, sensory or mental capabilities, or lack of experience and knowledge, unless they have been given supervision or instruction concerning use of the appliance by a person responsible for their safety.
- Page 4 SHORT CORD PURPOSE NOTE: A short power cord is provided to reduce the risk of personal injury resulting from becoming entangled in or tripping over a longer cord. Longer power-supply cords or extension cords are available and may be used if care is exercised in their use.
- Page 5 PARTS IDENTIFICATION Processor Attachments Main base Kneading dough blade Center post 10. Chopping blade Workbowl 11. Reversible thick slicing/coarse Cover shredding disc Feed Chute 12. Citrus juice press Food Pusher 13. Accessory holder Locking mechanism 14. Emulsifier Control Knob www.maxi-matic.com info@maxi-matic.com...
- Page 6 CONTROL PANEL The controls are located on the front of the base (1). Turn dial to P, 1 or 2 in order to select a function (see directions under "How to Use"). OFF CONTROL Processor should be stored in OFF position (0) and unplugged when not in use. PULSE CONTROL Use PULSE (P) for short processing tasks.
- Page 7 HOW TO USE YOUR FOOD PROCESSOR ASSEMBLING THE PROCESSOR HOW TO INSERT AND REMOVE THE CENTER POST The center post (2) is removable. When you are ready to use the food processor, place the center post into the smaller opening in the main base (1). HOW TO LOCK THE WORKBOWL INTO POSITION Attach center post to workbowl (3).
- Page 8 NOTE: Remove workbowl from appliance before removing the chopping blade to prevent food from leaking through the center opening of the workbowl. Carefully remove the chopping blade. Unplug appliance when not in use. HELPFUL TIPS FOR CHOPPING Watch carefully to avoid over-processing foods. ...
- Page 9 HOW TO SLICE OR SHRED IN THE WORKBOWL Lock workbowl into position. Carefully place reversible slicing and shredding disc on top of center post with appropriate side up (depending on work to be done). (See d & e). CAUTION: The slicing and shredding disc is very sharp. Use caution when handling and storing. Place cover on workbowl and lock into place by rotating cover counterclockwise.
- Page 10 After food has been processed, remove the cover and invert on countertop. Remove the slicing and shredding disc before removing the workbowl from the processor. Place the disc on top of the inverted workbowl cover. HOW TO USE THE KNEADING/DOUGH BLADE Lock workbowl into position.
- Page 11 SPEED GUIDE Tool/Attachment Function Speed Maximum Capacities Chopping Blade Chop onions, nuts, meta, parmesan 500g meat cheese Kneading/Dough Knead yeast dough for bread and pizzas 500g flour + 320g Blade water Slicing/Shredding Slice carrots, cucumbers or salami. Disc Shred cheese, cucumber, carrot or potatoes Emulsifying Disc Whipped cream, whisk egg whites, make...
- Page 12 If washing in a dishwasher, place removable parts on top rack only – not in or near utensil basket. Some staining of parts may occur. If so, make a paste of 2 tablespoons of baking soda and 1 tablespoon of water.
- Page 13 LIMITED WARRANTY* ONE (1) YEAR WARRANTY IS ONLY VALID WITH A DATED PROOF OF PURCHASE Your small kitchen appliance is built with precision, inspected and tested before leaving our factory. It is warranted, to the original purchaser to be free from any manufacturing defects under normal use and conditions for one (1) year, cord excluded.
- Page 14 RETURN INSTRUCTIONS RETURNS: Any return of defective merchandise to the manufacturer must be processed accordingly by first contacting customer service (contact information shown below) to obtain an RA # (Return Authorization Number). We will not accept any returns of merchandise without an applicable RA #. IMPORTANT RETURN INSTRUCTIONS.
Need help?
Do you have a question about the Platinum EFP-7730A and is the answer not in the manual?
Questions and answers