Advertisement
Quick Links
Deckenventilator Installationsanleitung
Ceiling Fan Instruction Manual
Modell/Model
122122016-1223312017
Raja & Bayu
Wichtig:
Bitte lesen Sie sich vor der Inbetriebnahme des Geräts
alle Anweisungen aufmerksam durch.
Bewahren Sie diese Anleitung für spätere Einsichtnahme gut auf.
Important:
Please read this manual carefully before operating this product.
Keep this manual at hand for further reference.
Advertisement

Related Manuals for Pepeo Raja


Summary of Contents for Pepeo Raja
- Page 1 Deckenventilator Installationsanleitung Ceiling Fan Instruction Manual Modell/Model 122122016-1223312017 Raja & Bayu Wichtig: Bitte lesen Sie sich vor der Inbetriebnahme des Geräts alle Anweisungen aufmerksam durch. Bewahren Sie diese Anleitung für spätere Einsichtnahme gut auf. Important: Please read this manual carefully before operating this product.
-
Page 2: Safety Instructions
Safety instructions To avoid the possibility of causing injury to users or damage to property, please follow all instructions below. Sicherheitshinweise Bitte folgen Sie allen untenstehenden Anweisungen, um mögliche Verletzungen der Nutzer oder Sachschäden zu vermeiden. Warning This sign relates to improper use which, if not avoided, may lead to the possibility of death or serious injury of users. Achtung Dieser Hinweis bezieht sich auf unsachgemäßgen Gebrauch, welcher, sofern nicht vermieden, möglicherweise zum Tod oder zu schweren Verletzungen der Nutzer führen kann. -
Page 3: Specifications / Technische Daten
Parts list / Bestandteilliste Concrete ceiling / Betondecke AC 160-240V, Mounting bracket / Deckenhalterung 50/60Hz J hook / J-förmiger Haken Power cable / Expansion bolts Live (brown) / Außenleiter (braun) Stromkabel Spreizdübel Infrared receiving wire Infrarot-Empfängerkabel Neutral (blue) / Neutralleiter (blau) Safety cable &... - Page 4 Caution / Vorsicht This appliance must be earthed. Dieses Gerät muss geerdet sein. To prevent injury, the distance between the blades and the floor should be at least 2.3 m and 10 cm from the nearest wall. Der Abstand der Flügelblätter zum Boden sollte mindestens 2,3 m und 10 cm zur nächsten Wand betragen, um Verletzungen zu vermeiden.
- Page 5 Caution / Vorsicht WARNING / ACHTUNG Do not use this appliance in areas with high temperature and high humidity. Benutzen Sie dieses Gerät nicht in Umgebungen mit hohen Temperatu- ren und hoher Luftfeuchtigkeit. Care and maintenance / Pflege und Wartung Keep the fan clean.
- Page 6 Installation instruction / Installationsanleitung WARNING: TURN OFF THE MAIN SWITCH AT THE DB (ELECTRICAL DISTRIBUTION BOX) ACHTUNG: SCHALTEN SIE DEN HAUPTSCHALTER AM VERTEILERKASTEN AUS Step 1: Upper motor cover assembly Match both holes of the down rod and upper motor cover, secure with the two screws provided. Schritt 1: Aufbau der oberen Motorabdeckung Legen Sie beide Löcher der Verbindungsstange und oberen Motorabdeckung übereinander, befestigen Sie sie mit den beiden bereitgestellten Schrauben.
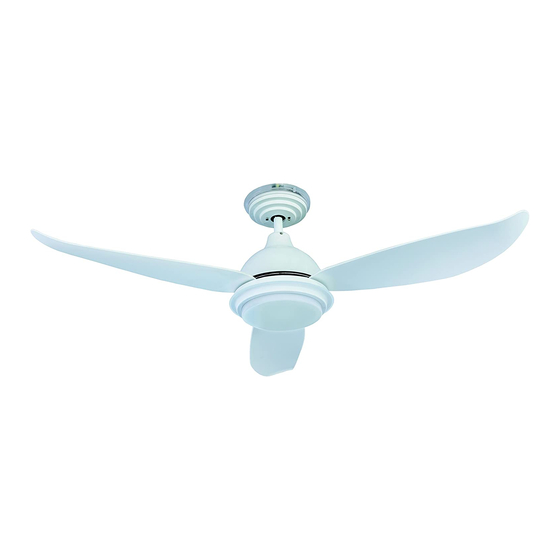
- Page 7 Installation instruction / Installationsanleitung Step 2: Mounting the blades Schritt 2: Installation der Flügel CAUTION / VORSICHT Make sure the ceiling fan does not wobble violently after installation. Injury can be caused if the ceiling fan drops down. Stellen Sie sicher, dass der Deckenventilator nach Installation nicht stark wackelt.
- Page 8 Installation instruction / Installationsanleitung Step 3: Installation of the canopy a) Installation of the mounting bracket Use expansion bolt to fix mounting bracket and J hook to the ceiling, also use the nut to lock them tightly. WARNING: THE COTTER PIN MUST BE INSERTED TO PREVENT THE NUT FROM BECOMING LOOSE! b) Hanging up the ceiling fan Secure the ceiling fan onto the bracket.
- Page 9 Installation instruction / Installationsanleitung Step 4: Connect the power cable to the ceiling fan Connect the wires to the connectors on the ceiling fan. Connect the power cable’s blue wire to N (Neutral), brown wire to L (Live) and green/yellow wire to E (Earth) on the connector. Make sure each wire’s colour is the same as the other side of the connector.
- Page 10 Installation instruction / Installationsanleitung AC 160-240V, 50/6050Hz Concrete ceiling / Betondecke Power cable / Stromkabel Step 6: Installation of the canopy Secure the wires and safety cable, secure the upper canopy using the screws provided. Connect the infrared receiver cable coming from the fan with the corresponding connector in the canopy. Secure the cables and the safety wire. Schritt 6: Befestigung des Baldachins Nachdem Sie die Kabel und das Sicherheitsseil befestigt haben, bringen Sie den Baldachin mithilfe der bereitgestellten Schrauben an.
- Page 11 Remote control & operation / Fernbedienung & Benutzung Battery compartment / Batteriefach Battery type: 2 pieces leak-proof UM4(AAA) batteries (1.5V) Batterietyp: 2 Stück auslaufsichere UM4(AAA) Batterien (1,5V) Remote control (back view / Fernbedienung (Rückansicht) Remote control operation procedures / Vorgehensweise bei der Benutzung der Fernbedienung Step 1: Turn ON the ceiling fan.
- Page 12 Remote control & operation / Fernbedienung & Benutzung Remote control buttons / Tasten auf der Fernbedienung POWER POWER Reverse Sleep LED ON/OFF Colour LED- LED+ Sleep button: Press the button to activate the SLEEP function. The fan will start at SPEED 3 for 1 hour and then continue at SPEED 2 until it is turned off or by pressing any other key.
- Page 13 Power supply connection diagram / Schaltplan Main circuit breaker / Hauptschalter Main ON/OFF switch / Netzschalter CAUTION / VORSICHT Do not use dimmer or speed controller to control this fan. Benutzen Sie keine Dimmerschalter oder Drehzahlsteller um diesen Ventilator zu steuern. Regulator Dimmer swith / soll sein Speed controller /...
- Page 14 Troubleshooting / Störungssuche Trouble / Störung Suggested remedy / Empfohlene Behebung Wobble / Wackeln All blades are weighed and grouped by weight. Natural woods vary in density which could cause the fan to wobble even though all blades are weight-matched. The following procedures should eliminate most of the wobble.
-
Page 15: Checklist After Installation
Checklist after installation To ensure safety, kindly check the following: (a) The ceiling fan is fixed securely to the mounting bracket. (b) The safety wire is fixed securely and tightened by a screw. (c) The wiring between power supply and ceiling fan is connected properly and correctly. (d) All screws that secure the plastic covers are tightened properly. - Page 16 Auf www.pepeo.de/deckenventilator/ventilatoren-faq/ sind ebenfalls häufige Fragen beantwortet. Help and Rating: Please give your seller a review of this Pepeo ceiling fan. This helps other customers to come to a decision. If you have any questions about your product, please get in touch with your seller.