Table of Contents
Advertisement
Quick Links
UNBOX AND ASSEMBLE VIDEO
Watch this video to see how to unbox and
assemble your Liberty Trike –
STEP 1: UNPACK AND CHECK CONTENTS
• Check your email for unpacking and assembly video.
• Refer to the list of box contents on page 4.
STEP 2: CHARGE YOUR BATTERY
• Refer to page 9 for battery instructions.
STEP 3: CONNECT THE TWO HALVES OF THE FRAME
• Refer to page 7 for fold and unfold instructions.
STEP 4: CHECK YOUR BRAKES
• The hand-brake with the e-brake, and the coaster brake should be checked and adjusted.
You must be sure, that you are able to control and stop the trike safely before you operate it.
STEP 5: CHECK THE FRONT WHEEL
• When putting on the handlebars, during the assembly,
check that the front wheel is facing the forward.
• If the front wheel and handlebars are backwards,
turn the wheel and the handlebars around.
STEP 6: TEST RIDE
• In a safe area, pedal at a low speed and test your
coaster brake and e-brake function.
• Do not place feet on the ground while the trike is moving.
WWW.LIBERTYTRIKE.COM | SUPPORT@LIBERTYTRIKE.COM | 1-866-894-4620
ASSEMBLY
Click Here
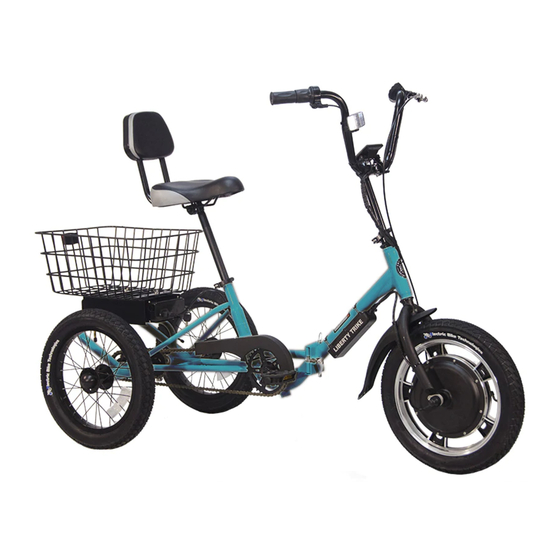
MOTOR WIRE
DISC BRAKE
This view is from sitting on the
Liberty Trike and looking down
at the front wheel.
Advertisement
Table of Contents

Subscribe to Our Youtube Channel
Summary of Contents for Unico Liberty Trike
- Page 1 UNBOX AND ASSEMBLE VIDEO Watch this video to see how to unbox and Click Here assemble your Liberty Trike – STEP 1: UNPACK AND CHECK CONTENTS • Check your email for unpacking and assembly video. • Refer to the list of box contents on page 4.
- Page 2 • If the stem or seatpost does spin, you need to tighten the nut on the clamp slightly. STEP 3: INSTALL THE BASKET Photo 1.3 NOTE: Never lift the Liberty Trike by the basket. • Line up and tighten the thumbscrews. (See photo 1.3) STEP 4: CONNECT THE CABLES NOTE: Carefully align the pins, when connecting the cables.
Need help?
Do you have a question about the Liberty Trike and is the answer not in the manual?
Questions and answers