Table of Contents
Advertisement
Quick Links
Advertisement
Table of Contents

Summary of Contents for Wildgame M16i19-8
- Page 1 Infrared Digital Scouting Camera User’s Manual Model # M16i19-8...
- Page 2 Includes Adjustable Strap User Manual Camera Unit page 1...
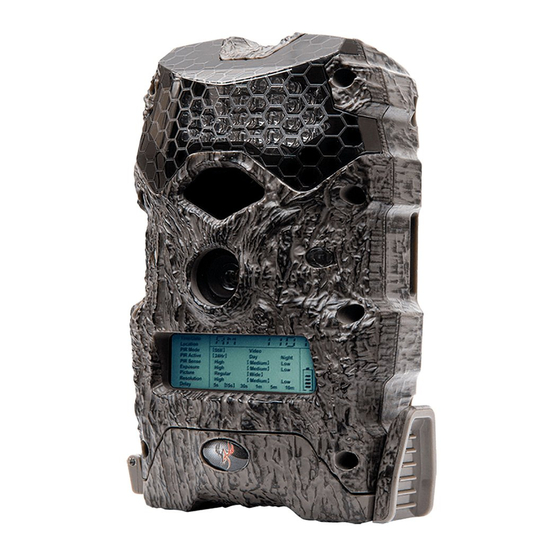
- Page 3 Features RESOLUTION MAX: 16 MP FLASH 36 High Intensity IR LED’s FLASH RANGE up to 80 feet SENSOR Passive Infrared Sensor (PIR) Motion and Heat SENSOR RANGE up to 60 feet IMAGE FORMAT JPEG - Digital Stills/ AVI-Digital Video MEMORY up to 32GB SD Card (not included and required) Class 4 and above recommended...
-
Page 4: Installing Batteries
Installing Batteries Open the door at the bottom of the With the bottom of the camera to- camera by unlatching the locking wards you, Make sure to insert the tab. batteries into the camera with the positive ends towards you where marked positive and the negative ends towards you where marked negative. - Page 5 Close battery compartment cover. Load SD memory card (up to 32GB To latch the cover simply pull the not included) into the SD card slot latch slightly to the left as you close with the connectors facing up. the battery compartment cover. IMPORTANT: Make sure the camera is powered off before removing or installing an SD card.
-
Page 6: Test Mode
Test Mode Power On LCD Ready Mode: The camera will To turn the unit ON press and re- automatically enter Ready Mode if a lease the power button. button is not pressed for greater than 30 seconds. Time/Date Location Still PIR Mode Video PIR Active... -
Page 7: Power Save
Power Save Setting Time After 30 seconds without any buttons To change date and time, start by being pushed, the LCD will turn off pressing and release the Enter and camera enters into Power Save navigation button to set the hour. or Ready Mode. -
Page 8: Setting Date
Location Setting Date Press the Enter navigation button Press the Enter navigation but- while Location is selected. The ton after setting the minute to first character will be blinking. change the Date. POWER ENTER Press the + or - navigation but- POWER ENTER ton to go up or down in sequence. - Page 9 PIR Mode PIR Active Press the Enter navigation button Press the Enter navigation button while PIR Active is selected. The while PIR Mode is selected. The highlighted option will be blinking. highlighted option will be blinking. POWER ENTER POWER ENTER Press the + or - navigation but- Press the + or - navigation but- ton to move to different options.
-
Page 10: Pir Sensitivity
Exposure PIR Sensitivity Press the Enter navigation button Press the Enter navigation button while PIR Sense is selected. The while Exposure is selected. The highlighted option will be blinking. highlighted option will be blinking. POWER ENTER POWER ENTER Press the + or - navigation but- Press the + or - navigation but- ton to move to different options. - Page 11 Resolution Press the Enter navigation button Press the + or - navigation but- while Resolution is selected. The ton to move to different options. highlighted option will be blinking. Press the Enter navigation button to save the setting. POWER ENTER POWER ENTER RESOLUTION:...
-
Page 12: Power Off
Delay Power Off Press the Enter navigation button To turn the unit off, first wake up the LCD screen and then depress while Delay is selected. The high- lighted option will be blinking. and hold the power button until the LCD turns off. Time/Date Location Still... - Page 13 Image Stamp Format SD Card Pictures Display: SDXC cards are not supported. Having trouble with your SD card? Try this. 1. Connect the SD card to your computer. If your computer has an SD card slot you can insert the SD card directly into the port. NOTE: If you are using a MicroSD card, you will need an adapter to allow it to fit into standard SD card ports.
- Page 14 Mounting When mounting to a tree, first remove the TIPS: Recommended distance from target area is 25-30 feet clip from one end of the strap so you can for optimal imaging quality. slide the strap through the slots located on To improve the quality of your images, try not to mount the back of the camera.
- Page 15 Retrieving Images (SD Card Reader) A. First, remove the SD Card from the cam- left of your screen and select “Computer”. era unit itself by pressing on it to where it The summary view will then be illustrated automatically ejects. on the right hand side of the window where B.
- Page 16 Warranty DISCLAIMERS WGI Innovations, LTD is not responsible for damage, expense or injury caused by the unauthorized use of, alterations to, improper connection of and abuse or neglect of the WGI Innovations™ products. WARRANTY For the warranty to be in effect, register your product at wildgameinnovations.com. Follow the onscreen directions to complete the process.
- Page 17 FCC STATEMENT Product Name: Digital Game Scouting Camera Trade Name: Wildgame Innovations Model# M16i19-8 This device complies with Part 15 of the FCC Rules. Operation is subject to the following two criteria: (1) This device may not cause harmful interference, and (2) This device must accept any interference received, including interference that may cause undesired operation.
- Page 18 602 Fountain Parkway Grand Prairie, TX 75050 (800) 847-8269 wildgameinnovations.com “Wildgame Innovations” and the “Button Logo” are trademarks of Wildgame Innovations, LLC.
Need help?
Do you have a question about the M16i19-8 and is the answer not in the manual?
Questions and answers