Table of Contents
Advertisement
Quick Links
Advertisement
Table of Contents

Subscribe to Our Youtube Channel
Related Manuals for Sanbot MAX


Summary of Contents for Sanbot MAX
- Page 1 SANBOT MAX USER MANUAL...
-
Page 2: Table Of Contents
ROBOT USER MANUAL Contents Introduction ......................1 Sanbot Max application scenario and main function ................ 2 Unpacking Instruction ...................................... 3 Basic operation ......................................... 6 Specifications & parameters .................... 8 Specifications of Charging pile ..................9 Safety guide ......................10 To Know Your Robot ....................13 1. - Page 3 ROBOT USER MANUAL 1. Download and Install ....................................36 2. Login ........................................... 36 3. Add Robot /Friends ..................................... 36 4. Chats ........................................... 27 5. Contacts ........................................27 6. Life ..........................................28 7. Me ..........................................30...
-
Page 4: Introduction
Thank you for purchasing our product. This manual is for Robot. Please carefully read this Instruction before using the Sanbot Max robot (hereinafter referred to as Sanbot Max), so you can operate this robot very easily as soon as possible.Please carefully read this Instruction before using the Sanbot Max robot (hereinafter referred to as Sanbot Max), so you can operate this robot very easily as soon as possible. -
Page 5: Sanbot Max Application Scenario And Main Function
There are 10 degrees of freedom on Sanbot Max’s two arms and 10 degrees of freedom on Sanbot Max’s two palms. With the rotation of 2 degrees of freedom on the head, it can realize the display of diversified gesture and actions, like greeter and dance. -
Page 6: Unpacking Instruction
Sanbot Max chassis adopts structural design of four-wheel outer hub motor plus Mecanum wheel, so it can realize the rotation of 360 degrees, speed of movement up to 5m/s. Sanbot Max with plenty of interfaces, such as USB, HDMI, RJ45, Audio IN, which can access to many kinds of external devices. - Page 7 3. Unscrew the butterfly nuts (4 in total) on the left and right sides of wooden pallet, then force out screws (4 in total) with hammer or by hand. 4. Take out of the two fixed wood blocks which are fixed by butterfly nuts and screw, and place them on the side of pallet behind Sanbot Max to make a slope (Please notice...
- Page 8 5. Two staffs stand in front of and behind of the Sanbot Max and hold on the torso of Sanbot Max to slowly push the Sanbot Max down the pallet along slope.
-
Page 9: Basic Operation
Please remove the back cover screw of charging pile with screwdriver (the specific position please referred to “know about Sanbot Max”- back of charging pile) and open back cover to remove the screw of power adapter (the specific position please refer to “know about your Sanbot Max” – inner of charging pile), then loosen the screw nut of the... - Page 10 5. Open and recover mode of forward/backward compartment and bracket Forward compartment of Sanbot Max adopts press type spring switch. There is a press type spring switch at the upper and lower ends of the forward compartment respectively. Press the medium position of the upper end and the lower end of forward compartment down respectively, then you can open the forward compartment. After aligning compartment, press it again to close the compartment.
-
Page 11: Specifications & Parameters
Specifications & parameters Item Parameters 1370mm(H) x 763mm(W)x 615mm(D) Size Weight About 90kg Lithium capacity: 1.0KWh; Voltage: 32V; Battery Working hours: normally about 10 hours Head Mic x7、HD camera x1, 3D camera x1, Visual camera x1, Touch sensor x1 Torso Gyroscope x1, PIR x2, Ultrasonic x2, Touch sensor x2, HD camera x1 Sensors Armx2... -
Page 12: Specifications Of Charging Pile
Wi-Fi: IEEE 802.11 a\b\g\n(2.4GHz\5GHz); Bluetooth 4.0; 4G(selectable) network Atmosphere Ear x2, arm x2 lamp Cornering Chassis x3(straight, left, right) lamp Moving Max 5m/s speed Climb height Max 4.5cm Charging Auto-charging, manual charging, wired charging type Specifications of Charging pile Item... -
Page 13: Safety Guide
Please make sure that there is no ladder or slope around the Sanbot Max. Please make sure that Sanbot Max would not collide with any surrounding cables or rope to prevent them from tripping or causing personal and property damage. ... - Page 14 been turned to a limited position. 6. During the operation of the robot, it is forbidden to use external force to prevent or accelerate the movement of head, arm and chassis so as to avoid structural damage. 7. Robot tend to lose their balance and fall when it moves forward or turns around along the edges of lower steps. 8.
- Page 15 Notice for charging pile use 1. This charging pile is designed for Sanbot Max and it is forbidden to use for other products. 2. This charging pile is designed for indoor use, please do not use outdoors.
-
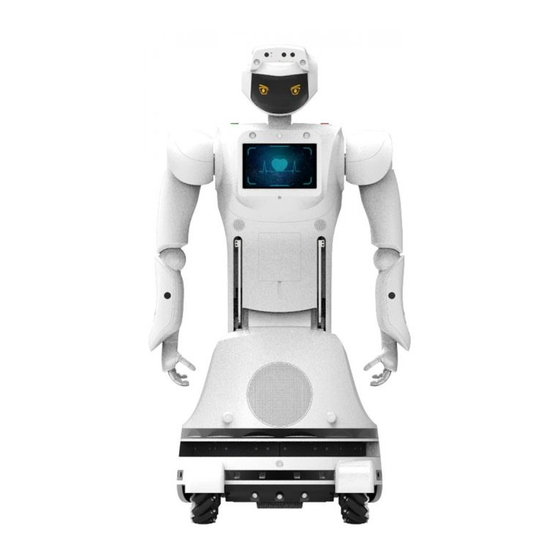
Page 16: To Know Your Robot
To Know Your Robot 1. Packing List Robot Charging pile (contains adaptor) Power line Quick guide manual We will arrange the consignment according to your choice of purchase; the above picture is for reference only. -
Page 17: Robot Appearance
2. Robot Appearance Front... - Page 18 Back...
- Page 19 8Lateral...
- Page 20 Bottom...
-
Page 21: Charging Pile Appearance
3. Charging Pile Appearance Front Back... -
Page 22: How To Operate The Robot
How to Operate the Robot 1. Turn On\Off Press the power switch at the bottom of the robot to turn on or turn off the power. Power switch 2. System load It takes about 2 minutes to perform self-test,navigation start,position calibration and other services.If there is a map on the robot, it asks you to select the current position on the map as the initial position, else it skips this step;... -
Page 23: Log-In
robot to select again. 3. Log-in Touch the screensaver of the robot to access the control interface, for better user experience, everyone can use all functions of the robot as default. But for privacy consideration, you can assign the permission for non-administrator, letting them can only use authorized function. Please access “Permission” and click “One key activate permission”, at this time, you should input the administrator password of the Q-Link account, then you can activate the permission. - Page 24 Network&security WIFI: Enable the wireless network of the robot, choose your WIFI and input the password to connect. Click “Other” to connect the hidden WIFI. Bluetooth: Enable Bluetooth function, you can see the available Bluetooth devices. General Face selection: To change the screensaver; Speech understanding: To set the linked semantic source(Dialogflow/Watson);...
- Page 25 Infrared obstacle avoidance&Ultrasonic barrier avoidance: Due to some abnormal conditions (such as light influence, failure, unknown factors, etc.), the robot cannot walk or work normally,turn off the corresponding obstacle avoidance switch, so that the robot can resume work first. Click "advanced Settings" to set the obstacle avoidance switch for each item separately.
- Page 26 1) Touch the icon; 2) Touch the robot touch sensor(Refer to “Robot Appearance”) 3) Speak “Hi Sanbot" to robot; 4) Click on the recommended questions above the robot icon Robot is listening, now the ear turns green you can speak to it;...
- Page 27 to call out Settings screen. Dialog window lock: Password verification: the administrator password is needed before exiting the Zhi Yin app if it is enalbled. The default password is “admin”. Automatically exit: the app will exit if there is no any interaction within 60 seconds if it is enabled. Welcome settings to change the welcome words;...
- Page 28 Go to Message setting, you can set popup window or voice remind for message arrival, you also can clear all messages by clicking the bottom button “CLEAR ALL MESSAGES” [File manager] View the local files of the robot. Click button and choose file to copy, cut, delete, etc. Steps to copy video/music/photos into the robot: ①Use a screwdriver to loosen the screw in the battery cover on the back of the robot.
- Page 29 setting of the Normal and Other users are both “123”. When you enable and set lock function for a certain application, the robot will open this application automatically in about 15 seconds as you start up the robot next time. Other applications are hidden unless you unlock them by clicking the hover button and input the admin password. When there is someone applying for adding the robot as a friend (see Part Four “Operate mobile APP”), the administrator will receive the application message on his/her smart phone.
- Page 30 ② Open the dance app -->click the “custom mode” -->select background music in the music select list for your dancing and click “Next”; ③ Choose the dance steps from dance library. You can select the step one by one or you also can add them all at once by “One-click”;Max steps is 16 for one dance;...
- Page 31 ② Click “Add Task”; ③ Set the task execution time and repeat days; ④ Click + to add one or more trumpets as the play content; adjust the play order by clicking “↑” and “↓”;delete selected trumpet by clicking ⑤ Trigger mode: “Auto Play”-- task is performed as your set time and mode; “Trigger condition”-- task is performed by one or more trigger conditions(Human Body Induction/Face Induction/Touch The Head/Touch The Hand) during “Execution Time”,it only can be performed if the the trigger conditions is triggered.
- Page 32 [Map] Map Build Build a map if you need to use the navigation function of the robot kong and have not built a map for the scene. Please refer to the “Sanbot Max Map building operation manual”to build a map.
- Page 33 Import map: Insert USB key into USB interface of robot, open “Map” App, click “import map” to import the map saved in the USB key root directory Export map: Insert USB key into USB interface of robot, open “Map” App, select one or multiple maps, click “export map” to export the map selected to USB key. Modify name: Long press the map and choose “Modify the name”, input new name and confirm;...
- Page 34 ⑤ Prompt will be popped up when robot detects vision label, please click “confirm to add”; ⑥ Push robot to next place with vision label and click “confirm to add”when detecting vision and popping up a window; ⑦ If you want to delete a vision label , please select “delete vision label”and click corresponding label on the map. ⑧...
- Page 35 ① Create a .txt file to write the preaching content; Put the .txt to a folder which named “xuanjiang”,copy the folder to the root directory of the U disk; ② Insert the U disk, the system will automatically detect the folder and pop up a prompt, click "ok" to import the preaching content; ③...
-
Page 36: Voice Interaction
(1) Wake-up voice: The ear light goes out when the robot is in sleep state. Speak the robot’s name “Hi, Sanbot” to wake it up and the ear light turns green. Now you can control the robot by voice command (view table below) and chat with it if it is connected to the network. - Page 37 If you set the Speech understanding/synthesis is Watson/Nuance under the Language &Region option in the settings, you can use the below command words directly to control the robot. Function Voice Command Wake robot up Hi Sanbot, Hello Sanbot Keep silent, Stop talking(Silent mode) Voice interruption Be quiet (Sleep state) Turn left...
- Page 38 Function Voice Command Volume down Speak softer Open APP Run + “APP” “APP” is related APP name Close APP Exit + “APP” Start take photos Take a photo, Take photo, Take a picture, Take picture Exit camera Quit camera...
-
Page 39: To Operate Mobile App
To Operate Mobile APP 1. Download and Install Download and install the “San-Link” APP from the APP Store on your phone. We recommend that you use a phone running Android 4.0 + or IOS 9.0+. 2. Login Open the “San-Link” APP, click “Login”. If you have not register the San-Link account, please click “Register”... -
Page 40: Chats
· If you are not a company manager and the scanning robot does not belong to any company;It is needed to input the auth code robot received for creating a company.If the robot cannot receive the auth code, please contact Sanbot team to help create the company;. -
Page 41: Life
ROBOT USER MANUAL New friend: To view the added or request history information of friends or robots; Group chat: To view joined group and launch a group chat; Company: To view all the added company; If you are not the manager of the company: ·... - Page 42 ROBOT USER MANUAL function ① Back to father interface---life ② To browse videos in the high-definition color camera of the robot ③ Turn on/off the sounds from the robot side Click to view robot current voltage and click “go charging” in the son interface to control robot go to ④...
- Page 43 My robot: Show all robots of your company. View robot details info.(sw version, robot memory and permission only valid for company manger); View/manage the picture or videos taken by remote control; Community: Visit Sanbot community; Member Center:Robot Ray(Only for rent business), Order record(to view the history orders); ...
- Page 44 ROBOT USER MANUAL...
- Page 45 ROBOT USER MANUAL...
Need help?
Do you have a question about the MAX and is the answer not in the manual?
Questions and answers