Advertisement
Table of Contents
- 1 Description of Carrier Equipment
- 2 Description of Crane Equipment
- 3 Major Specifications
- 4 Main Relief Valve
- 5 Pressure Reducing Valve
- 6 Back Pressure Valve
- 7 Pressure Regulator Valve
- 8 Hydraulic System
- 9 Overwinding Alarm
- 10 Maintenance and Inspection of Carrier
- 11 Inspection before Operation
- 12 Maintenance and Inspection of Crane
- 13 Filling Water and Lubrication Chart
- Download this manual
Advertisement
Table of Contents

Related Manuals for Unic URW295CUR

Summary of Contents for Unic URW295CUR
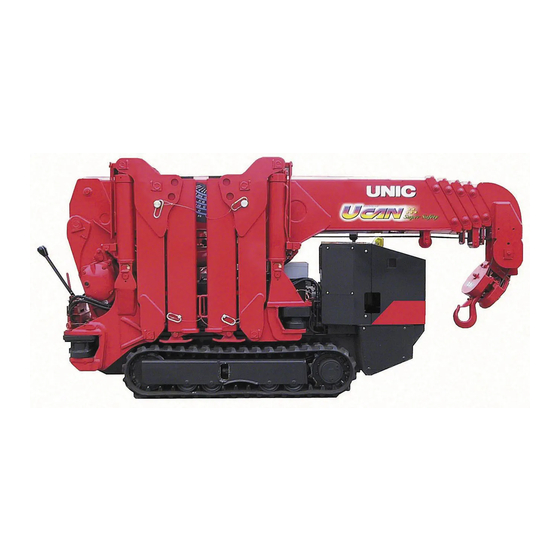
- Page 1 W A A URW295CUR URW295CUR URW295CAR URW295CAR F AWA C C A Courtesy of Machine.Market...
- Page 2 Courtesy of Machine.Market...
- Page 3 9 1 RV-5 9-1) 2 9-2) R 9- ) P 9- ) 9- ) 6 P 9-6) V y (D, H, T, 9- ) 8 V y (O 9-8) 9 O- 9-9) 9-10) y ( y D, H, T, 9-11) 10 O 1 W 10-1)...
- Page 4 1 1 5- ( 1 -1) ( 1 -2) ( 1 - ) ( 1 - ) (5 W 1 - ) (6 W 1 -6) (7 A 1 - ) 2 F ( 1 -8) ( 1 -9) 1 -10~11) C 1...
- Page 5 3. OVER WINDING ALARM 1 F ctio of o erwi i alar a roce re for o eratio 3-1 Boo to i etail 3- 4. Electric wiri 1 4 - 1 Arra e e t lace of t e ai electrical e i e t (Ga oli e e i e ty e 4-...
- Page 6 29 1 I 29-1) 2 C 29-2) 29-2) R 29- ~6) R 29- ) 0 1 L 0-1) 2 F 0-2) 0- ) 0- ) 0- 6) 1 1 URW 95CUR -1 2) 2 URW 95CAR - ) Courtesy of Machine.Market...
- Page 7 1.Dimensions and weight of crane body All width 1.97 ft(600mm) The total height 4.51 ft (1375mm) Tread length 3.44 ft (1050mm) The total length 8.83 ft (2690mm) Total weight(approx.) 1850kg 1-1) Courtesy of Machine.Market...
-
Page 8: Description Of Carrier Equipment
2. DESCRIPTION OF CARRIER EQUIPMENT 14 7 er crawler witc W eel rocket F el ta k I le roller Hy ra lic oil ta k Tr ck roller Stater witc Crawli otor Ho r eter Crawli le er C oke k o Accelerator le er Lock le er 2-1)... -
Page 9: Description Of Crane Equipment
3. DESCRIPTION OF CRANE EQUIPMENT 6 16 O er-wi i alar eter Fra e War i Hoi t wi c Wire ro e Slewi e ice Loa i icator Derrick cyli er A to atic to for lea i wire ro e Tele co i cyli er (Wit wire ro e retai i... - Page 10 113゜F~131゜F (45℃~55℃ , o erati o-loa , a at rate i c ar e. Mo el URW295CUR or URW295CAR Cra e ca acity 6450 l ×4.6ft(2930k ×1.4 ( a i lifti (Wit o tri er e te e f lly...
- Page 11 MA OR SPECIFICATIONS e t a co tr ctio Mo el URW295CUR or URW295CAR Boo : 5- ectio , He a o al o Tele co e y irect of y ra lic cyli er a y wire ro e...
-
Page 12: Major Specifications
MAJOR SPECIFICATIONS Crawling device Model URW295CUR or URW295CAR (5-section boom) Crawling Endless rubber crawler 7 1/8 (in.)×40 links×2 7/8 (in.) FR (180(mm)× Crawler 40 links×72 (mm) FR) Length of ground contact 3.44ft (1050mm) Pressure of ground contact 6.96psi {48.0kPa (0.49kgf/c㎡)} Crawling speed Forward/Backward: 0~2.3km/h 0~1.4mph (2.3km/h) - Page 13 MA OR SPECIFICATIONS 5.C art of rate loa CAUTION RATED LOADS RATED LOADS T e rate loa ow t e erfor a ce of t e cra e o BOOM SECTION le el ro a are a e o t e act al worki WORKING RADIUS(ft 10.0 11.0...
- Page 14 MA OR SPECIFICATIONS ● How oo - ectio are e te e Boo : 1 All oo ectio are retracte . Boo : 1+ ectio (2 o ly i e te e . Boo : 1+ +3 3 ectio (2 a (3 are e te e .
- Page 15 6.1 Inspection before crane operation Do not operate the crane for about 2 seconds after starter switch has been tuened on. The crane is carrying out the system diagnosis to prevent incorrect operation. The mode indicator lamp is to be fully lit up for 2 seconds during the system diagnosis.
- Page 16 6 When making the crane a sudden stop, actuate the “selector switch” controlling opposite function while the shock-less is functioning. (Do not pull the speed lever during this operation.) In order to inactivate the shock-less function, turn ON the “hook winding-down” switch with the “Mode switch”...
- Page 17 7.1 Switching of mode ( Manual mode ⇔ Radio control mode ) However, this operation is possible under the following condition. 1) Starter switch on. 2) Shift the travel lever to “CRANE OPERATION” position. LOCK LEVER STAND LEVER TRAVEL LEVER TRAVEL LEVER STAND CRANE OPERATION POSITION TRAVEL POSITION STOWAGE POSITION...
- Page 18 7.2 How to operate outriggers by manual lever. However, this operation is possible under the following condition. 1) Starter switch on. 2) Shift the travel lever to “CRANE OPERATION.” position. LOCK LEVER STAND LEVER TRAVEL LEVER TRAVEL LEVER STAND CRANE OPERATION POSITION TRAVEL POSITION STOWAGE POSITION 3) ...
- Page 19 7.3 How to operate outriggers by radio control transmitter. However, this operation is possible under the following condition. 1) Starter switch on. 2) Shift the travel lever to “CRANE OPERATION” position. LOCK LEVER STAND LEVER TRAVEL LEVER TRAVEL LEVER STAND CRANE OPERATION POSITION TRAVEL POSITION STOWAGE POSITION 3) ...
- Page 20 ⇔ O ) + 7.5 R ) [ F]. ” ( 7 - Courtesy of Machine.Market...
- Page 21 7.6 Switching of "shockless"function (Operate it when it is not over-wound) Turn ON winding-down switch with para-hook switch depressed. " " s " o " s “[-]” appears on the left side of mode indicator. (normal case) Turn ON winding-up switch with para-hook switch depressed.
- Page 22 7.8 Method of engine start and stop that uses radio controller However, this operation is possible under the following condition. 1) Starter switch on. 2) Shift the travel lever to “CRANE OPERATION.” position. LOCK LEVER STAND LEVER TRAVEL LEVER TRAVEL LEVER STAND CRANE OPERATION POSITION TRAVEL POSITION STOWAGE POSITION...
- Page 23 Courtesy of Machine.Market...
- Page 24 mode indicator lamp is mounted in the control box indicating conditions of crane opera- tion and troubles in detail. When the mode indicator lamp lights, the crane system is working normally. When the mode indicator lamp blinks, the crane system is in a trouble or prohibited operation is being carried out.
- Page 25 Radio Manual control Mode Mode description operation Priority operation mode mode Current control is on low temperature operation mode. Operation can be carried by manual control but not × ◯ through radio remote control. Hook hits against weight for over-winding alarm ―...
- Page 26 8.3 Mode indication when crane is mistakenly operated When prohibited operation or combination of operation which may invites dangerous situations has been carried out, the mode indicator lamp will blink corresponding numbers (operation error indication). When the operation error is indicated, the mode indicator lamp blinks showing corresponding numbers accordingly.
- Page 27 Courtesy of Machine.Market...
- Page 28 Courtesy of Machine.Market...
- Page 29 Courtesy of Machine.Market...
- Page 30 8 6 Z ACC ON " " W ” "CC" ” C.W.” C.C.W.” ” -- ” F ” C C ” C F ” 0 0 8-8) Courtesy of Machine.Market...
- Page 31 8 1 ACC ON 2 ” ” C.W.” C.C.W.” ” ”--” ” ”F ” ” " " " " W, " ". ” " " " " W, " " " " " ". ” 6 ” ...
- Page 32 1 . The pin that connects the fork end of the accelerator cable with the link is pulled out, and the cable is made free. et the cable free. 11. The pin that connects the lever of the derrick with the spool is pulled out. 12....
- Page 33 8 8 d d d C.C.W. C.W. 8-11) Courtesy of Machine.Market...
- Page 34 8-9 How to correct crane operation speed when it will not be right even after pump has been set at the rated speed Slewing speed may be too fast or too slow (Speed between 35 and 45 seconds per revolution is normal).If this occurs, adjust it as follows: Step1 Factory set accelerator rate...
- Page 35 Courtesy of Machine.Market...
- Page 36 8.11How to correct s of hook or Procedure Mod indi a ion 1 or a T r o t e oice witc wit t e cra e er o erati co itio . 2 De re ot "t e re et witc for o erwi i a to atic to "...
- Page 37 8.12 How to correct release of hook Pro dur Mo e i icatio Voice 1 T r ON t e oice witc wit t e cra e er o erati co itio . Nor al o e 2 De re ot "...
- Page 38 8.13 PWM value correction procedure Procedure Mode indication Voice T r ON t e oice witc wit t e cra e t er o erati co itio . Normal mode 2 De re t e " re et witc for o erwi i a to atic to "...
- Page 39 8.14 O tri er o eratio i ol i ro e e t roce re When Crane operates four outrigger at the same time, the load of the pump might become large too much. When Crane operates four outrigger at the same time, the load of the pump might become large too much. Therefore, the engine might stop when outrigger is operated by a low engine rotation.
- Page 40 Courtesy of Machine.Market...
- Page 41 Port relief for storing hook Engine side 9.1 MRV-500 control valve 606041000 Gauge port for pilot Pressure reducing valve Proportional solenoid for Back pressure valve accelerator cylinder 3.0MPa(30kgf/cm ) 1.0MPa(10kgf/cm ) 740192193 Gauge port Lever side Flame side Needle valve for releasing automatic Tank port Accelerator stop for over-winding...
-
Page 42: Main Relief Valve
9.2 Main relief valve Gauge port PT1/4 Main relief set pressure pump speed O-ring 770170014 20.6MPa 210kgf/cm2 )at 38L/min 2000 rpm Backup ring 770180045 Relief for storing hook set Pressure O-ring 731191021 Gauge port 3.9MPa 40kgf/cm2 )at 17L/min Main relief Backup ring 732121021 for pilot valve... - Page 43 9.3 Relief valve for storing hook oring oo oring oo Relief setting pressure for storing hook 3.9MPa [40kgf/c㎡ ] at 17L/min -ring High-pressure side In-out body Tank side High-pressure side -ring 3 -ring 3 Ba up ring 3 Courtesy of Machine.Market...
-
Page 44: Pressure Reducing Valve
9.4 Pressure reducing valve ur r du ing a o noid a or un oading pring In-out body Main r i Pu p por O-ring 3 pi o Ba -up ring O-ring Pu -rod O-ring O-ring 3 O-ring O-ring Pi o pr o r gu ar r p a Courtesy of Machine.Market... -
Page 45: Back Pressure Valve
9.5 Back pressure valve Gauge port O-ring 731191018 Back pressure valve Courtesy of Machine.Market... -
Page 46: Pressure Regulator Valve
9.6 Pressure regulator valve Pressure regulator valve Derrick Down Hoist Down Telescope Extend Retract C.C.W Slew Outrigger Extend Retract Tank side Tank side High-pressure Control valves side O-ring 731191022 Pilot line Choke plug with filter 605686360 Courtesy of Machine.Market... - Page 47 9.7 Valve body (D, H, T, S) O-ring Lower,Down,Extend,C.C.W O-ring 731191006 Raise,Up,Retract, C.W 731171011 Shuttle O-ring valve 731171015 Packing Raise Lower 770200059 O-ring 731171015 Down Badk-up ring 732131015 O-ring Retruct Exitend 731171011 C.W. C.C.W. Differential O-ring 770170053 transformer 750211006 Tank side Tank side O-ring 731174008 High...
- Page 48 9.8 Valve body (Outrigger) O-ring 731191014 O-ring 731171011 O-ring 731171015 Packing 770200059 O-ring 731171015 Badk-up ring 732131015 O-ring 731171011 Differential O-ring 770170053 transformer 750211006 Tank side Tank side O-ring 731194008 O-ring 731194009 High pressure side O-ring 731191512 Pressure regulator valves O-ring 731191512 for each control element Proportional solenoid ...
- Page 49 9.9 O-ring fitted on jointing surface of valve body O-ring O-ring O-ring O-ring 731194010 770170014 Tank 731171005 731194010 O-ring 770170054 Tank Tank High- High- Pressure Pressure O-ring 731191018 O-ring 731171005 O-ring 731191018 In-out body side Accelerator cylinder side Valve body side (Derrick,Hoist,telescoping,Slewing) Valve body Pressure regulation) Valve body In-out body...
- Page 50 9.10 Accelerator cylinder Propor iona o noid O-ring O-ring O-ring O-ring ra or Cy ind r r n ia ran or r Ba -up ring Pa ing O-ring O-ring O-ring Courtesy of Machine.Market...
- Page 51 Courtesy of Machine.Market...
- Page 52 Por r i or oring oo 10.1 Oil flow i t e i -o t o y Gaug por or Poi o pr w e o o eratio i carrie o t ur r du ing a 3 MPa 3 g Gaug por Sole oi al e for Relief al e for...
- Page 53 Back pressure valve Back pressure valve Port relief for storing hook Port relief for storing hook 10.2 Oil flow in the in-out body 1.0MPa(10kgf/cm ) 1.0MPa(10kgf/cm ) Gauge port for Pilot pressure Gauge port for Pilot pressure Pressure reducing valve Pressure reducing valve when crane is being operated 3.0MPa(30kgf/cm )
- Page 54 Back pressure valve Back pressure valve Port relief for storing hook Port relief for storing hook 10.3 Oil flow in the in-out body 1.0MPa(10kgf/cm ) 1.0MPa(10kgf/cm ) Gauge port for pilot pressure Gauge port for pilot pressure when unloading Pressure reducing valve Pressure reducing valve 3.0MPa(30kgf/cm ) 3.0MPa(30kgf/cm )
- Page 55 10.4 Oil flow in the in-out body when hook is being wound up by hook storing operation Sole oi al e Relief al e for tori for tori Ta k Core Winding up Back re re al e re re lator al e Spool Main relief Feedback...
- Page 56 10.5 Oil flow in the in-out body when hook storing relief valve is being functioned by hook storing operation Sole oi al e Relief al e for tori for tori Ta k Core Back re re al e re re lator al e Spool Feedback Main relief...
- Page 57 10.6 Oil flow in the valve body when boom up, hook up, boom retraction, and slewing C.W. are functioning When electric current flows through the solenoid coil with the output Actuator port Actuator port signal supplied out of control box, the core is magnetized accordingly. Lower,Down,Extend,C.C.W Raise,Up,Retract, C.W The spool in the solenoid moves upward leading the pilot pressure...
- Page 58 10.7 Oil flow in the valve body when boom down, hook down, boom extension, and slewing C.C.W. are functioning When electric current flows through the solenoid coil with Actuator port Actuator port the output signal supplied out of control box, the core is Raise,Up,Retract, C.W.
- Page 59 10.8 Description of acceleration cylinder function When controlling through the radio remote controller, electric Coil current proportional to the movement of speed control lever flows from the control box to the cylinder coil so that the iron core is gradually magnetized accordingly. Core The iron core and the spool facing each other with the spring 1 placed them move downward to lead the pilot...
-
Page 60: Hydraulic System
11.1 Hydraulic System Relief valve for storing hook Solenoid valve 3.9MPa(40kgf/cm ) for storing hook Solenoid valve Working Set bolt stop valve) for unloading Secondary pressure pressure Gauge Port Main relief valve Tank 20.6MPa(210kgf/cm ) Primary pressure Back pressure valve Pump Pressure 1.0MPa... - Page 61 11.2 Hydraulic Circuit Diagram (control valve) Tank Gauge Port From pump Solenoid valve Main relief valve for unloading In-out Back pressure valve Pressure reducing valve Solenoid valve Pilot pressure Set bolt for storing hook Emergency screw Gauge Port Pressure regulator Derrick valve Lower...
- Page 62 11.3 Hydraulic Circuit Diagram Geuge Port Derrick Pressure relief 21.6MPa Counter-balance Line filter (220Kgf/c㎡) valve 606022000 740580036 Filter 770290150 Hydraulic motor Check valve 740197149 740390024 Hoist Doun Hydraulic motor 740320029 Counter-balance valve Load meter 606004000 770363335 Filter770290147 Telescoping Left Slewing Hydraulic motor 740360027 Contorol valve W.P.check valve 601463000 740170007...
- Page 63 12.1 Control valve piping for running Pomp Motor for running Pomp1 Control valve Pomp2 for running Control valve for running Tank1 Tank2 High-pressure line filter Right Left Advancement Advancement Retreat Retreat It connects it with the control valve for the crane. Motor for running Motor for running 12-1)...
- Page 64 12.2 Control valve piping for crane View A Plug Slewing Telescoping Hoist Derrick Left Extention Down Lowering Right Retraction Raising Outrigger Control valve for crane View A To tank It connects it from Outorigashirinda to the tank. Connection from control valve for running 12-2)...
- Page 65 12.3 Control valve piping for outrigger Tank It connects it with the crane side control valve. Outrigger Rear left retract Rear left extend Rear Right retract Rear Right extend Front left extend Front left retract Front Right extend Front Right retract Outrigger cylinder Retract Extend...
- Page 66 12.4 Construction of swivel joint and position of houses. Hoist Up Hoist Down Hoist Drain Derrick Lowering Telescoping Retraction Derrick Telescoping Raising Extention To hexagon socket head plug,apply "Lock Tight#202"before tightening. (Don't use a sealing tape.) Inner Joint When assembling,fill up with chassis grease.
- Page 67 Hoist Down Hoist Up Derrick Hoist Lowering Drain Derrick Telescoping Raising Retraction Telescoping Extention Derrick Raising Hoist Up Derrick Lowering Telescoping Retraction Telescoping Extention Hoist Down Hoist Drain 12-5) Courtesy of Machine.Market...
- Page 68 12.5 Piping of Column Hoist drain Hoist down Hoist up Slewing reduction gear assy Slewing Left Slewing Right Frame Hydraulic motor (Slewing) Plea s e p r e p a r e t h e h o s e a n d t he same part when you e x c h a n g e t h e h o s e s .
- Page 69 13. BOOM (5-section boom) (1) Simultaneous telescoping of boom4 and boom5 Extending wire rope Cord reel Boom1 Boom3 Boom5 Tere1 Tere2 Tere3 Boom4 Boom2 Retracting Sheave2 Sheave1 wire rope Operation To the slide sheave pin do not apply grease. Extending Extension of tele1 allows boom2 to extend.
- Page 70 (2) Boom 4, 5 front side section in detail Boom4 Boom5 Pipe Guide Connect the cord which came out of the pipe to the overwinding detector by passing it through inside of the guide. Extending wire rope Adjusting bolt for extending wire rope Retracting wire rope...
- Page 71 (3) Boom 3, 4 rear side section in detail Apply "Three Bond #1 102"to the slide plate to prevent it from falling. Apply the disulide molybudenum grease to the slide plate surface. Tele1 Boom4 Retracting wire rope Tele2 Tere3 T ube Boom4 Connecting Pin Boom3...
- Page 72 (4) Installation procedures for slide plate and guide It has similar construction irrespective of number of boom section Bolt Clearance 2mm Clearance 1mm When assembling, apply"LOCTITE #242". Slide plate 13-4 Courtesy of Machine.Market...
- Page 73 14 . TELESCOPING CYLINDER 14-1 5-Section Boom (Triple Cylinder) Operation Check valve 1 (1) When Telescoping Cylinder1 extends After the set-screw is tightened with LOCTITE #2701 applied hit with a punch at 2 places on the Spool circumference and leave it as it is for 1 hour. Check Bolt valve...
- Page 74 (2) When Telescoping Cylinder1 retracts After the set-screw is tightened with LOCTITE # 2701 applied , hit with a punch at 2 places on the Check valve 1 circumference and leave it as it is for 1 hour. Spool ロッド Check valve Bolt...
- Page 75 (3) When Telescoping Cylinder2 extends Bolt Check valve 1 Slide pipe Tele2 Check Selector valve ass’y valve Check valve 2 Piston After the set-screw is tightened with LOCTITE #2701 Check valve 1 applied,hit with a punch at 2 places on the Spool Counterbalance circumference and leave it as it is for 1 hour.
- Page 76 4) When Telescoping Cylinder2 retracts Bolt Check valve 1 Tele2 Slide pipe Check valve Selector valve ass’y Spool Check valve 2 Piston After the set-screw is tightened with LOCTITE #2701 Check valve 1 applied, hit with a punch at 2 places on the Spool circumference and leave it as it is for 1 hour.
- Page 77 (5) When Telescoping Cylinder3 extends Check valve 1 Slide pipe Bolt Check Tele3 valve Selector valve ass’y Piston Check valve 2 Check valve 1 Slide pipe Spool Counter balance Pressure Oil To tank valve How oil flows when tele3 is extended Bolt Pressure oil opens the check valve in the counter-balance valve to Tele3...
- Page 78 (6) When Telescoping Cylinder3 retracts Check valve 1 Slide pipe Bolt Checkvalve Tele3 Spool Selector Valve Ass’y Piston Check valve 2 Check valve 1 Slide pipe Spool Pressure To tank Counterbalance Pilot Pressure valve Bolt Tele3 How oil flows when tele3 is retracted Pressure oil lows through the dual cylinder of cylinder rod of tele1 Piston Selector Valve Ass’y...
- Page 79 (7) Adjusting Procedures for Selector Valve with Adjusting Bolt Adjusting Procedures with Adjusting Bolt Retract telescoping cylinders (1) and (2) to their minimum. Apply LOCTITE #242 to the threads of the adjusting bolt. Put a board with a thickness of 3mm to the part marked with*.and tighten the adjusting bolt. After adjusting, lock with the lock nut.
- Page 80 Courtesy of Machine.Market...
- Page 81 . C ec a i of t e tele co i cyli er (2 for 5- ectio a 5- ectio oo . S UEEZING PART PISTON PLUNGER CUSHION SEAL (2 Flow of Pre re Oil W e E te i W e e te i , t e re re oil flow i to t e c a er A a...
- Page 82 Cause of Troubles and Measures to be Taken 14.3 (1) 5-section boom When retraction of the boom (3) becomes impossible at the position just before full retraction of the booms (4), (5) and (6), inspect the plunger which is assembled in the telescoping cylinder (3). When the boom (3) does not change over to the boom (2), and retraction becomes impossible at the position just before full retraction, inspect the drilled hole at the position of the plunger of the telescoping cylinder (2).
- Page 83 5-section boom (Triple cylinders) Troubles Possible cause Measures to be taken Some foreign substances are Disassemble selector valve for Retraction is normal, but when extending, booms (2) and (3) cleaning, or replace it with a clogging the part of selec- new one.
- Page 84 Courtesy of Machine.Market...
- Page 85 Courtesy of Machine.Market...
- Page 86 16 HOW TO PUNCH LOCTITE # 6 ” # 7 ” "LOCTITE # 7 " F . P F . . LOCTITE” (T y LOCTITE” 16-1) Courtesy of Machine.Market...
- Page 87 TELE COPING DERRIC CYLINDER A ’Y, EA URE TO PREVENT PI TON FRO EING LOO ENED LOCTITE #6 8” ( LOCTITE # 7 ” LOCTITE #6 8”. LOCTITE” y LOCTITE” #7 7 ( #7 69 y, y #7 7 : P y LOCTITE”...
- Page 88 TELE COPING DERRIC CYLINDER A ’Y, EA URE TO PREVENT PI TON FRO EING LOO ENED LOCTITE” • A y LOCTITE” y LOCTITE” ” • LOCTITE #6 8” #6 8” y LOCTITE” • T y LOCTITE” • T LOCTITE” • LOCTITE”...
- Page 89 HOIST WINCH 17 . 1 Construction of Hoist Winch and brake shoe adjusting procedure Gear4 Drum Apply"LOCTITE#242" Breather Gear2 Ratchet Wheel Brake Shoe Split Pin After assembling, apply grease to engaging tooth surfaces of the gear. Castle Nut Rotate the gear shaft to Washer check that the pawl makes a smooth movement.
- Page 90 17 . 2 Ca tio to e take w e rea e oi t wi c C eck t at t e i ca i t e rill ole o t e awl. Di e io ee ally arra e w e fitti t e ratc et w eel.
- Page 91 17 . 3 Cause of Troubles and Measures to be Taken ( Hoist winch ) Problems Possible cause Measures to be taken Pump is faulty. Replace. Pressure does not rise. (Pressure does not rise at idling speed.) (Total pressure required for operation is insuicient.) Relief set of control valve is faulty.
- Page 92 18. HOOK A lly "LOCTITE 242" Beari -T r t all A lly rea e A lly rea e If t e a of ore t a 2 i co fir e , c eck t e ook, t e t r t eari re lace a efor e (wor o t co o e t.
- Page 93 19. SLEWING 1 Slewi re ctio (1 Co tr ctio of lewi re ctio D t eal Beari Ta er roller eari Fla e Wor w eel Ca i Ball eari Crow Gear Breat er Crow S a ri Te er roller eari 19-1)...
- Page 94 (2 Co tr ctio to e take w e rea e lewi re ctio A ly "T reeBo A ly Grea e to 1401"to it. t e i i e of t eal. D t Seal Fill rea e ere. U e Lit i oa ra ical rea e ( c a Rizo i...
- Page 95 (3) Slewing reduction gear disassembly procedures Remove a snap ring (H-80) retaining the taper roller bearing which sustains the worm shaft. Turn the gear shaft counterclockwise, and pull out the worm shaft from the casing. (Use of special tool for removing worm shaft is recommended.) Remove 8 pcs.
- Page 96 This gure shows the pulled out housing with gear shaft and worm wheel. Grip the housing with a vice and pull out the worm wheel with a gear puller. Pull out the collar which is assembled in the nut. 19-4 Courtesy of Machine.Market...
- Page 97 Pull out the O-ring which is assembled in the nut. With a pin spanner, remove the nut which retains the taper roller bearing. Note: To the threaded part of the nut,LOCTITE was applied. Therefore, when loosening, warm up lightly the threaded part with gas lame, and then loosen.
- Page 98 2 .1 Turntable Mounting Procedures 1 Install the slewing reduction gear to the base. 2 Set the turntable on the base to screw-in the bolts for mounting turntable lightly. 3 Insert the thickness gauge(0.1~0.2mm)into the space between the turntable gear and the pinion gear,and press strongly the turntable to the pinion gear. 4 So as not to part from the turntable and the pinion gear,it tightens with the specified torque in the order of tightening the installation bolt.
- Page 99 2 .2 Position of soft zone,tightening sequence of bolts and tightening torque "S"Mark(Soft zone)Position 8 4 7 1 Back Front 6 2 Slewing reduction 3 5 9 gear ass'y Turntable Tempered bolt Tighting sequence of bolt for mounting turntable Tightnen the bolts in the numerical order as illustrated in the figure above.
- Page 100 21.1 Tightening torque for bolts fastening column and tightening order Inspection Hole for bolts mounting turntable Stopper Bolts for Column M 6×5 (12T) 8H651 6 When assembling,apply"LOCTITE♯962T" Tightning Torque:25±2 gf・m Tighten the bolts in the numerical order as illusted in the figure. Column Turntable 21-1)...
- Page 101 22.1 Construction of slipriing (22-1) Courtesy of Machine.Market...
-
Page 102: Overwinding Alarm
23.1 Overwinding alarm 1. Function of overwinding alarm and procedures for operation (1) Function of overwinding alarm The device automatically makes an alarm sound to warn that the wire rope is overwound when the hook comes close to the boom top. Cord reel Overwinding detector... - Page 103 23.2 Boom top in detail ( 23 - 2 ) Courtesy of Machine.Market...
- Page 104 24.1 Sy te tr ct re Battery E i e Voice alar Co trol o re et SW Co torol o Mo e i icator la E i e tart relay O tri er o e zzer E er e cy to SW E i e to relay O tri er o e la Detectio of...
- Page 105 24.2 URW295CUR GASOLINE ENGINE TYPE CONTROL VALVE CONTROL BO (for CRANE (for CRANE LEAVING MINIMAM WIRE GASOLINE ENGINE ROPE DETECTOR OPERATION MODE LAMP FUSE CONTROL VALVE (for OUTRIGGER OUTRIGGER MODE LAMP MODE SELECTOR SW MODE SELECTOR SW (TRAVEL⇔CRANE KEY SW OUTRIGGER BUZZER...
- Page 106 LEAVING MINIMAM WIRE ROPE DETECTOR LORD CELL AMP 24.3 Br/Ye OVERWINDING DETECTOR SPEAKER URW295CUR CORD REEL (CLOSED ON SAFE) Wh/Ye ELECTRIC WIRING DIAGRAM ( All DEVICES Gr/Wh HORN SW SLIPRING Wh/Pi DIGITAL SIGNAL -) SPEAKER +) BL/Ye DIGITAL SIGNAL +) Re/Ye...
- Page 107 LEAVING MINIMAM WIRE ROPE DETECTOR 24.4 Br/Ye SPEAKER OVERWINDING DETECTOR URW295CUR CORD REEL (CLOSED ON SAFE) Wh/Ye ELECTRIC WIRING DIAGRAM ( CRANE ) Gr/Wh HORN SW SLIPRING Wh/Pi DIGITAL SIGNAL -) SPEAKER +) BL/Ye DIGITAL SIGNAL +) Re/Ye POWER SUPPLY (RESERVE)
- Page 108 24.5 URW295CUR KEY SWITH MODE SELECTOR(TRAVEL/CRANE ELECTRIC WIRING DIAGRAM CONTOROL BO MODE SELECTOR(TRAVEL/CRANE ( OUTRIGGER Re/Gr OUTRRIGER MODE BUZZER OUTRIGGER MODE BUZZER Br Gr Br Gr Br B OUTRRIGER MODE LAMP GND LINE OUTRRIGER MODE LAMP Ye Gr CRANE POWER LINE...
- Page 109 LORD CELL AMP 24.6 COM(GND) CONTOROL BOX POWER SUPPLY (RESERVE) URW295CUR POWER SUPPLY (RESERVE) NOTICE + LIMIT BL/Wh SAFTY DEVICE RESET SW ELECTRIC WIRING DIAGRAM OUTRIGGER STOP SIGNAL +12V) Or/Wh OPERATION SIGNAL OPERATION +12V) ( TURN OVER PREVENTION DEVICE )
- Page 110 24.7 Electric wiring around control box Eart Ter i al Nor al o e Gree Gree W ite E er e cy Ter i al Co trol o Nor al cro e Re ラ コン 非常停止 スイッチ 輸出) O tri er Mo e elector witc O eratio To Mo e elector witc...
- Page 111 24.8 Electric wiring under control valve for crane RELAY BATTERY MAIN RELAY Outrigger buzzer 転倒防止 転倒防止 Black アウ ザー BOOM DOWN ROTATION White RELAY Power supply ロー セ 予備電源 予備電源 予備電源 アンプ Horn 予備電源 予備電源 転倒防止 転倒防止 転倒防止 転倒防止 転倒防止 STOP 転倒防止...
- Page 112 24.9 Electric wiri ( Ga oli e e SPARK PLUG MITSUBISHI HEAVY INDUSTRIES GM401LE GENERATOR ENGINE STOP REGULATOR Regulator レギュレータ ソレノイ Solenoid HOUR METER To hour meter. To harness Assy of electric wiring ( upper )assy SOLENOID STARTER MOTOR Re W Re i ta ce of coil 6Ω...
- Page 113 Courtesy of Machine.Market...
- Page 114 24.11 Electric wiring DIESEL ENGINE TYPE) ENGINE SOLENOID EMERGENCY UNIT Re W STARTER MOTOR 7 8 3 11 4 6 9 10 1 5 OIL PRESSURE SW PRELIMINARY SWITCH WATER TEMPERATURE SW HOUR Re W DYNAMO METER OIL PRESSURE CHARGE HORN WATER TEMPERATURE GLOW Re W MONITOR LAMP...
- Page 115 URW295CDR (DIESEL ENGINE TYPE DIESEL ENGINE CONTROL BO CONTROL VALVE LEAVING MINIMAM WIRE (for CRANE (for CRANE ROPE DETECTOR CONTROL VALVE (for OUTRIGGER OPERATION MODE LAMP OUTRIGGER MODE LAMP OUTRIGGER BUZZER MODE SELECTOR SW MONITOR LAMP CHARGE OIL PRESSURE LOAD CELL AMP WATER TEMPERATURE GLOW HORN...
- Page 116 WIRE ROPE RETAINING MECHANISM Limit switch 750306029 Courtesy of Machine.Market...
- Page 117 Outrigger Mode indicator lamp The Outrigger mode indicator lamp lights Outrigger Mode ⇒ Light on when the operation mode is changed to Crane Mode ⇒ Light off Outrigger and outrigger buzzer rings. Mode indicator lamp Radio control Mode ⇒ Light on Manual Mode ⇒...
- Page 118 Detector for limit rotation Limit switch for change detection of running and crane operation ( 25 - 3 ) Courtesy of Machine.Market...
- Page 119 6. E 1) 2) ’ ) ) ) 6) ATTERY AIN”. UNIC ATTERY AIN”. ( 6 - Courtesy of Machine.Market...
- Page 120 6. H ① ④ ( 6 - Courtesy of Machine.Market...
- Page 121 ” ” 80 81 82 8 8 8 ① 2Ω 1←→2 2 Ω ←→ 6 Ω ①Y ←→ 2Ω ←→ ― ― ― 2Ω 2 Ω 6 Ω 2Ω ― ― ④ Terminal arrangement of connector of differential transformer ( 6 - Courtesy of Machine.Market...
- Page 122 Ω ④ ① ① , ④, d 1←→ d(∞) d 1←→ d(∞) 1←→ ①Y d(∞) ― ― ― d ― ― ④ Terminal arrangement of connector of differential transformer , ④, 2←→ d(∞) 2←→ ①Y d(∞) 2←→ ― ― ― d(∞)...
- Page 123 26. ①R . 6 °. ④R Courtesy of Machine.Market 26- )...
- Page 124 6.5 IN PECTION PROCEDURE WHEN CYLINDER IN I ①A ④R ( 6 - 6 Courtesy of Machine.Market...
- Page 125 6.6 P W.P. W.P. W.P. ” ” ”T ”; W.P. ” CRANE OUTRIGGER 5. T 6. T ① ④ TORAGE 7. T ① ④ EXTEN ION ( 6 - 7 Courtesy of Machine.Market...
- Page 126 27.1 I itial zero oi t a t e t roce re for O tri er ro etector co trol o Proce re T r OFF t e e i e key witc a fa te t e crew to o e t e co er of t e co trol o . Screw Proce re T r t e rotary witc to ali...
- Page 127 Proce re 3 T e e i e i tarte a tra el le er i a te to t e cra e o eratio o itio to li k t e ERR la Proce re 4 After t e o tri er a e ee O tri er ro etector...
- Page 128 , ‥‥ . (P ‥‥‥ . (L ☆ ZERO RE ET” "ZERO RE ET" UZZER WITCH FOR OUTRIGGER ZERO RE ET ♦ . I UNIC • • • • ON OFF ZERO RE ET” The ZERO RE ET” 7- ) Courtesy of Machine.Market...
- Page 129 27.4 Check points of "TURN OVER PREVENTION DEVICE" 1.Please remove the wiring connector of the load cell. Please measure the resistance between each terminal. Please confirm whether in the following ranges. ⇔ 348Ω~358Ω ⇔ 260Ω~270Ω ⇔④ 348Ω~358Ω ⇔④ 260Ω~270Ω ④...
-
Page 130: Maintenance And Inspection Of Carrier
MAINTENANCE AND INSPECTION OF CARRIER 28.1 Inspection before operation WARNING ★ Since the machine uses gasoline as fuel, check the hose for crack and connections for tightness if you have a smell of gasoline around the engine. If fuel leaked in the vicinity of engine and muffler which are very hot may cause a fire. - Page 131 Courtesy of Machine.Market...
- Page 132 MAINTENANCE AND INSPECTION OF CARRIER 2. Check for engine oil quantity / Filling up / Change WARNING ★ Wipe up spilled oil thoroughly after filling it up as it may cause the fire. ★ Do not check and change the engine oil while it is still hot. CAUTION ★...
- Page 133 MAINTENANCE AND INSPECTION OF CARRIER 3. Check for battery electrolytic solution level / Filling up WARNING ★ Gas evaporated from the battery solution is inflammable. Do not bring a fire source close to the battery during battery mainte- nance. And, be sure to disconnect the negative (-) side of battery cord.
- Page 134 MAINTENANCE AND INSPECTION OF CARRIER 4. C eck y ra lic oil ta k for oil le el Filli WARNING ★ Since temperature on the hydraulic oil tank surface is too high imme- diately after operation, remove the cap of the filling port after the tem- perature has gone down.
- Page 135 MAINTENANCE AND INSPECTION OF CARRIER 5. C eck for r er crawler t e t WARNING ★ Do ot c eck r er crawler te io wit t e cra e o y rai e a o e t e ro It i ery a ero eca e a acci e tal fall of t e cra e...
- Page 136 MAINTENANCE AND INSPECTION OF CARRIER CAUTION ★ Do not crawl over lying rocks or stones with sharp edges. ★ Do not change direction where there is a difference in ground level. ★ Do not make a quick change of direction as it may cause the wheels to go off the rubber crawler.
- Page 137 MAINTENANCE AND INSPECTION OF CARRIER Inspection and Maintenance which is to be carried out every 250 hours or 3 months 1. Check/Cleaning of air cleaner element WARNING ★ Do not make a cleaning and a replacement of air cleaner while engine is running.
- Page 138 MAINTENANCE AND INSPECTION OF CARRIER 2. Check oil quantity in the reduction gears of crawling motor/Filling up (Change oil every 1,000 hours) WARNING ★ Do not rush to work as each section of crawling devices is heated to a high temperature immediately after the crane operation. Work after temperature of crawling devices has cooled down.
-
Page 139: Maintenance And Inspection Of Crane
MAINTENANCE AND INSPECTION OF CRANE 1. Inspection before operation I or er to ec re afe o eratio a ro e worki efficie cy, e re to i ect aily eac art of t e cra e accor i to t e ta le a follow : Device Servicing item Device... - Page 140 UNIC a t orize er ice for i ectio a for re air.
- Page 141 MAINTENANCE AND INSPECTION OF CRANE 4. Re lace e t of wire ro e (for wi i - W ire ro e i acti e er ice e i ally ecte o ce e ery worki ay. A t oro ectio of c ro e a e at lea t...
- Page 142 MAINTENANCE AND INSPECTION OF CRANE CAUTION ★ Wear leather gloves when replacing wire ropes. ♦ 2. How to re lace wire ro e Refer to t e fi re i t e left for ow to ook t e wire ro e for wi i w ere t e wei t for o er-wi i alar Wire cli...
- Page 143 MAINTENANCE AND INSPECTION OF CRANE How to fi wire ro e e t e wire ro e e t ro t e wire ocket, e re to a it a i icate Wire ro e e y t e arrow ark o t e ocket. 1 5 8i .
- Page 144 MAINTENANCE AND INSPECTION OF CRANE ♦ 3. How to correct twi te wire ro e W ire ro e te to t r i twi ti irec- tio w e t ey are er te io . If two or ore wire ro e are ooke to et - er, t ey te to e twi te...
- Page 145 A k a local UNIC a t orize er ice o for re lace e t of a ket a or eal .
- Page 146 WATER SUPPLY AND LUBRICATION TO CARRIER 1. List of recommended lubricant for carrier ♦ 1. Use the engine oils as below: 10W40 Multi-grade 10W30 5W20 30 40°C (-22 86 104°F) T e electio of e i e oil i ery i orta t to a e i e.
-
Page 147: Filling Water And Lubrication Chart
WATER SUPPLY AND LUBRICATION TO CARRIER 2. Filling water and lubrication chart ④ No. of Ser ice i ter al W ere to l ricate L rica t Tool I itial: Re lace after 25 o r E i e 0.3 al. E i e oil After : Re lace e ery 50 o r (1.2 liter... - Page 148 LUBRICATION TO CRANE 3. List of recommended lubricant for crane ♦ 1. List of recommended lubricants ★ Use the UNIC genuine hydraulic oils listed below as hydraulic oil for the crane. Use industrial-type hydraulic oil ISO VG 46 for temperatures above 32F.
- Page 149 LUBRICATION TO CRANE 4. Lubrication chart for crane ④ Ser ice No. of W ere to l ricate L rica t Tool i ter al li e late (U er i e & i e face of oo Moly e rea e Ma al a li- ,and...
- Page 150 LUBRICATION TO CRANE L ricatio ♦ 1. Re lace e t of ear oil (Wi c re ctio ear a Slewi e ctio ★Air e ter i a o t of t e ear ca e o Wi c re ctio t at irt a oi t re are ro t i t e...
- Page 151 LUBRICATION TO CRANE ♦ 2. Lubrication to slewing bearings The crane employs ball bearings as the slew- ing bearing. Be sure to lubricate the bearings as insuffi- cient lubrication may cause it to make unusu- al noise. Grease the nipples while slewing the boom once a month for moderate operation, and once a week for heavy-duty operation.
- Page 152 31.1 Battery removal procedures for models of URW295C (Gasoline engine type) (1) Battery is installed on the battery mount as illustrated in the Fig. 1. Battery mounting position Fig. 1 Battery mounting position (2) Remove the M8 bolt shown in the Fig. 2 to remove the cover. Then remove the M8 double nut system to remove the battery attachment bracket.
- Page 153 (4 Di co ect eac attery ca le fro attery ter i al of (+ a (- to ll o t t e attery a ill trate i t e Fi . 4. re to i co ect t e ca le to t e (- ter i al fir t, t e t e ca le to t e (+ ter i al. W ile t e attery i lle o t, ay ecial atte tio t at a y of attery ter i al...
- Page 154 31.2 Battery re o al roce re for o el of URW295C (Die el e i e ty e (1 Battery i i talle o t e attery o t a ill trate i t e Fi . 5 Battery mounting position Fi .5 Battery o ti o itio (2 Re o e t e M6 olt (5 lace...
- Page 155 (3 Re o e t e M8 olt a t e M8 o le t y te to re o e t e attery attac racket ill trate i t e Fi . 9. Remove M8 bolt Battery attachment braket Remove M8 double nut system to remove battery attachment bracket...
Need help?
Do you have a question about the URW295CUR and is the answer not in the manual?
Questions and answers