Table of Contents
Advertisement
Advertisement
Table of Contents

Related Manuals for ROCK JAM RJ88DP

Summary of Contents for ROCK JAM RJ88DP
- Page 1 RJ88DP User Guide...
- Page 2 PRECAUTIONS Please be sure to read the following information carefully and keep this in the safe place for your further reference. WARNING In order to avoid serious casualties caused by electric shock, short circuit, fires or other dangers, please be sure to obey the following information at all times.
-
Page 3: Table Of Contents
CONTENTS: Technical Specification......................1 Box Contents........................2 Setup........................... 2 Rear Panel Connection Diagram..................2 Front/Rear Panel Connection Diagram................3 Top Panel..........................3 Rear Panel........................... 3 Quick Start........................... 4 Playing Demo........................4 Tones Selection........................5 Layer Mode......................... 5 Split Mode........................... 5 Advanced Functions...................... -
Page 4: Box Contents
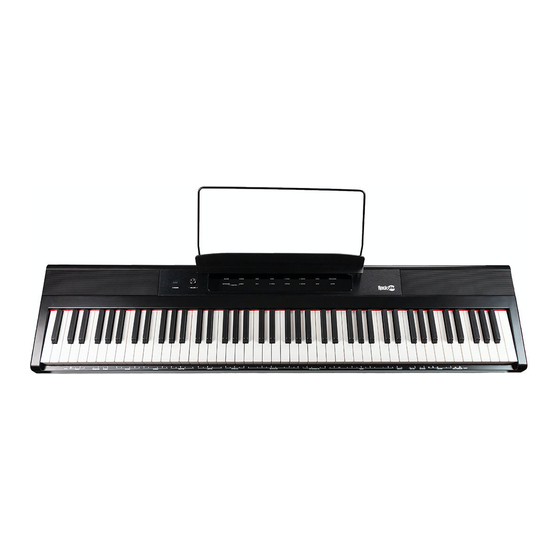
Box Contents • RockJam Digital Piano • Power Adapter • Music Stand • User Guide Setup Music Stand Step 1 Step 2 Rear Panel Phone, MP3, Audio Output Mobile Phone Computer Sostenuto Pedal Amplifier Sustain/ Soft Pedal... -
Page 5: Front/Rear Panel Connection Diagram
Front/ Rear Panel Connection Diagram Headphone Front Headphone Electret Microphone Rear Headphone Power Adapter Top Panel 1. Power Switch: Turn the piano’s power on or off. In order to save energy, the piano will automatically shut down after 30 minutes if it is not used. 2. -
Page 6: Quick Start
2. Back Headphone Output: Connect stereo headphones with a 1/4”(6.35mm) stereo connector. When headphones are connected, the internal speakers will automatically turn off and sound will only be heard from the headphones. 3. Front Headphone Output: Connect stereo headphones with a 3.5mm stereo connector. When headphones are connected, the internal speakers will automatically turn off and sound will only be heard from the headphones. -
Page 7: Tones Selection
Tones Selection 1. Touch one of Tone buttons, the corresponding LED will be lit for that voice. 2. Play the keys to hear the tone accordingly. Layer Mode Layer Mode allows for two different voices to be layered together for a more full and rich sound. To Enable Layer Modes: 1. -
Page 8: Advanced Functions
Advanced Function Mode How to Enter and Exit Advanced Function Mode: To enter Advanced Function Mode, touch the “Metronome” and Lesson buttons at the same time, the function LED will be lit Then use the keys that correspond to graphics below to change to your desired setting Touch both the “Metronome”... -
Page 9: Reverb
To Change the Octave of both Zones in Lesson Mode: 1. Enter Advanced Function Mode. The function LED will be lit on. 2. Use the keys marked “ Octave+” or “ Octave-” to adjust the octave value from (-3 to 3). Touch both keys at the same time to restore the default octave value to 0. -
Page 10: Metronome
Metronome Turn the metronome on, and the speaker has a tick sound which provides a steady beat to aid in practicing at a consistent tempo. Press the “Metronome” button to turn the metronome on or off. When the metronome is in use, the Metronome button LED will flash along with the current tempo which can be freely adjusted from 30 to 400 beats per minute. -
Page 11: Mp3 Function
MP3 Function Play songs from a USB stick. Insert the USB stick into the USB port. 1. Enter Advanced Function Mode. The function LED will be lit on. 2.Touch MP3 key “ ” to play or pause songs. 3. Touch the MP3 Play key to choose the one you desired. 4. -
Page 12: Troubleshooting
Troubleshooting Problem Possible Cause and Solution The speakers produce a pop sound This is normal and is no cause for whenever the power is turned on/off. alarm Check if the master volume is set too low or if headphones The speakers do not produce sound are plugged into the Headphone Output. -
Page 13: Fcc Compliance Statement
FCC Compliance Statement FCC Class B Part 15 This device complies with Part 15 of the Federal Communications Commission (FCC) Rules. Operation is subject to the following two conditions: This device may not cause harmful interference. This device must accept any interference received, including interference that may cause undesired operation. CAUTION: Changes or modifications to this unit not expressly approved by the party responsible for compliance could void the user’s authority to operate this equipment.
Need help?
Do you have a question about the RJ88DP and is the answer not in the manual?
Questions and answers