Table of Contents
Advertisement
Quick Links
Preface
Welcome to the world of Hytera and thank you for purchasing this product. This manual includes a
description of the functions and step-by-step procedures for use.
Safety
To avoid bodily injury or property loss caused by incorrect operation, please carefully read the
Information Booklet
before use.
This manual is applicable to the following product:
PNC 550 Smart LTE Terminal
Advertisement
Table of Contents

Related Manuals for Hytera PNC 550


Summary of Contents for Hytera PNC 550
- Page 1 Preface Welcome to the world of Hytera and thank you for purchasing this product. This manual includes a description of the functions and step-by-step procedures for use. Safety To avoid bodily injury or property loss caused by incorrect operation, please carefully read the Information Booklet before use.
-
Page 2: Table Of Contents
Contents Preface ............................... 1 Copyright Information ..........................1 Disclaimer ..............................1 FCC Statement ............................1 IC Statement .............................. 2 Documentation Information ........................4 Icon Conventions ............................. 4 Notation Conventions ..........................4 Key Operations ............................5 Unpacking ............................6 1.1 Packing List ............................6 1.2 Product Overview .......................... - Page 3 3.2.1 Brightness Level ........................22 3.2.2 Night Light ..........................22 3.2.3 Sleep ............................23 3.2.4 Auto Rotate Screen ........................23 3.2.5 Text Display ..........................23 3.2.6 Wallpaper and Screen Saver ....................24 3.3 Sound ..............................24 3.3.1 Volume, Sound Effect, and Vibration ..................24 3.3.2 Do Not Disturb Mode ........................
- Page 4 5.3.5 Deleting Contacts ........................38 5.3.6 Other Operations ........................39 Multimedia Services ........................40 6.1 Snapdragon Camera ........................40 6.1.1 Photo Mode ..........................40 6.1.2 Video Mode ..........................43 6.1.3 Panoramic Mode ........................44 6.2 Snapdragon Gallery ......................... 44 6.2.1 Viewing Pictures or Videos ...................... 45 6.2.2 Playing Videos ..........................
- Page 5 8.2.3 Managing Recording Files ....................... 55 8.3 Clock ..............................56 8.3.1 Setting the Alarm Clock ......................56 8.3.2 Viewing the World Clock ......................56 8.3.3 Using the Timer ........................57 8.3.4 Setting the Stopwatch ......................57 8.4 Calendar ............................57 8.4.1 Adding Accounts ........................
-
Page 6: Preface
Copyright Information Hytera is the trademark or registered trademark of Hytera Communications Corporation Limited (the Company) in the People's Republic of China (PRC) and other countries or areas . The Company retains the ownership of its trademarks and product names. All other trademarks and/or product names that may be used in this manual are properties of their respective owners. -
Page 7: Ic Statement
NOTE: This equipment has been tested and found to comply with the limits for a Class B digital device, pursuant to Part 15 of the FCC Rules. These limits are designed to provide reasonable protection against harmful interference in a residential installation. This equipment generates, uses and can radiate radio frequency energy and, if not installed and used in accordance with the instructions, may cause harmful interference to radio communications. - Page 8 of the device. L'émetteur/récepteur exempt de licence contenu dans le présent appareil est conforme aux CNR d'Innovation, Sciences et D é veloppement é conomique Canada applicables aux appareils radio exempts de licence. L'exploitation est autorisée aux deux conditions suivantes : (1) L'appareil ne doit pas produire de brouillage;...
-
Page 9: Documentation Information
Documentation Information Icon Conventions Icon Description Indicates references that can further describe the related topics . Indicates situations that could cause data loss or equipment damage . C au tio n Notation Conventions Item Description Example To save the configuration, click Apply. Denotes menus, tabs, parameter names, Boldface window names, dialogue names, and... -
Page 10: Key Operations
Key Operations Operation Description Short press Press and release quickly. Long press Press and hold for the preset duration . Press and hold Keep the key pressed . -
Page 11: Unpacking
1. Unpacking 1.1 Packing List Please unpack carefully and check that you have received the following items. If any item is missing or damaged, please contact your dealer. Item Quantity (PCS) Item Quantity (PCS) Terminal Data Cable Battery Battery Cover Power Adapter Documentation Kit ... -
Page 12: Product Overview
1.2 Product Overview 1.3 Installing Cards Insert the Nano SIM cards and Micro SD card into the slots as shown in the following figure. -
Page 13: Attaching The Battery
To remove the Nano SIM cards, slide the latch until the Nano SIM cards pop out. 1.4 Attaching the Battery C au tio n Use the approved battery by the Company to avoid the risk of explosion. Safety Information ... -
Page 14: Charging The Battery
3. Press the cover into place and slide the battery latch to the lock position. 1.5 Charging the Battery C au tio n Use the approved charger to charge the battery . Read the Safety Information Booklet before charging . ... - Page 15 power adapter, mobile power supply or PC by the data cable. It is recommended to charge the battery when the power is below 15%. During charging, check whether the battery is fully charged by the battery level icon or battery percentage displayed on the touchscreen.
-
Page 16: Basic Operations
2. Basic Operations 2.1 Activating the Terminal Activation must be done over a network. Make sure that the SIM card is inserted or the Wi-Fi network is available during activation. 1. Long press until the startup screen appears, and then tap START. 2. -
Page 17: Adjusting The Volume
Turning the Terminal Off To turn the terminal off, long press until the terminal displays Power Off and Restart, and then select Power Off. 2.3 Adjusting the Volume To increase or decrease the ring volume, press the Volume Up or Volume Down key. ... -
Page 18: Status Indications
2.4.1 Status Indications Icon Terminal Status Icon Terminal Status Wi-Fi network The BT feature is enabled. connected. The SIM card registers with An earpiece is connected. the mobile network. The SIM card does not register with the mobile The GPS is positioning. network. -
Page 19: Control Center
Icon Terminal Status Icon Terminal Status The Do Not Disturb mode is enabled, and The battery is fully charged. Total silence is selected. battery being There is/are new message(s). charged. Power Saver There is/are missed call(s). enabled. No SIM card is installed. The terminal has downloaded file(s) airplane mode... -
Page 20: App Center
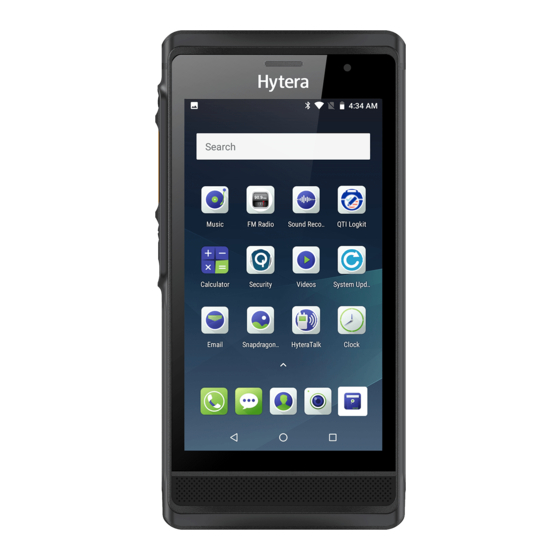
2.4.3 App Center or swipe upward on the home screen to open the app center, and then swipe up or down to view all apps. 2.4.4 Screen Operation Understanding Gestures... - Page 21 Tap: Touch the target to open an app or select a function. Tap and hold: Touch the target for more than two seconds to enter the editing mode. Swipe: Swipe through items, such as control panels, pages, or recently used apps.
- Page 22 When the standby time reaches the Sleep time, the terminal will be automatically locked. You can change the lock pattern. To change the pattern, tap Settings > Security & Location > Screen lock, and then select Pattern, PIN or Password. To prevent data loss or data leakage, you can also suspend the terminal receiving calls, messages, or notifications when screen is locked.
-
Page 23: Configuring The Dual Sim Standby Feature
2. Do one of the following: To end one app, tap , or swipe it left or right. To end all apps, swipe the interface downward to the last app, and then tap CLEAR ALL. 2.5 Configuring the Dual SIM Standby Feature The terminal supports Dual SIM Dual Standby feature, and allows you to use two SIM card at the same time. -
Page 24: Connecting To The Network
2.6 Connecting to the Network 2.6.1 Mobile Network Before you connect the terminal to the mobile network, make sure that the SIM card has registered with the carrier network. When you do not use the mobile network, disable the mobile network to save the data usage and prolong the standby time. -
Page 25: Terminal Settings
3. Terminal Settings to open Settings, and then you can configure the following terminal settings: 3.1 Network and Internet 3.1.1 Mobile Network To enable Roaming, tap Network & Internet > Mobile network, and then in one SIM card interface turn on the Roaming switch. -
Page 26: Vpn
shortcut in the control center. USB Tethering Before using the USB tethering, make sure that the driver is installed on the computer or the network connection is established. To configure the USB Tethering, do as follows: Connect the terminal to the computer with a USB cable. Tap Network &... -
Page 27: Airplane Mode
Tap Network & Internet > VPN. to edit the VPN profile, including Type/Server address/Username/Password, and then tap SAVE. To obtain the VPN user name and password, consult your dealer. Before adding a VPN profile, you need to set the PIN code or Password. 3.1.5 Airplane Mode Airplane Mode suspends the terminal's signal transmitting or receiving, so as to avoid emitting interference to the airplane when you are on a flight. -
Page 28: Sleep
when you work in the darkness. To enable Night Light, swipe down from the status bar to expand all shortcuts, and then turn on Night Light. To configure Night Light, tap Settings > Display > Night Light, and then do one of the ... -
Page 29: Wallpaper And Screen Saver
To adjust the display size, tap Display > Advanced > Display size, and then drag the slider to set the display size as Small, Default, or Large. 3.2.6 Wallpaper and Screen Saver To set the wallpaper, tap Display > Wallpaper, and then select your favorite picture as the ... -
Page 30: Do Not Disturb Mode
3.3.2 Do Not Disturb Mode Do Not Disturb Mode prevents your terminal from giving audio indications or waking the screen when the terminal receives calls or notifications. To enable the Do Not Disturb mode, do one of the following: Through the shortcut ... -
Page 31: Location
to add more automatic event rules, or add time rules to schedule the Do not disturb mode according to your needs. 3.4 Location The Location feature allows the terminal to determine its location through Wi-Fi, mobile network, BT, or GPS. -
Page 32: Date And Time
3.6 Date and Time With network connected, you can enable automatic synchronization of date, time, and time zone of the system. Or you can manually adjust them, if an error appears. To configure date and time, tap System > Date & time, and then perform the following operations: To enable automatic synchronization of date, time, and time zone, do as follows: ... -
Page 33: Reset Options
Tap Select Time Zone, and then select the desired time zone from the list. To set the time format of 12-hour or 24-hour, turn on or turn off the Use 24-hour format switch as required. 3.7 Reset Options C au tio n Before a terminal reset, back up the data in advance to avoid loss of important data. - Page 34 After the terminal is successfully connected to a BT device, you can transmit or receive files such as pictures, audios, and videos through BT. Connecting to a BT device Through the shortcut 1. Swipe down from the status bar to expand all shortcuts, and then turn on Bluetooth. 2.
-
Page 35: Nfc
3.8.2 NFC NFC (Near Field Communication) is a wireless connection technology that offers easy, secure and fast communication. With this feature enabled, the terminal can be identified by compatible devices in a short distance, and then it exchanges data upon touching the devices. To enable this feature, tap Settings >... -
Page 36: Storage
To manually enable Battery Saver, turn on the switch. To enable automatic Battery Saver, tap Turn on automatically, and then select the condition to trigger battery saver. Battery Saver is disabled when the terminal is being charged. Remaining Power Display To display the remaining power in the status bar, turn on the Battery percentage switch. -
Page 37: About Product
Auto Release Tap Storage Manager, and then select the time period for automatic removal of pictures, videos, and app data that have been backed up. 3.9.3 About Product To view the information about the terminal, tap Settings > System > About Phone. To view the status of the terminal, tap Status, and then check the detailed information, including ... -
Page 38: Applications
4. Applications 4.1 Installation C au tio n To protect the device from malware or viruses, download the trusted applications only. To avoid personal information leakage or misuse, read the instruction carefully and operate with caution when installing an application. If the default apps cannot meet your requirements, you can download more apps through browser, computer, Micro SD card or BT. -
Page 39: Communication Services
5. Communication Services 5.1 Phone 5.1.1 Initiating Calls With a registered SIM card, you can initiate a call in one of the following ways: Manual Dialing 1. Tap to open the Phone app. 2. Tap to open the dial pad. 3. -
Page 40: Receiving Calls
3. Tap the desired call log to initiate a call. 5.1.2 Receiving Calls Answering or Rejecting calls When receiving an incoming call, you can answer or reject it. To answer the call, tap Answer. To reject the call, tap Reject. ... -
Page 41: Other Operations
5.1.4 Other Operations To configure other settings, such as the ring tone, alert tone, quick dial, reject message, and shield the call, tap to open the Phone app, tap on the right side of the search box, and then perform the desired operations. -
Page 42: Contacts
Configuring Message Settings To configure the message settings, do as follows: 1. Tap to open the Messaging app. 2. Tap at the upper right corner. 3. Select Settings. 4. Customize your message settings such as notification sound, delivery report etc. Sharing, Copying, Forwarding and Deleting Messages Open a conversation, select one or more messages, and then you can perform the following operations: To share the selected message(s) with others, tap... -
Page 43: Managing Contacts
5.3.2 Managing Contacts To manage a contact, tap the contact in the contact list, and you can perform the following operations shown in the figure below. 5.3.3 Searching for Contacts To quickly find a contact in the contact list, do as follows: 1. -
Page 44: Other Operations
5.3.6 Other Operations In the Contacts interface, tap , and then you can perform the following operations: To view the contacts saved in the SIM card or the terminal, tap SIM 1, SIM 2, or Device. To configure the settings, tap Settings and customize your settings such as your profile, accounts, ... -
Page 45: Multimedia Services
6. Multimedia Services 6.1 Snapdragon Camera Snapdragon Camera allows you to shoot photos and videos. To open the camera, do one of the following: When the screen is unlocked, tap to open the camera. When the screen is locked, wake the screen, tap and hold at the lower right corner, and then ... - Page 46 1. Tap to open camera. 2. Switch to the photo mode. 3. (Optional) Tap to switch the front/rear camera. 4. (Optional) Zoom in or zoom out to increase or decrease the focal length. 5. Tap to take the photo. To view the photo you have taken, tap the thumbnail button. Other Operations Selecting a capture mode ...
- Page 47 GPS Location: Tap GPS Location and select Off or On. With this feature turned on, your geographic location will be recorded when you take a photo. Picture Size: Tap Picture size and select the picture resolution. A photo of higher resolution ...
-
Page 48: Video Mode
6.1.2 Video Mode The following figure shows the options available in the video mode. Recording a Video To record a video, do as follows: 1. Tap to open camera. 2. Switch to the video mode. 3. (Optional) Tap to switch the front/rear cameras. 4. -
Page 49: Panoramic Mode
Other Operations In the viewfinder, tap , and then you can perform the following operations: Flash: Tap Flash and select On or Off. The flash provides extra lighting when you record videos in dim light conditions. Video Quality: Tap Video quality and select the video resolution. A video of higher resolution ... -
Page 50: Viewing Pictures Or Videos
6.2.1 Viewing Pictures or Videos Open the Snapdragon Gallery, tap at the upper left corner: Tap Timeline to view all pictures and videos by the time they were taken. Tap Albums to view pictures and videos taken by camera, downloaded images, or screenshots. ... -
Page 51: Cutting Videos
to play the video in full screen, and tap to exit. to capture a video screenshot. 6.2.3 Cutting Videos 1. In the gallery, select the video you want to cut. 2. Tap and select Trim. 3. On the progress bar, move the two blue balloons to set the starting and ending points, and then tap SAVE. -
Page 52: Sharing Pictures Or Videos
to beautify face in the portrait photo. to calibrate the lenses. to remove the haze from the picture. to enhance pictures of people. to add a watermark to the picture. 3. After editing, tap SAVE in the upper right corner. 6.2.5 Sharing Pictures or Videos To share a picture or video, do as follows: 1. -
Page 53: Other Operations
Artists, Albums, Songs, or Playlists. In the music play interface, you can perform the following operations: to pause playing. to resume playing. to enable or disable the repeat playback. to enable or disable the shuffle play. to play the previous or next song. -
Page 54: Google Apps
7. Google Apps A Google account is required before you use the Google apps. Otherwise, your access to Google services may be totally or partially restricted. To create your Google account, you can: Follow the setup instructions of the terminal in 2.1 Activating the Terminal. -
Page 55: Webpage Settings
To open a new webpage, tap To switch among multiple webpages, swipe up or down the webpages, and then select the page you want to view. To close a webpage, tap on the selected webpage, or swipe it left or right. ... -
Page 56: History
To manage a bookmark, tap and hold the desired bookmark in the list, or tap next to each bookmark, and then you can edit, move, or delete the bookmark. 7.1.4 History To view the history websites you have visited, tap Settings >... -
Page 57: Google
Google Gmail™ allows you to send and receive emails, and manage the emails in different boxes. You can archive important emails, or delete the ones you no longer need. With spam filtering feature, you can also use Gmail to block spam for a better experience. For details of the app, visit http://support.google.com/gmail. -
Page 58: Play Music
For details of the app, visit http://play.google.com/store/movies. 7.9 Play Music Google Play Music™ allows you to listen to music online and offline. With the music streaming service, you can listen to the online songs in the Google catalog. You can also download the songs and store them on the app for offline playback. -
Page 59: Utility Apps
8. Utility Apps 8.1 File Manager File Manager allows you to manage all your files, including pictures, videos, audio files, and downloaded applications. 1. Tap 2. View files. a. tap on the left side of the screen. b. Do one of the following: To view files by categories, tap Images, Videos, Audio, Recent, or Downloads. -
Page 60: Viewing Recording Files
2. Tap to start recording. During recording, tap to pause, and tap again to continue recording. 3. Tap to finish the recording. The "Save recording?" dialog appears. 4. Enter the file name and tap SAVE. 8.2.2 Viewing Recording Files To view the recording files, do as follows: 1. -
Page 61: Clock
8.3 Clock The Clock can manage the alarm clock, world clock, timer and stopwatch. To open the Clock, type 8.3.1 Setting the Alarm Clock To set an alarm, do as follows: 1. Tap ALARM to enter the alarm interface. 2. Tap to add an alarm. -
Page 62: Using The Timer
8.3.3 Using the Timer To use timer, do as follows: 1. Tap to enter the timer interface. 2. Enter the desired time duration. 3. Tap to start the countdown. During the countdown, you can perform the following operations: to pause the timer. ... -
Page 63: Adding Activities
In the Calendar interface, Tap . Select Settings. Tap ADD ACCOUNT in the upper right corner, and then add a personal mailbox account. 8.4.2 Adding Activities After adding an account, you can add an activity through the calendar. Do as follows: In the Calendar interface, tap . -
Page 64: Calculator
If you tap… You can… Default reminder time select the time to remind you of an event in advance. 8.5 Calculator The Calculator allows you to perform basic calculations. To open the Calculator, tap in the app center, and then swipe left or right to enter the math symbols or numbers. -
Page 65: System Upgrade
9. System Upgrade C au tio n Use the official software only to upgrade the system, to prevent equipment failure, data loss, or damage to the system security. Be sure to back up your data before upgrade. Ensure that the battery power is more than 30% before upgrading. The terminal prompts in the status bar when the latest software version becomes available. -
Page 66: Troubleshooting
10. Troubleshooting Phenomena Analysis Solution The battery may be improperly Remove and reattach the battery. installed. The battery power may run out. Recharge or replace the battery. You cannot turn The battery may suffer from poor on the terminal. contact caused by dirty or damaged Clean the battery contacts. - Page 67 Phenomena Analysis Solution service. the data service. Ensure that the terminal is within signal The signal is poor. coverage. The terminal is connected to Wi-Fi and the cellular data network. But the Disconnect the Wi-Fi network. Wi-Fi network is unstable. Ensure that the terminal is within signal The signal is poor.
-
Page 68: Care And Cleaning
11. Care and Cleaning To guarantee optimal performance as well as a long service life of the terminal, follow the tips below. 11.1 Product Care Do not pierce or scrape the screen of the terminal. Do not drop the terminal or collide with other objects. ... -
Page 69: Optional Accessories
12. Optional Accessories C au tio n Use the accessories specified by Hytera only; otherwise, we will not be liable for any loss or damage arising out of the use of any unauthorized accessories. Contact your dealer for the optional accessories used with the terminal.
Need help?
Do you have a question about the PNC 550 and is the answer not in the manual?
Questions and answers
Hard reset sıfırlamak nasıl olur
To perform a hard reset (factory reset) on the Hytera PNC 550:
1. Tap System > Reset Options.
2. Tap Erase all data (factory reset).
3. Tap RESETTING PHONE.
4. Tap ERASE EVERYTHING to confirm the reset.
This answer is automatically generated