Advertisement
Quick Links
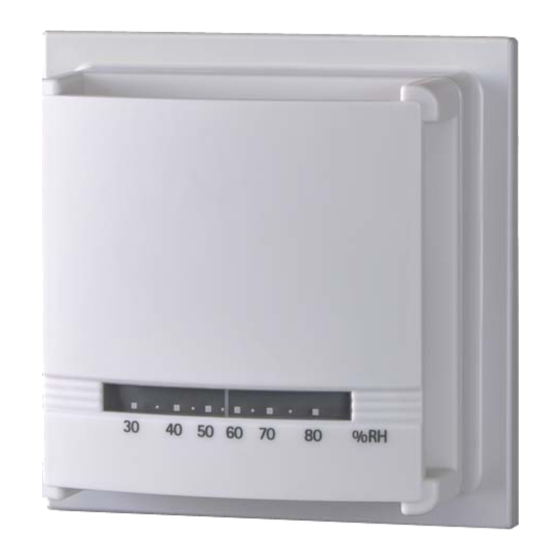
Room Humidistat (Proportional Type)
General
Neostat Model HY9000Z is an electric room humidistat that is
similar in design and size to Neosensor, the electronic room
temperature or humidity sensor.
A moisture-sensitive nylon ribbon is adopted for the
humidistat.
Features
●
Simple connection to our actuator allows easy humidity
control.
●
Compact (thin) and lightweight.
●
Several installation types selectable in combination with
optional auxiliary devices.
Model Numbers
Model number
HY9000Z8000
HY9000Z8000-1
Note:
* Use Neostat (proportional type) with our Control Motor or ACTIVAL™.
Neostat
Control action
Proportional*
Range
30 %RH to 80 %RH
1
AB-7259
Specifications/Instructions
Our corporate logo (on the cover)
Printed
Not printed
Advertisement

Summary of Contents for Azbil Neostat HY9000Z
- Page 1 AB-7259 Specifications/Instructions Neostat Room Humidistat (Proportional Type) General Neostat Model HY9000Z is an electric room humidistat that is similar in design and size to Neosensor, the electronic room temperature or humidity sensor. A moisture-sensitive nylon ribbon is adopted for the humidistat.
- Page 2 Azbil Corporation will not bear any responsibility for the results produced by the operators. Warnings and Cautions ...
- Page 3 AB-7259 Part Numbers of Optional Items Mount Neostat with the following optional items (sold separately). Order necessary items. Item Part number/Model number Note Dedicated mounting kit Wall-direct mounting kit Part No. 83165803-001 — Thermoplate mounting kit Part No. 83165803-011 — Multi-Thermocase mounting kit Part No.
- Page 4 AB-7259 Specifications Item Specification Proportional bands Approx. 12 %RH fixed (at 50 %RH) Sensing element Nylon ribbon Power supply 24 V AC -15/+10 % (50 Hz/60 Hz) Environmental conditions Rated operating conditions Transport/storage conditions Ambient temperature 15 °C to 40 °C -20 °C to 50 °C Ambient humidity 10 %RH to 95 %RH (non-condensing)
- Page 5 AB-7259 Neostat with Thermoplate mounting kit Thermoplate mounting kit Thermoplate (optional) 12.5* Heat sink Mounting Connectors for connection check surface Thermoplate mounting kit Note: * Secure more than 12.5 mm clearance from the Thermoplate surface to the inside of the mounting wall when installing Neostat with Thermoplate mounting kit.
- Page 6 AB-7259 Neostat (without the cover) with Multi-Thermocase mounting kit (to mount in Multi-Thermocase) When installing Neostat in the optional Multi-Thermocase, remove the cover of Neostat. 72.8 Multi-Thermocase mounting kit 72.8 Figure 5. Mounting dimensions (mm): Neostat (not covered) with Multi-Thermocase mounting kit Multi-Thermocase mounting kit ⌀3.4 mounting hole 66.7*...
- Page 7 AB-7259 Installation CAUTION Use the product under the operating conditions (temperature, humidity, power, vibration, shock, mounting direction, atmospheric condition, etc.) as listed in the specifications. Failure to do so might cause fire or device failure. Installation and wiring must be performed by qualified personnel in accordance with all applicable safety standards. Requirements for installation location IMPORTANT: ●...
- Page 8 AB-7259 Cover removal To remove the cover: Press the spring, located on the upper center part of the Neostat main unit, using a thin object. To attach the cover: Engage the tabs, located on the lower part of the cover, with the slots on the lower part of the main unit. Then fix the cover with the spring, located on the upper center part of the Neostat main unit.
- Page 9 AB-7259 Installation steps: Neostat directly on a wall with Wall-direct mounting kit 1) Attach the mounting plate of the Wall-direct mounting kit to the outlet box cover (JIS C8340:1999 Boxes and box covers for rigid metal conduits (mounting dimension: 66.7 mm)) on the mounting surface with tow pan-head machine screws (M4 x 8) supplied with Wall-direct mounting kit.
- Page 10 AB-7259 Installation steps: Neostat on Thermoplate for open wiring with Wall-direct mounting kit 1) Attach the mounting plate of the Wall-direct mounting kit to the Thermoplate for open wiring on the mounting surface with two pan-head machine screws (M4 x 8) supplied with Wall-direct mounting kit. 2) Attach the main unit of Wall-direct mounting kit to the mounting plate with one flat-head machine screw (M3 x 16) supplied with Wall-direct mounting kit.
- Page 11 AB-7259 Installation steps: Neostat on Thermoplate with Thermoplate mounting kit 1) Attach the mounting plate of Thermoplate to the outlet box cover (JIS C8340:1999 Boxes and box covers for rigid metal conduits (mounting dimension: 83.5 mm)) on the mounting surface with two pan-head machine screws (M4 x 8) supplied with Thermoplate.
- Page 12 AB-7259 Installation steps: Neostat in Multi-Thermocase with Multi-Thermocase mounting kit 1) Attach the main unit of the Multi-Thermocase mounting kit to the device mounting plate of Multi-Thermocase with two pan-head machine screws (M3 x 6). 2) Connect the lead wires of Neostat to the wires from the load. 3) Remove the cover from the Neostat main unit.
- Page 13 AB-7259 4) Fix the raised Neostat main unit to the Wall-direct Protection from radiation and conduction heat mounting kit with four mounting screws. To protect the measuring accuracy from disturbances (including radiation and conduction heat) caused by the wall where Neostat is mounted, the distance between the Neostat sensing element and the wall can be changed by extending the depth of the Neostat main unit.
- Page 14 AB-7259 Wiring CAUTION Installation and wiring must be performed by qualified personnel in accordance with all applicable safety standards. All wiring must comply with applicable codes and ordinances. Before wiring, be sure to turn off the power to the product. ...
- Page 15 AB-7259 Setting Humidity setting range of Neostat is variable. You can either set the setting range or lock the setting. The center of the proportional band is setpoint (which is, 50 % position of the proportional band when humidity falls). High and low limits of the range 1) Remove the cover of Neostat.
- Page 16 AB-7259 ACTIVAL is a trademark of Azbil Corporation in Japan or in other countries. Specifications are subject to change without notice. Building Systems Company http://www.azbil.com/ Rev. 0.0 Jan. 2014 AB-7259 (J: AI-7259 Rev. 0.0)
Need help?
Do you have a question about the Neostat HY9000Z and is the answer not in the manual?
Questions and answers