
Subscribe to Our Youtube Channel
Summary of Contents for Ducar DR40
- Page 1 car er / Lawn dethatcher erat r an a Before using your scarifier, please read this manual carefully to understand the proper use of your unit. Keep this manual handy.
-
Page 2: Table Of Contents
Contents 1. Know your scarifier ............3 2. Symbols marked on the product ..........3 3. General safety information ..........4 3.1 Training................4 3.2 Preparation ................. 4 3.3 Operation................5 3.4 Maintenance and storage ............ 5 Layout and items supplied ..........9 4.1 Layout ................ -
Page 3: Know Your Scarifier
1.Know your scarifier Read this manual carefully, observing the recommended safety instructions before, during and after using your lawn mower. Following these simple instructions will also maintain you lawn mower in good working order. Familiarize yourself with the controls on your mower before attempting to operate it, but above all, be sure you know how to stop your mower in an emergency. 2.Symbols marked on the product Read this instruction book carefully before using the lawn mower and keep it in a safe place for future reference Keep bystanders away. Sharp tines‐Beware of cutting fingers or toes Remove spark plug lead before maintenance Wear eye protection Wear ear protection Carbon monoxide (CO) danger ... -
Page 4: General Safety Information
3. General safety information IMPORTANT READ CAREFULLY BEFORE USE KEEP FOR FUTURE REFERENCE Read the operating instructions carefully. Be familiar with the controls and the proper use of the machine. Local regulations can restrict the age of the operator. 3.1 Training a) Read the instructions carefully. -
Page 5: Operation
3.3 Operation b) operate the machine only in daylight or in good artificial light; c) avoid operating the machine in wet grass or take additional precautions to avoid slipping; d) always be sure of your footing on slopes; e) walk, never run; f) always work across the face of slopes, never up and down;... - Page 6 g) if the fuel tank has to be drained, this should be done outdoors. The drained fuel should be stored in a container specifically designed for fuel storage or it should be disposed of carefully.
- Page 8 min. max.
-
Page 9: Layout And Items Supplied
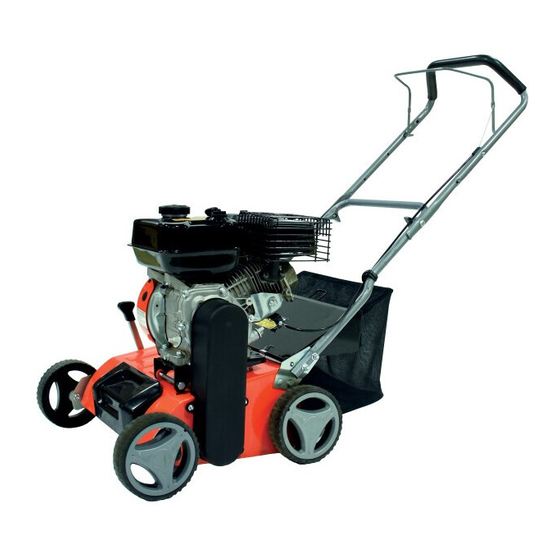
4. Layout and items supplied 4.1 Layout (Fig. 1/2) 1. Engine start/stop lever – engine brake 2 fastening nuts for top push bar 4 fastening screws for bottom push bar 2. Top push bar 4 fastening nuts for bottom push ba 3. Bottom push bar 4. Scarifying depth cable securing clips 2 fastening screws for top push bar 5. Ejector flap 6 Grass basket 4.2 Items supplied Please check that the article is complete as specified in the scope of delivery. If parts are missing, please contact our service center or the sales outlet where you made your purchase at the latest within 5 working days after purchasing the product and upon presentation of a valid bill of purchase. Also, refer to the warranty table in the service information at the end of the operating instructions. Open the packaging and take out the equipment with care. Remove the packaging material and any packaging and/or transportation braces (if available). Check to see if all items are supplied. Inspect the equipment and accessories for transport damage. If possible, please keep the packaging until the end of the guarantee period. Danger! The equipment and packaging material are not toys. Do not let children play with plastic bags, foils or small parts. There is a danger of swallowing or suffocating! 5. Proper use The equipment is designed for scarifying lawned areas. The scarifying process is designed for ripping moss and weeds ‐ complete with their roots. Out of the soil and for loosening the soil. As a result your lawn can absorb nutrients better and is cleaned. We recommend you to scarify you lawn in the spring (April) and autumn (October). Important! ... -
Page 10: Technical Data
Please note that our equipment has not been designed for use in commercial, trade or industrial applications. Our warranty will be voided if the machine is used in commercial, trade or industrial businesses or for equivalent purposes. 6. Technical data Engine DH212 1 cylinder, 4-stroke Engine oil (L) Displacement (cc) Blades (number) Engine Power (kW) Blade diameter (mm) Engine rated speed 3600 Depth setting (mm) -15 - +5 (r/min) Working speed (r/min) 2800 Working width(mm) Fuel type Unleaded petrol Tank capacity (L) -
Page 11: Operation
8. Operation Important! The engine does not come with oil in it. Therefore, be sure to add oil before starting the engine. The oil level in the engine must be checked each time before carrying out any work. Important! When the engine brake lever is released it must return to its initial position and the engine must stop. If this is not the case, do not use the equipment again. 8.1 Starting the equipment (Fig. 6 – 7) In order to avoid any unintentional start‐ups of the engine, it comes equipped with an engine brake (Fig. 6/Item 1) which must be pressed at all times whilst the device is in use, otherwise the engine will stop. Open the petrol cock (Fig. 7 / Item B). Set the cock to “ON” for this purpose. Set the choke lever (Fig. 7/Item C) to the “Choke” position. Note: Normally the choke is not required to restart a warm engine. Move the throttle lever (Fig. 1 / Item 7) to the center position. Press the engine brake lever (Fig. 6 / Item and pull the starter cable (Fig. 7 / Item A) forcefully until the engine starts. Allow the engine to warm up briefly and then set the choke lever (Fig. 7 / Item B) to the “RUN” Position. The speed of the cutter unit can be controlled using the throttle lever (Fig. 6 / Item 7) (tortoise = slow / rabbit = fast). Important! Always pull the starter cable slowly until you feel the initial resistance before you then pull it quickly to start the engine. Do not allow the starter cable to whip back of its own accord. Important! The scarifier roller begins to rotate as soon as the engine is started. Important! Never open the ejector flap when the motor is running. A rotating cutting unit can cause injuries. Always fasten the ejector flap carefully. The flap flips back to the “Closed” position by the tension springs! Always ensure that a safe distance (provided by the long handles) is maintained between the user and the housing. Be especially careful when scarifying and changing direction on slopes and inclines. Maintain a solid footing and wear sturdy, non‐slip footwear and long trousers. Always sca‐ rify along the incline (not up and down). For safety reasons, the scarifier may not be used to scarify inclines whose gradient exceeds 15 degrees. Use special caution when backing up and pulling the scarifier (tripping hazard)! 8.2 Adjusting the working depth (Fig. 8) ... -
Page 12: Cleaning, Maintenance, Storage, Transport And Ordering Of
Important! For transport move the lever for setting the depth to the highest position. Tips for proper working It is recommended that you overlap scarifying paths a little. Try to scarify in straight lines for a nice, clean look. Insodoing, the aeration swaths should always overlap each other by a few centimeters in order to avoid bare strips. -
Page 13: Servicing
9.2 Servicing Checking the oil level Set the equipment down on a fl at, level surface. Unscrew the oil dipstick by turning it anti-clockwise. The oil level must be as shown in page 8 - Figure 10. Oil Recommendations • We recommend the use of our Warranty Certifi ed oils for best performance. Other high-quality detergent oils are acceptable if classifi ed for service SF, SG, SH. -
Page 14: Preparing The Equipment For Storage
Never run the engine with no or too little oil. This can cause serious damage to the engine. Changing the oil a) Change the engine oil every year before the start of the season (in addition to the informa- tion in the petrol service manual) when the engine is warm. b) Use only recommended engine oil. -
Page 15: Preparing The Device For Transport
- Have the blades replaced by a customer does not service workshop. operate smoothly and Motor is V-belt torn - Have the V-belt replaced by a cus- tomer running, roller service workshop. 12. Warranty Ducar power products are covered by a one-year limited consumer warranty.
Need help?
Do you have a question about the DR40 and is the answer not in the manual?
Questions and answers