Advertisement
Quick Links
Advertisement

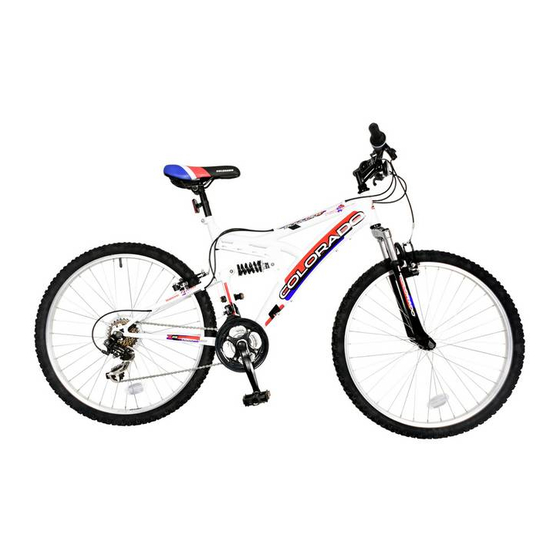
Summary of Contents for COLORADO Boulder
- Page 1 INSTRUCTION MANUAL HELPLINE CALL FCSI LTD ON 01789 207419...
- Page 2 TABLE OF RECOMMENDED TORQUE VALUES TABLE OF RECOMMENDED TORQUE VALUES TABLE OF RECOMMENDED TORQUE VALUES DESCRIPTION DESCRIPTION TORQUE TORQUE DESCRIPTION TORQUE A-Head Steerer Clamp Bolts A-Head Steerer Clamp Bolts 20Nm 20Nm A-Head Steerer Clamp Bolts 20Nm (where fitted) (where fitted) (where fitted) Stem Binder Bolt Stem Binder Bolt...
-
Page 3: Warranty
Roux bikes are guaranteed against material defects or faults of manufacturing from the date of the original purchase as follows. COLORADO bikes are guaranteed against material defects or faults of manufacturing from the date of the original purchase as follows. - Page 4 Page 3 Page 3...
- Page 5 YOUR BICYCLE — OWNER’S RESPONSIBILITY YOUR BICYCLE — OWNER’S RESPONSIBILITY Owner’s Responsibility and Important Points Owner’s Responsibility and Important Points Point 1 Carefully and thoroughly read this manual and follow the Point 1 Carefully and thoroughly read this manual and follow the instructions.
- Page 6 Every six months (more frequently if high mileage or subject to heavy use) your bicycle Every six months (more frequently if high mileage or subject to heavy use) your bicycle should be professionally checked to ensure that it is in correct and safe working order. should be professionally checked to ensure that it is in correct and safe working order.
- Page 7 General Suspension Units Notes General Suspension Units Notes Your cycle may be fitted with suspension units built into parts of the frame and forks Your cycle may be fitted with suspension units built into parts of the frame and forks We recommend these are serviced by your dealer as required.
- Page 8 HANDLEBARS AND STEMS HANDLEBARS AND STEMS As your cycle may be fitted with a standard ‘quill’ stem or an A-Head stem, you must always As your cycle may be fitted with a standard ‘quill’ stem or an A-Head stem, you must always check that all the bolts are tight before cycling.
- Page 9 Recessed Type Standard Stem Recessed Type Standard Stem Stem Expander Binder Bolt 6mm Allen Key Bolt Stem Expander Binder Bolt 6mm Allen Key Bolt Handlebar Handlebar Stem Bolt (Allen Head) Stem Bolt Minimum Insertion (Allen Head) Mark Minimum Insertion Mark A-Head Type A-Head Type Compression Cap...
- Page 10 BRAKE MAINTENANCE BRAKE MAINTENANCE 1. Check cables are corrosion free and lubricated to maintain smooth function. 1. Check cables are corrosion free and lubricated to maintain smooth function. 2. Check all cables are free of kinks or frayed section, replace as necessary. 2.
- Page 11 Brake Pipe 4. Locate the brake cable wire into position behind Brake Pipe Hanger Brake Pipe 4. Locate the brake cable wire into position behind 4. Locate the brake cable wire into position behind Hanger Hanger the pinch bolt (some have a hole to thread the wire the pinch bolt (some have a hole to thread the wire the pinch bolt (some have a hole to thread the wire through).
- Page 12 9. It is possible to alter the rest position of the brake lever by screwing in the reach 9. It is possible to alter the rest position of the brake lever by screwing in the reach adjuster screw which pushes the lever nearer to the handlebars. If you utilise this adjuster screw which pushes the lever nearer to the handlebars.
- Page 13 CHAIN TENSION CHAIN TENSION If your cycle has a single rear gear sprocket (internal gears or single speed cycles). You If your cycle has a single rear gear sprocket (internal gears or single speed cycles). You may need to adjust the chain tension from time to time or after rear wheel removal. To may need to adjust the chain tension from time to time or after rear wheel removal.
- Page 14 GATES CARBON DRIVETM (GCD) GATES CARBON DRIVETM (GCD) GATES CARBON DRIVETM (GCD) GATES CARBON DRIVETM (GCD) GATES CARBON DRIVETM (GCD) Crimping Crimping Twisting Twisting Back Back Inverting Inverting Zip tieing Zip tieing Crimping Crimping Twisting Twisting Back Back Inverting Inverting Zip tieing Zip tieing bending...
- Page 15 DERAILLEUR GEARS INTRODUCTION DERAILLEUR GEARS INTRODUCTION DERAILLEUR GEARS INTRODUCTION The derailleur gear is so named because it works on the derailing principle to move the The derailleur gear is so named because it works on the derailing principle to move the chain from one sprocket to another.
- Page 16 Page 15 Page 15 Page 15...
- Page 17 TYRE CARE AND WHEEL ADJUSTMENTS CONTINUED TYRE CARE AND WHEEL ADJUSTMENTS CONTINUED QUICK RELEASE FRONT WHEEL QUICK RELEASE FRONT WHEEL To remove the front wheel, first release the front wheel brake. The release the To remove the front wheel, first release the front wheel brake. The release the quick-release lever on the axle and pull the wheel from the forks.
- Page 18 STANDARD WHEEL ADJUSTMENT & REMOVAL STANDARD WHEEL ADJUSTMENT & REMOVAL To Remove Rear Wheel Move the chain onto the smallest rear sprocket. Disengage the brake quick release lever To Remove Rear Wheel if your bicycle is so equipped. Loosen both axle nuts by turning in a counter clockwise Move the chain onto the smallest rear sprocket.
- Page 19 BIKE CARE Page 18 Page 18...
- Page 20 GENERAL MAINTENANCE GENERAL MAINTENANCE WARNING: As with all mechanical components, the bicycle is subjected to wear and high WARNING: As with all mechanical components, the bicycle is subjected to wear and high stresses. Different materials and components may react to wear or stress fatique in stresses.
- Page 21 Page 20 Page 20 Page 20 Page 20...
- Page 22 TYRE CARE TYRE CARE To obtain maximum life and full benefit from your tyres, it is essential to maintain the To obtain maximum life and full benefit from your tyres, it is essential to maintain the recommended pressure indicated on the tyre sidewall. recommended pressure indicated on the tyre sidewall.
- Page 23 BICYCLES STANDARDS BICYCLES STANDARDS Roux bikes are manufactured to comply with ISO 4210 -2 this covers city and trekking, young adult, mountain and racing bicycles. This part of ISO 4210 does not apply to Roux bikes are manufactured to comply with ISO 4210 -2 this covers city and trekking, specialized types of bicycle, such as delivery bicycles, recumbent bicycles, tandems, young adult, mountain and racing bicycles.
Need help?
Do you have a question about the Boulder and is the answer not in the manual?
Questions and answers