Table of Contents
Advertisement
Quick Links
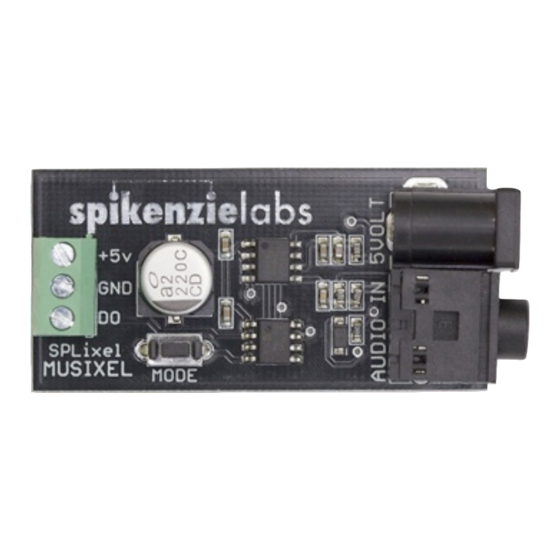
Musixel Build Guide
1
Place the parts onto the PCB. Make sure the openings point towards the outside of the board.
2
Solder the legs where the red circles indicate.
(Component legs not shown for clarity.)
Quick soldering tips:
Prep: Allow your soldering iron to get hot. Melt a small amount of solder on the tip of the soldering iron, so that it is shiny and not globby.
Touch iron to
both pin and pad.
Wait about 2
seconds.
Caution:
Avoid breathing the fumes. Wash your hands before eating or drinking. Wear safety glasses. Clean up small pieces.
Touch solder to the
pin and pad.
(Not the iron)
Solder should start to melt.
Allow solder to flow
onto pin and pad.
Remove solder.
Count 2 seconds with
the iron still touching.
Remove iron.
Note: Solder should
be smooth and shiny.
Trim with flush
cutters if needed.
WEAR SAFETY
GLASSES!
Advertisement
Table of Contents

Related Manuals for spikenzielabs Musixel

Summary of Contents for spikenzielabs Musixel
- Page 1 Musixel Build Guide Place the parts onto the PCB. Make sure the openings point towards the outside of the board. Solder the legs where the red circles indicate. (Component legs not shown for clarity.) Quick soldering tips: Prep: Allow your soldering iron to get hot. Melt a small amount of solder on the tip of the soldering iron, so that it is shiny and not globby.
- Page 2 Musixel will light up to 64 LEDs Don’t place the Musixel on a conductive surface. Eg: Keys / Change / Metal table The Standard Musixel Kit comes with a 16 LED (WS2812B) strip. Every Musixel comes pre-programmed with nine modes. Some modes are designed Musixel for 16 LEDs, and some for an optional strip of 64 LEDs.
Need help?
Do you have a question about the Musixel and is the answer not in the manual?
Questions and answers