Table of Contents
Advertisement
Quick Links
Advertisement
Table of Contents

Subscribe to Our Youtube Channel
Related Manuals for YOKOGAWA FG410


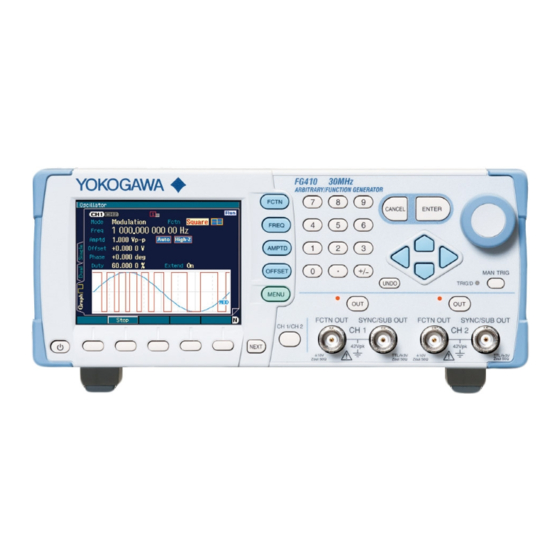
Summary of Contents for YOKOGAWA FG410
- Page 1 User's Manual FG410/FG420 ARBITRARY WAVEFORM EDITOR IM FG410-61EN 3rd Edition...
- Page 2 Registered Trademarks IBM and AT are registered trademarks of International Business Machines, Inc. Microsoft is a registered trademark of Microsoft Corporation. Windows is a trademark of Microsoft Corporation. Adobe and Acrobat are trademarks of Adobe Systems, Inc. Other company or product names are generally trademarks or registered trademarks of the company to which each relates.
-
Page 4: Preface
Preface Thank you for purchasing the FG410/FG420 Arbitrary/Function Generator. To ensure safe use of this product, please first read Safety Precautions on the following pages. ◼ Before Reading This Manual This manual is a PDF file stored in the CD-ROM. Acrobat Reader (Adobe Systems, Inc.) Ver. 5 or higher is required to view the file contents. -
Page 5: Safety Precautions
Safety Precautions To ensure safe use, be sure to observe the following warnings and cautions. Yokogawa Test & Measurement Corporation shall not be held liable for damages that arise from failure to observe these warnings and cautions. Be sure to observe the contents of this instruction manual. -
Page 6: Disclaimer
Reproduction of this instruction manual without permission, either in part or in whole, is prohibited. ABOUT CONTACT If a problem occurs or if you have questions, contact Yokogawa Test & Measurement Corporation or the Yokogawa Test & Measurement Corporation sales representative where you purchased this product. -
Page 7: Table Of Contents
Vertical zoom ................... 4-5 4.5.2 Horizontal zoom ..................4-5 4.5.3 Scrolling ....................4-5 4.5.4 Marker and range selection ..............4-5 4.5.5 Marker operations ..................4-6 4.5.6 Range selection ..................4-7 File Operations and Printing ................4-9 4.6.1 File types ....................4-9 IM FG410-61EN... - Page 8 File operations ..................5-29 5.6.7 Print ......................5-30 5.6.8 Initial values ................... 5-30 ERROR MESSAGES ......................6-1 Arbitrary Wave Edit Software Error ..............6-2 MAINTENANCE ....................... 7-1 Handling CD-ROM....................7-2 Replacement of Damaged CD-ROM ..............7-2 Version Check ....................... 7-2 IM FG410-61EN...
- Page 9 Table 5-9 Surge Group ......................5-20 Table 5-10 Others Group ..................... 5-20 Table 5-11 Examples of Custom Units for the Horizontal Axis ......... 5-24 Table 5-12 Signal Generator Setting .................. 5-27 Table 5-13 Initialized Values ....................5-30 Table 6-1 Error Messages ..................... 6-2 IM FG410-61EN...
-
Page 10: Overview
1. OVERVIEW General ······························································ 1-2 Function Tree ······················································ 1-2 Conventions ························································ 1-5 ARB Edit... -
Page 11: General
1.1 General General The Arbitrary Waveform Editor is software that supports FG410/FG420 Arbitrary/Function Generator arbitrary wave function. The Arbitrary Waveform Editor operates on Windows on a personal computer (PC), transferring waveform and other data via USB. The main functions of the Arbitrary Waveform Editor are listed below. - Page 12 X Axis Start Point Decompress X Axis End Point Decompress to Entire X Axis Y Axis Max/Min Y Axis Amplitude/ Amplitude Offset Offset Decompress to Max. Amplitude with Fixed Offset Decompress to Max. Amplitude Cancel (Continued on next page) IM FG410-61EN...
- Page 13 Maximum Value Setting Y Axis Unit Setting Unit Unit Name Minimum Value Setting Maximum Value Setting Waveform Waveform Memory Name Memory Waveform Memory Number Settings Transfer Method Waveform Memory Size Waveform Data Transfer Waveform Data Read (Continued on next page) IM FG410-61EN...
-
Page 14: Conventions
• Press one key while holding down another key: Two keys are connected by a plus (+) symbol. Example: Ctrl + O • Press one key, release it and press another key: Two keys are divided by a comma (,). Example: Alt , F IM FG410-61EN... - Page 15 1.3 Conventions IM FG410-61EN...
-
Page 16: Installation
Hardware Requirements ········································ 2-2 2.1.1 Personal computer ········································· 2-2 2.1.2 USB interface ················································ 2-2 Installation Procedure ··········································· 2-3 2.2.1 Installing the USB driver software ······················ 2-3 2.2.2 Installing Arbitrary Waveform Editor ··················· 2-4 2.2.3 Uninstalling Arbitrary Waveform Editor ················ 2-4 IM FG410-61EN... -
Page 17: Hardware Requirements
The company and product names are trademarks or registered trademarks of their respective owners. CAUTION The CD-ROM drive is required only when the software is installed. This software does not support Windows 10 tablet mode. 2.1.2 USB interface USB 1.1 Full Speed ⚫ IM FG410-61EN... -
Page 18: Installation Procedure
The installation process starts automatically. Follow the guidance. CAUTION If GPIB is selected as the remote interface of the FG410/FG420, select USB and then follow the procedure described above. For details, refer to the “FG400 Arbitrary/Function Generator Communication Interface User ’s Manual”. -
Page 19: Installing Arbitrary Waveform Editor
2.2 Installation Procedure 2.2.2 Installing Arbitrary Waveform Editor (a) Insert the “FG410/FG420 ARBITRARY/FUNCTION GENERATOR” CD-ROM into the CD-ROM drive of the PC. (b) Execute [English\Application\ARB_EDIT\Setup.EXE] on the CD-ROM or [D: \English\Application\ARB_EDIT\Setup.EXE] from [Run] on the start menu. [D:] indicates the CD-ROM drive. If another drive letter is assigned to the CD -ROM driver, assign it appropriately, according to your system. -
Page 20: For First-Time Users
Numerical Expression Waveform ····························· 3-5 Waveform Generation Through Interpolation ·············· 3-6 Compression and Extension of Waveform - 1 ············· 3-7 Compression and Extension of Waveform - 2 ············· 3-8 Operation Between Waveforms ······························· 3-9 3.10 Waveform Generation Through PWF ······················ 3-10 IM FG410-61EN... -
Page 21: General
3.6 Waveform Generation 3.7 Compression and 3.8 Compression and Through Interpolation Extension of Waveform - 1 Extension of Waveform - 2 3.9 Operation Between 3.10 Waveform Generation Waveforms Through PWF Figure 3-1 Examples of Waveforms Described in This Chapter IM FG410-61EN... -
Page 22: Start And Termination
The same result can be obtained when [Tools] - [Wave Create] is selected. The screen titled [YOKOGAWA ARB Edit - Wave Create] appears. button to the right of [Function] and click [Triangle] from the list. -
Page 23: Copying And Pasting A Waveform
For example, when the range specified with the markers is from 0 to 1.000, the actual selection range will be 0 ≤ X < 1.000. Explanation 4: For the clipboard, see “4.7.2 Clipboard” and your Windows OS manual. IM FG410-61EN... -
Page 24: Numerical Expression Waveform
Step 1: Select [Setup] - [Setup]. The screen titled [YOKOGAWA ARB Edit - System Setup] appears. Step 2: Click the [Unit] page tab. button to the right of [X-Axis Unit] and click [User Unit] from the Step 3: Click the displayed list. -
Page 25: Waveform Generation Through Interpolation
This section explains how to create a smooth pulse waveform, as a sample of generating a waveform through interpolation. Step 1: Select [Setup] - [Setup] to display the dialog box titled [YOKOGAWA ARB Edit - System Setup]. Next, click the [Unit] page tab. -
Page 26: Compression And Extension Of Waveform - 1
The same result can be obtained when [Tools] - [Compress/Decompress] is selected. The screen titled [YOKOGAWA ARB Edit - Compress/Decompress] appears. Step 3: In the initial status, [1.000000] is displayed to the right bottom of the waveform display screen. -
Page 27: Compression And Extension Of Waveform - 2
The same result can be obtained when [Tools] - [Compress/Decompress] is selected. The screen titled [YOKOGAWA ARB Edit - Compress/Decompress] appears. Step 3: Change the setting in the number area to the right of [Max.(X)] from [1.0] to [3.0] and press the Enter key. -
Page 28: Operation Between Waveforms
Step 3: Click the Created Waveform button in the middle of the inter-waveform operation screen. The screen titled [YOKOGAWA ARB Edit – Waveform Create] appears as when button is clicked. button to the right of [Function] and click [Noise] from the displayed Step 4: Click the list. -
Page 29: 3.10 Waveform Generation Through Pwf
Step 1: Click the button at the top left of the screen. The same result can be obtained when [Tools]-[PWF] is selected. The screen titled [YOKOGAWA ARB Edit - Parameter-Variable Waveform Create] appears. Step 2: Click the button to the right of [Function], and then click [On-Ph Ctrl Sine] in the list. -
Page 30: Operations On Arbitrary Waveform Display Screen
4.6.1 File types ····················································· 4-9 4.6.2 New ···························································· 4-9 4.6.3 Specialized format file ··································· 4-10 4.6.4 Text file ······················································ 4-10 4.6.5 Print ·························································· 4-12 Copy and Paste ················································· 4-13 4.7.1 Edit operation ·············································· 4-13 4.7.2 Clipboard ··················································· 4-13 IM FG410-61EN... -
Page 31: Organization And Functions Of Waveform Display Screen
If [Ctrl + *] (*: an alphabetic character) is displayed to the right of the menu option, the corresponding function can be directly executed when the menu option is not displayed. (For example, [Ctrl + V] is displayed to the right of [Paste] on the [Edit] menu. In this case, pressing IM FG410-61EN... -
Page 32: Tool Menu
Opens the compress/decompress screen, as does the button on the toolbar. Opens the interpolate screen, as does the button on the toolbar. Opens the operate screen, as does the button on the toolbar. Opens the operate screen, as does the button on the toolbar. IM FG410-61EN... -
Page 33: Setting Menu
(Undo). Select [Edit] - [Undo] ( Alt , E , U ) or pressing Ctrl + U undoes the operation. To cancel the Undo operation (Redo), select [Edit] - [Redo] ( Alt , E , R ) or press Ctrl + U . IM FG410-61EN... -
Page 34: Zooming And Scrolling The Display
The markers are used to select the horizontal waveform range before editing or creating waveforms. The markers are also used to specify the horizontal position to read the vertical value of the waveform. The ARB Edit markers are displayed as vertical lines in the waveform display area. IM FG410-61EN... -
Page 35: Marker Operations
Likewise, to jump marker B to the specified position, click the right space to [MrkB(X)] or press Alt + B and input a numerical value in the marker B position display section, and then press the press Enter key. IM FG410-61EN... -
Page 36: Range Selection
- Copy/cut/paste range of waveform See “4.7 Copy and Paste”. - Contraction/extension range See “5.2 Contraction/Extension of Waveform”. - Range to generate the waveform through interpolation See “5.3 Waveform Generation Through Interpolation”. - Inter-waveform operation range See “5.4 Operation Between Waveforms”. IM FG410-61EN... - Page 37 5 ≤ X < 10. Marker A is located just before 5, so 5 is between marker A and marker B. Marker B is located just before 10, so 10 is not between marker A and marker B. IM FG410-61EN...
-
Page 38: File Operations And Printing
Selecting [File] - [New] ( Alt , F , N or Ctrl + N ) starts another “ARB Edit”. The new “ARB Edit” starts in the same position as where the first “ARB Edit” started. It is possible to exchange data between “ARB Edits” via the clipboard. See “4.7.2 Clipboard” and “5.4.2 Object of operation”. IM FG410-61EN... -
Page 39: Specialized Format File
Waveform data created using the “ARB Edit” can also be saved in a text file so that other applications can easily handle it. Selecting [File] - [Save As(TXT)] ( Alt , F , T or Ctrl + T ) displays the screen titled [Save As]. Saving location Input file name IM FG410-61EN 4-10... - Page 40 In [Files of type], select [Text Real data files (*.txt)] and specify the file name. When creating a real number format text file, do so that there is 1 data per line. Restrictions regarding the number of data are the same as for whole number format text files. IM FG410-61EN 4-11...
-
Page 41: Print
See “4.3 Setting Menu”. Selecting [File] - [Print] ( Alt , F , P or Ctrl + P ) displays the screen titled [YOKOGAWA ARB Edit - Print]. Make settings for the printer or font as needed and click the OK button. -
Page 42: Copy And Paste
(−32768 to +32767) is regarded as one data unit contained in one numerical row. Data on the clipboard can be pasted as is to the text editor, spreadsheet software, or other application or pasted within that “ARB Edit” or other “ARB Edit” when multiple ARB Edit s are operating. IM FG410-61EN 4-13... -
Page 43: Figure 4-2 Waveform Editing Operation
When the clipboard data is smaller: 0 is embedded at the end. Paste When the clipboard data is larger: The overflowed section disappears. Delete Though the selected part is deleted, the clipboard remains unchanged. Figure 4-2 Waveform Editing Operation IM FG410-61EN 4-14... - Page 44 4.7 Copy and Paste IM FG410-61EN 4-15...
-
Page 46: Other Screen Operations
5.6.2 Axis unit setting ··········································· 5-23 5.6.3 Waveform memory setting ····························· 5-25 5.6.4 Oscillator Setup ··········································· 5-27 5.6.5 Cautions during transfer and reading ··············· 5-29 5.6.6 File operations ············································ 5-29 5.6.7 Print ·························································· 5-30 5.6.8 Initial values················································ 5-30 IM FG410-61EN... -
Page 47: Generation Of Standard Waveform And Numerical Expression Waveform
Immediately after returning to the waveform display screen after creating a waveform on the waveform generation screen, the status before waveform creation can be recovered by selecting [Edit] - [Undo] (Alt, E, U ), or pressing Ctrl + U. Figure 5-1 Waveform Generation Screen IM FG410-61EN... -
Page 48: Range Setting And Page
The noise is generated based on the random number calculation, so different waveform data is created at each generation. DC makes the specified range the same data. The waveform function defines the waveform with a numerical expression. “5.1.4 Inter-Waveform Numerical Expression” IM FG410-61EN... -
Page 49: Parameter Setting
[Amplitude] is changed by vertical extension/compression and [Period] is changed by vertical extension/compression. Using enables you to intuitively set parameters while looking at the waveform. It is also possible to roughly make settings in this way and then set a more accurate value by inputting numerical values. IM FG410-61EN... -
Page 50: Inter-Waveform Numerical Expression
Use 1-byte characters for the constant or expression. Constants and expressions are not case sensitive. The constant should begin with an alphabetic character and consist of alphanumeric characters. Constants must be strings other than those shown in “Table 5-4 Built-in Functions”. It is IM FG410-61EN... - Page 51 Assume that the horizontal axis unit is [Address] and the range is between 0 and 8,192. Because 8,192 = 2*π*1303.797..., the result of this expression is a sine wave with approximately 1,304 waves. IM FG410-61EN...
- Page 52 Monadic operator, ! is a logical operator ← Binary operator, exponential → Binary operator, multiplication/division → Binary operator, addition/subtraction → < <= > >= Logical operator, size comparison → Logical operator, Equivalence comparison → && Logical operator, AND → Logical operator, OR → IM FG410-61EN...
- Page 53 Page 1 [Constant] [fs=10;] [Y=] [fs*sin(x*s)] [s=2*pi/1e-3;] ← 1 ms is regarded as 2π. • One cycle of sine wave (horizontal axis: user unit 0 to 6.283185, vertical axis: user unit −1 to +1) Page 1 [Constant] [None] [Y=] [sin(x)] IM FG410-61EN...
- Page 54 [Y=] [exp(-((x+0.5)^2)*j)] Page 2 [Area(X)] [0] to [1] [Constant] [j=32;] [Y=] [-exp(-((x-0.5)^2)*j)] • Magnetic head waveform: Lorentz waveform (horizontal axis: user unit 0 to 6.283185, vertical axis: user unit −1 to +1) Page 1 [Constant] [None] [Y=] [(sin(x)-sin(x*3)/3+sin(x*5)/5)/1.533333333] IM FG410-61EN...
-
Page 55: File Operation
Print The setting conditions for the waveform generation screen can be also printed out. Selecting [File] - [Print] ( Alt , F , P or Ctrl + P ) displays the screen titled [YOKOGAWA ARB Edit - Print]. Make settings for the upper, lower and left margins, the printer or font as needed and click the OK button. -
Page 56: Contraction/Extension Of Waveform
The range selected with the markers in advance can be contracted, extended, or moved to the range selected with the start/end points. Data immediately before or after is filled in the area where data is removed as a result of contraction/extension. IM FG410-61EN 5-11... -
Page 57: Contraction/Extension Of Vertical Axis
Amplitude = (maximum value − minimum value), Offset = Maximum value = offset + (amplitude/2), Minimum value = offset − (amplitude/2) Input the amplitude/offset value of the target after contraction/extension in each display section and click the OK button. IM FG410-61EN 5-12... -
Page 58: Waveform Generation Through Interpolation
Click the interpolation editing screen. (Waveform display screen) Interpolation editing screen Figure 5-4 Interpolation Editing Screen Interpolation editing is applied to the selected range. Select the range beforehand on the waveform display screen with markers A and B. IM FG410-61EN 5-13... -
Page 59: Control Point Setting
• Linear interpolation where the spaces between control points are interpolated with a straight line • Spline interpolation where the spaces between control points are interpolated with a smooth curve • Continuous spline interpolation to use such a curve that the waveform is continued outside to the selected range for interpolation IM FG410-61EN 5-14... -
Page 60: File Operation
Otherwise, ARB Edit can read the text file created by using a text editor, spreadsheet software, or other application. When creating a text file, put the X data and Y data on one row. Other files that can be handled with the ARB Edit: “4.6.1 File types” IM FG410-61EN 5-15... -
Page 61: Operation Between Waveforms
- The range cannot be divided into multiple pages. Create a waveform referring to “5.1 Generation of Standard Waveform and Numerical Expression Waveform” and click the Page OK button. The created waveform is displayed in the [Clip Board/Created Waveform] area. IM FG410-61EN 5-16... -
Page 62: Operation Execution
When the operation result exceeds the ± full scale value, waveforms are clipped at the ± full scale value. Note that dividing a number by 0 results in infinity and an error usually occurs. To avoid such an error, the result of division by 0 is 0 as an exception in this inter-waveform operation. IM FG410-61EN 5-17... -
Page 63: Pwf (Parameter-Variable Waveform)
[Edit]-[Undo] ( Alt , E , U ) or by pressing Ctrl + U . Figure 5-6 PWF Screen For details on PWF waveforms, refer to FG410/FG420 Application Instruction Manual. The waveform data that can be generated from the PWF screen includes single-polarity waveforms. -
Page 64: Waveform Selection
Off-Ph Ctrl Sine OffPhase 0.00 360.00 0.01 SlopeT 0.00 50.00 0.01 Chattering-On Sine OnPhase 0.00 360.00 0.01 ChatterN 0.00 20.00 0.01 Toff 0.00 20.00 0.01 Chattering-Off Sine OffPhase 0.00 360.00 0.01 ChatterN 0.00 20.00 0.01 Toff 0.00 20.00 0.01 IM FG410-61EN 5-19... -
Page 65: File Operation
When the screen titled [Open] appears, select a file location, input a file name and click the Open button. Because the file containing the PWF screen settings is a text file, the file can be edited using a text IM FG410-61EN 5-20... -
Page 66: Print
Print The setting conditions for the PWF screen can be also printed out. Selecting [File] - [Print] ( Alt , F , P or Ctrl + P ) displays the screen titled [YOKOGAWA ARB Edit - Print]. Make settings for the upper, lower and left margins, the printer or font as needed and click the OK button. -
Page 67: Transferring The Waveform And Settings
The setting item and settable range in [Waveform] and [Oscillator] vary depending on the selected model. The selected model is saved even after the ARB Edit is exited and the same setting applies at the next startup. IM FG410-61EN 5-22... -
Page 68: Axis Unit Setting
The time is interlocked with [Frequency] and [Period] in [Oscillator]. From the head to the tail of waveform data, that is, one cycle corresponds to [Period] in [Oscillator]. For example, this function is useful when creating a waveform through interpolation by setting the IM FG410-61EN 5-23... - Page 69 [Name]. Input numerical values for the minimum value (lowermost value of waveform) and maximum value (uppermost value of waveform) for the custom unit in the areas to the right of [Min to Max]. IM FG410-61EN 5-24...
-
Page 70: Waveform Memory Setting
It is also possible to directly input a numerical value in the numerical value display area. CAUTION FG410/FG420 waveform memory Waveform data cannot be transferred to memory 0. Memories 1 to 128 are non-volatile memories. The transferred waveform data in these memories is saved even after the power is switched off. - Page 71 Therefore, when using arbitrary waveforms during sequence oscillation of the FG410/FG420, a larger number of waveform types can be used. Note that the control point format data of this transfer method does not necessarily match the control points on the interpolation editing screen.
-
Page 72: Oscillator Setup
The relationship between the signal generator models and settable items is shown in “Table 5-12 Signal Generator Setting”. Table 5-12 Signal Generator Setting FG410 FG420 Channel − Output on/off Frequency Period Output range Amplitude DC offset Amplitude range IM FG410-61EN 5-27... - Page 73 In addition, the amplitude and DC offset settings put restrictions on each other, with restrictions placed on the range to prevent errors when transfer is executed. The settable range also differs according to the amplitude range setting. IM FG410-61EN 5-28...
-
Page 74: Cautions During Transfer And Reading
Setup] frame to the signal generator. CAUTION If amplitude parameter settings for the FG410 or FG420 are performed with [ARB Edit], the following items are forcibly switched. • Amplitude mode In the case of sequence oscillation only, continuous oscillation is set. -
Page 75: Print
Select [System Setup File] - [Print] ( Alt , F , P or Ctrl + P ) to display the screen titled [YOKOGAWA ARB Edit - Print]. Make settings for the upper, lower and left margins, the printer or font as needed and click the OK button. -
Page 76: Error Messages
6. ERROR MESSAGES Arbitrary Wave Edit Software Error ·························· 6-2 IM FG410-61EN... -
Page 77: Arbitrary Wave Edit Software Error
An error occurred because a data file containing the Read in is interrupted because the data file information of a model other than the FG410/FG420 was contains data of a model that is not supported. read. Do not use this file. -
Page 78: Maintenance
7. MAINTENANCE Handling CD-ROM ················································ 7-2 Replacement of Damaged CD-ROM ························· 7-2 Version Check ····················································· 7-2 IM FG410-61EN... -
Page 79: Handling Cd-Rom
Replacement of Damaged CD-ROM If the Arbitrary Wave Edit Software CD-ROM is damaged, contact Yokogawa Test & Measurement Corporation or your local distributor. We will replace it with a new CD-ROM at cost. - Page 81 Yokogawa Test & Measurement Corporation sales representative in case any unclear points, errors, or omissions are found. 4. Yokogawa Test & Measurement Corporation shall not be held responsible for any errors, defects, lost profits, or other consequential damages arising from the use of this product, regardless of item FG410/FG420 ARBITRARY WAVEFORM EDITOR User’s Manual...
- Page 83 Yokogawa Test & Measurement Corporation...
Need help?
Do you have a question about the FG410 and is the answer not in the manual?
Questions and answers