Table of Contents
Advertisement
Quick Links
DRYER
User Manual
Model:
SLD242W
LDHP24
BEFORE USE, PLEASE READ AND FOLLOW ALL SAFETY RULED AND OPERATING
INSTRUCTIONS
Summit Appliance
Write Model and Serial Numbers
Division of Felix Storch, Inc.
here:
An ISO 9001:2015 registered company
Model: _____________________
770 Garrison Avenue
Bronx, NY 10474
Serial No.: __________________
www.summitappliance.com
1
Advertisement
Table of Contents

Summary of Contents for Summit Appliance SLD242W
- Page 1 DRYER User Manual Model: SLD242W LDHP24 BEFORE USE, PLEASE READ AND FOLLOW ALL SAFETY RULED AND OPERATING INSTRUCTIONS Summit Appliance Write Model and Serial Numbers Division of Felix Storch, Inc. here: An ISO 9001:2015 registered company Model: _____________________ 770 Garrison Avenue Bronx, NY 10474 Serial No.: __________________...
-
Page 2: Table Of Contents
TABLE OF CONTENTS Safety Precautions Location of Parts Technical Information Installation and Connection Location Requirements Dryer Placement Opening the Dryer Leveling the Dryer Attaching the Drain Hose Connecting the Power Supply Proper Usage 9-16 Turning on the Dryer Selecting the Dryer Cycle Preparing for the Drying Cycle 9-10 Laundry Warning Labels... -
Page 3: Safety Precautions
SAFETY PRECAUTIONS Your safety and the safety of others is very important. This manual contains imporatant information on the installation, use, and care of your appliance. Read the instructions for use carefully before using the dryer to prevent injury and property damage. - Page 4 • Do not place items exposed to cooking oils in your dryer. Items contaminated with cooking oils may contribute to a chemical reaction that could cause a load to catch fire. To reduce the risk of fire due to contaminated loads, the final part of a tumble dryer cycle occurs without heat (cool down period).
-
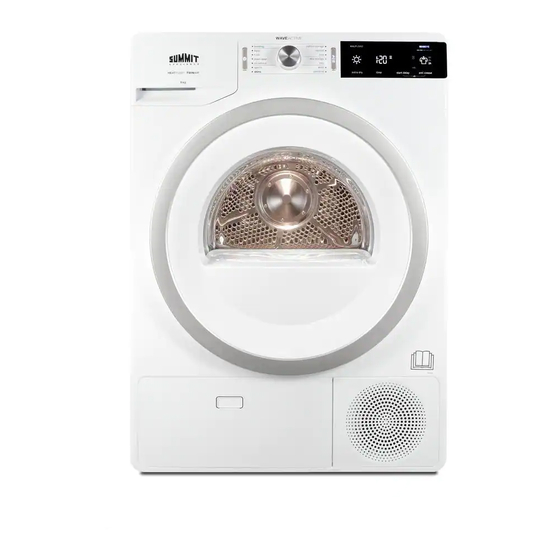
Page 5: Location Of Parts
LOCATION OF PARTS FRONT BACK 1. Condensate Tank 2. ON/OFF Button 3. Drying Cycle Selector Knob 4. START/PAUSE Button 5. Control Unit 6. Door 7. Net Filter 8. Air Vent 9. Heat Pump Filter 10. Rating Plate 11. Power Cord 12. -
Page 6: Installation And Connection
INSTALLATION AND CONNECTION CAUTION: Installation of this dryer should be performed by a qualified installation specialist. 1. Before using your dryer, remove the exterior and interior packaging. 2. Place the dryer on a clean, dry concrete floor strong enough to support the machine. DO NOT place the dryer on a carpet with long fibers, as it may impede air circulation. -
Page 7: Dryer Placement
Dryer Placement A dryer with the same dimensions as a washer can be placed on top of the washing machine as long as the vacuum feet are used on the dryer (Fig. 1). Alternatively, the dryer can be placed next to the washing machine (Fig. 3). •... -
Page 8: Attaching The Drain Hose
Attaching the Drain Hose This dryer needs to be connected to a drain to dispel the water collected during the drying cycle. A drain hose is supplied with the appliance, and simply needs to be attached to an outer drain before use. -
Page 9: Proper Usage
PROPER USAGE NOTE: Before using the dryer, clean the dryer drum using a soft, damp cotton cloth and water. DO NOT use any solvents or cleaning products, which could damage the dryer. Turning on the Dryer Once the dryer is properly placed, cleaned, and ready for use, press the ON/OFF switch (1). Selecting a Dryer Cycle Rotate the cycle selector knob (2) to the left or right to choose the appropriate drying cycle for your clothes. -
Page 10: Laundry Warning Labels
Drying laundry made of particularly delicate fabrics, which may be deformed during the drying process, is not recommended. The following types of laundry may not be dried in the dryer as this may cause your garments to deform: • Leather garments and other leather products •... -
Page 11: Dryer Cycle Table
Dryer Cycle Table Program Max. Program description Dryness levels load Cotton Storage (Closet) 17.6 lb Use this program for thicker, non-sensitive cotton (8 kg) laundry. After drying, it will be dry and ready to be stored in a closet. Normal* 17.6 lb Use this program for thicker, non-sensitive cotton (8 kg) -
Page 12: Using A Dryer Basket
Bedding 11 lb Use this program for larger items. When the program is complete, they will be thoroughly dry. An adjusted (5 kg) drum rotation prevents the laundry from tangling. Using a Dryer Basket Depending on the model, a dryer basket may be used in the dryer. Laundry may only be dried in the basket when using the timed drying program. -
Page 13: Selecting Extra Functions
Selecting Extra Functions Many drying cycles feature specific, extra functions, which can be adjusted by pressing the relevant functional buttons before staring the drying cycle. Activate and deactivate any setting by pressing the desired function before pressing the START/PAUSE button (3). •... - Page 14 NOTE: If a power failure occurs during the Start Delay time period, press the START/PAUSE button to resume the countdown. • symbol will illuminate when the Start Delay setting is selected. Anti-Crease Use the Anti-Crease setting if you do not intend or cannot remove laundry from the dryer immediately after the drying cycle finishes.
-
Page 15: Extra Function Table
Extra Function Table TIME ANTI HALFLOAD EXTRA START (DRYING DELAY CREASE Program TIME) Cotton Storage (Closet) • • • • • • • • Normal Iron • • • • (Moist for ironing) Mix (Mixed laundry/Synthetics) Storage (Closet) • • •... -
Page 16: Changing The Drying Cycle/Functions
Full Condensation Tank • When the condensate tank is full, the symbol will illuminate, and the drying cycle will pause. • Empty the condensate tank, and then press the START/PAUSE button to resume the drying cycle from the point at which it was interrupted. Power supply failure After a power supply interruption, and the power supply is resumed, the signal light on the START/PAUSE button will flash. -
Page 17: Low Standby Mode
Saving Personal Settings 1. When the proper drying cycle and additional functions are selected, you may store these setttings by pressing the START/PAUSE button and holding it for five seconds. An indicator light on the START/PAUSE button and an acoustic signal will confirm your selection. -
Page 18: Cleaning The Heat Pump Filter
Cleaning the Net Filter Open the filter housing. Remove the net filter. Gently scrape the filter to remove any lint with your hand or with a soft cloth. Clean the filter housing and door gasket as well, if necessary. Insert the net filter, and close the filter housing. -
Page 19: Cleaning The Heat Exchanger
The heat pump filter has to be correctly inserted into its slot, otherwise, the heat exchanger installed inside the dryer may be clogged or damaged. NOTE: Clean the foam filter after every five drying cycles, at least. Cleaning the Heat Exchanger CAUTION: Do not touch the inner metal parts of the heat exchanger with bare hands to prevent injury. -
Page 20: Emptying The Condensation Tank
Emptying the Condensation Tank • Empty the condensation tank after every drying cycle. • It is not necessary to empty the condensate tank if the drain hose is connected directly to a drain. NOTE: Never add chemicals or fragrances to the condensation tank. 1. -
Page 21: Troubleshooting
TROUBLESHOOTING If any irregularities occur during normal operations, turn the dryer off, and wait one minute. Turn the dryer back on, and repeat the drying program. Most errors can be solved by trying the suggestions below: Problem/error Cause What to do? The machine will •... - Page 22 If your appliance shows other symptoms than those described above, or if you have checked all items listed as the cause and the problem still exists, then call Summit Appliance Customer 1-800-932-4267 Service at •...
- Page 23 Error Display Meanings Errors indicated on the display unit may include the following: Error Display Indication on the display What to do? unit and description of error Control unit failure Call the service center. Temperature sensor failure Call the service center. Call the service center.
-
Page 24: Consumption Table
CONSUMPTION TABLE The table lists the values for drying time and power consumption for drying of a test batch of laundry with various spinning rpm in the washing machine. SPK A Spinning Load [rpm] Electric energy consumption Drying time [min] [kWh] Program 17.6 lb (8 kg) -
Page 25: Economic Drying
ECONOMIC DRYING • Dry the recommended amount of laundry in each load (see PROGRAM TABLE). • Drying laundry made of particularly delicate fabrics that may be deformed is not recommended. • The use of conditioner in the washing cycle is not necessary, as the laundry is soft and smooth after drying in the dryer. - Page 26 NOTES...
- Page 27 NOTES...
-
Page 28: Limited Warranty
IMPLIED WARRANTIES OF MERCHANTABILITY OR FITNESS, SO THESE EXCLUSIONS OR LIMITATIONS MAY NOT APPLY TO YOU. THIS WARRANTY GIVES YOU SPECIFIC LEGAL RIGHTS AND YOU MAY ALSO HAVE OTHER RIGHTS, WHICH VARY FROM STATE TO STATE. Summit Appliance Division of Felix Storch, Inc. An ISO 9001:2015 registered company...
Need help?
Do you have a question about the SLD242W and is the answer not in the manual?
Questions and answers