Table of Contents
Advertisement
User Manual
the Smart way to control your world
Features:-
Environmental control from your iPad or iPhone
Learn and transmit InfraRed codes
HouseMate Switch drives iOS Switch Control
Full control over iOS device
Important Notes:
1.
This manual assumes that you are familiar with the operation of an iOS device and should be read in
conjunction with its user manual.
2.
Read this manual carefully before installing or operating your HouseMate.
3.
Due to continuous product improvement AbleNet reserves the right to update this Manual. This
Manual supersedes all previous issues which must not continue to be used.
4.
Any attempt to gain access to or in any way abuse the electronic components of the HouseMate
renders the manufacturer's warranty void and the Manufacturer free from liability.
AbleNet Inc.
App version 1.1
www.ablenetinc.com
Page 1 of 65
Advertisement
Table of Contents

Summary of Contents for HouseMate HouseMate
- Page 1 Manual supersedes all previous issues which must not continue to be used. Any attempt to gain access to or in any way abuse the electronic components of the HouseMate renders the manufacturer’s warranty void and the Manufacturer free from liability.
-
Page 2: Table Of Contents
1.2. About the Hardware................... 4 1.3. About the App .................... 5 1.4. Key Features ....................5 HouseMate iOS Quick Start Guide ................6 Getting started ......................8 3.1. Downloading the software ................ 8 3.2. Setting up your device ................10 Using HouseMate .................... - Page 3 User Manual 10.2. Using iExplorer to transfer Existing Projects or backups....58 Connections & Wheelchair Interfacing ..............59 Hardware Specifications ..................61 Intended use, Safety and Misuse Warnings ............62 Maintenance ......................63 Regulatory ......................64 Warranty ......................... 65 AbleNet Inc.
-
Page 4: Introduction
Answer a phone call and send some texts. Browse the Internet, play some music or watch YouTube. HouseMate hardware in combination with an iOS device enables you to do this and much more. Read on and discover why HouseMate, together with an iOS device is the smart way to control your world. -
Page 5: About The App
User Manual 1.3. About the App The HouseMate app that has been specially designed for switch access and can be downloaded free from iTunes. It will run on any iOS device running 8.0 or higher. The HouseMate app communicates with the HouseMate hardware using Bluetooth Smart. -
Page 6: Housemate Ios Quick Start Guide
Time out Setting • HouseMate will be set to go into a ‘sleep’ mode and disconnect from your iOS device after about 5 minutes to conserve on battery. You can change this timing to one of the following – 1 minute – 5 minutes – never when connected – never (set top mode). - Page 7 • Follow onscreen prompts (some notes about recording) HouseMate will record the length of the IR signal in real time and will only record for 4 seconds for a single function. To start recording – press and hold the button on the HouseMate. Then aim your remote at the HouseMate.
-
Page 8: Getting Started
Install the HouseMate app from iTunes. “HouseMate Home Control” and click the install button. Search for After installation the HouseMate icon should appear on your home screen. Enabling Technician Mode Now, open the App. The example grid will appear. The first step is to enable Technician Mode. - Page 9 User Manual Note: Every time you launch HouseMate the spanner icon will appear. However, after 60 seconds it will change to a padlock icon, thereby preventing the user from making inadvertent changes. If you run out of time return to the home screen and start HouseMate again.
-
Page 10: Setting Up Your Device
User Manual 3.2. Setting up your device Choose Project->Setup your devices->HouseMate hardware->Pair your hardware. The Pairing wizard is presented. Read the instructions carefully as these steps must be carried out manually within the iOS Settings page. AbleNet Inc. www.ablenetinc.com Page 10 of 65... - Page 11 If you intend to use the touch-screen only then you can click and jump to step 5 below. Step 1: Pairing the HouseMate Switch The first step is to pair the HouseMate Switch. The switch is used to drive the iOS scanning. When you are ready choose Settings and you will be brought to the iOS Settings page.
- Page 12 HouseMate switch and then choose Select Item action. Step 4: Enable & optimize Switch Control This is the last step to set up the HouseMate switch to drive the iOS scanning. Navigate back to Switch Control. Tap Behaviour AbleNet Inc.
- Page 13 Hide All Items. In this set up, after you launch HouseMate, there is no way for the user to return to the home screen or control other Apps. Switch Control If you wish to start the iOS scanning at this point return to Switch Control and turn on the Switch Control switch.
- Page 14 When you are finished, return to the HouseMate app for the final step of setting up your hardware. Step 5: Pairing the ECU Module.
- Page 15 User Manual Make sure your hardware is on and then press Continue. A popup dialog will display the text Scanning for HouseMate and after a moment this should change to Found HouseMate and then Connected to HouseMate. Your done! However, unless you want to start editing the grids and recording codes, be sure to exit Technician mode by tapping on the back arrow in the AbleNet Inc.
- Page 16 If you switched on Switch Control you can now confirm that you can use the HouseMate switch to navigate the example grids and choose icons. Although you have not recorded any InfraRed codes spend some time familiarizing yourself with the iOS scanning, entering and exiting grids and selecting cells.
-
Page 17: Using Housemate
When you launch HouseMate for the first time a set of default grids and icons are generated. These grids can be edited in technician mode and you can save your project to memory. - Page 18 Tip: The bell symbol in this default grid is Project Command 1, and as such will trigger the output relay in your HouseMate hardware or activate the RF alarm if fitted.
-
Page 19: Editing Your Project
5. Editing your Project Note: Before you can make changes to the grids or edit the cells you must Technician Mode. When you launch HouseMate press and hold on the enable spanner icon for 5 seconds until the Technician Mode dialog appears. - Page 20 User Manual Changing the Name and Label You can change the name or cell label of the grid. The cell label appears under the chosen picture. The grid name is the name that is used to identify the grid when reconfiguring a cell. In many cases they will be the same.
- Page 21 You can also define a cell as a back key or a stand-by key. will bring Stand-by you back to the previous grid. will instruct the HouseMate Disable Lock Screen hardware to turn off and, if is enabled, allow the screen to dim down.
- Page 22 User Manual Back keys Disable Lock Screen Back position disable the option. keys Project->Scanning Options. can be found under AbleNet Inc. www.ablenetinc.com Page 22 of 65...
-
Page 23: Editing A Grid
User Manual 5.2. Editing a Grid To edit a grid, first navigate to the grid in question and then choose Configure. Configure Grid menu provides several tools for populating and editing grids. Templates A number of grid templates are included in the software. To import a predefined Templates Configure Grid grid template choose... - Page 24 User Manual Then select the template you require. You will be prompted as whether you wish to continue as this action will replace the current grid, and, unless you have made a backup there is no undo. Reorder You can re-order or re-position the cells in a grid two at a time. Simply press on the cell you want to move and then press on the position you want to move it to.
- Page 25 User Manual AbleNet Inc. www.ablenetinc.com Page 25 of 65...
- Page 26 Batch recording User Manual Very useful for recording all the codes for a particular grid one after the other, rather than individually one cell at a time. Erase signals Erases the InfraRed, EasyWave and Z-Wave signals for each command defined in the current grid. Erase commands As well as erasing the signals this option also removes the commands defined in the current grid from the project.
- Page 27 User Manual Font size You can change the font size used for the cell labels throughout the project. Colors You can change the color of the grid background, key background and font. AbleNet Inc. www.ablenetinc.com Page 27 of 65...
-
Page 28: Creating And Populating A New Grid
User Manual 5.3. Creating and populating a new grid If none of the grid templates suit your requirements you can create a new grid yourself. First reconfigure a cell to link to a blank grid. Press on a cell and choose Reconfigure Cell Open another grid from the popup dialog. - Page 29 User Manual 30 grids can be defined within HouseMate. Eight grids are pre-defined within the example project but if you create a new project you can define all 30 yourself. For now choose one of the unused grids, “Grid 10”, for example. An empty 3x4 grid will be assigned to the chosen cell.
- Page 30 User Manual Now we want to populate the grid with commands. There are three ways to do this: 1. Importing a grid template. 2. Using the wizard 3. Populating each cell one at a time Importing a Grid template A number of grid templates are included in the App. To import a predefined grid Templates Configure Grid template choose...
- Page 31 User Manual Using the wizard Configure Grid Choose Wizard from the menu. First choose a category, then choose some commands within that category and then choose how you want these commands to populate your grid. This last option is useful if you want to add more commands at a later stage from the same or another category.
- Page 32 User Manual Note that the wizard tool in this section is making command suggestions from a small sub-set of the complete icon list. To access the complete icon list it is necessary to populate each cell one at a time as described in the next section. Populating each cell one at a time Use the wizard to create a new Make a long click on a cell and then choose...
- Page 33 User Manual Again there are three steps to the wizard. First select the icon category, then the icon for the command and finally a name for the new command. You can optionally choose to use the command name as the cell label during this final step.
-
Page 34: Recording Infrared Signals
Before you start, make, sure that you have the Infra-red controls of the devices you want to control and that they have new batteries. Position the Infra-red control facing into the left hand side of the HouseMate as in the picture below, at least one foot apart. - Page 35 User Manual Turn on HouseMate and wait until it connects. Then navigate to the grid that contains the Project Command that you want to record a signal for. Make a long click on the cell until the popup dialog for that command appears. This is called the Command dialog.
- Page 36 You should see the red InfraRed LED on the HouseMate hardware light up. Next press and hold the button on the HouseMate hardware. When you are ready make a short press of the button on the remote control whose signal you want to record and then release the HouseMate button.
- Page 37 InfraRed signal. Therefore there is no rush to press the remote button after you have pressed the HouseMate button. In fact you can keep the HouseMate button pressed for as long as you want. However it is important to keep the button press on the remote as short as possible AND then release the HouseMate button quickly after that.
- Page 38 5. If HouseMate did not detect any InfraRed signal the record operation will be canceled. Otherwise the following dialog should appear. 6. Now HouseMate is ready to record a second copy, or alternate, of the signal. This is how HouseMate records the toggle codes described earlier. As before press and hold the button on the HouseMate hardware.
- Page 39 Another mistake is to press the HouseMate button and the remote control button at the same time. It is important to press and hold the HouseMate button before you press the remote control button so as to capture all the signal. You can leave...
- Page 40 You stop the sequence by pressing your switch or joystick a second time. To Record a Macro: 1. Make sure that you are connected to the HouseMate hardware. Make a long Record signal- click on the command you want to record and then choose >Record macro...
- Page 41 HouseMate allows you to do this by recording two series of codes. In the PROGRAM+ example above the first series would be the codes and the second series, or “OK command”, would be just the...
- Page 42 Note that there is no visual indication on the iOS device that you are recording an OK command. It is purely a feature of the HouseMate hardware. 6. Now press the OK button on your remote control and then release the HouseMate button.
-
Page 43: Using The Signal Database
6.2. Using the signal database HouseMate is supplied with a number of InfraRed signal databases pre-installed. You can also create your own. The databases include SKY, UPC and GEWA and others and will be expanded over time to include other generic brands. You can download these signals into your HouseMate hardware as an alternative to recording them. - Page 44 User Manual The left-hand list contains the signals stored within the database and the right- hand list contains the commands defined within the current grid. Pair the signal you want to download with the chosen command in the grid. In the example Info Info below we have paired the...
- Page 45 Download You can make more than 1 pairing and after you have done so click Signals. The InfraRed signal data will be transferred into the HouseMate memory. When the transfer has completed you can test the commands by clicking on them.
-
Page 46: Examining The Infrared Macros
Remember that if you record a macro that is less than 4 seconds long it will be stored in the single InfraRed code memory and will not appear in this list. To examine the Macro memory, make sure you are connected to the HouseMate hardware and then choose Configure->Advanced. - Page 47 User Manual InfraRed The HouseMate Advanced Settings window will appear. Choose settings-> InfraRed Macros and a progress bar will be displayed as the Macro information is retrieved from the HouseMate hardware. Followed by a list of the 32 Macros and which Project Commands they are assigned to.
-
Page 48: Erasing Infrared Signals
6.5. Advanced Settings Remote Control Brands, InfraRed Macros Erase all Besides the InfraRed signals options already discussed the HouseMate Advanced Settings window gives you access to the following additional options. AbleNet Inc. www.ablenetinc.com Page 48 of 65... - Page 49 You will be asked to enter a filename for the database and to confirm this action as it may take several minutes to upload the signal data from the HouseMate hardware. AbleNet Inc.
- Page 50 User Manual To use the signals and/or grid at a later stage in another project choose Configure->Signals and then select the newly created signal database. Project Commands Configure->Advanced->Project Commands Choose to see a complete list of commands that have been defined within your project. Commands with a tick mark are in use.
-
Page 51: Alarms
7. Alarms HouseMate contains different methods for generating alarms. 7.1. Relays HouseMate contains a relay that is available on a 3.5mm jack socket. This can be connected to a wireless call bell system. 7.2. InfraRed When you make an alarm the InfraRed signal associated with the first Project Command is transmitted. -
Page 52: Hardware Settings
8. Hardware Settings The hardware settings option allows you to control the power down and relay output functions of HouseMate hardware. These options affect the behavior of the hardware units even when they are not connected to your iOS device. -
Page 53: Never When Connected
User Manual October 2015 When set to 1 or 5 minutes the HouseMate hardware will automatically switch off if you have not made any switch presses for the chosen time. This allows the device to turn off or dim the screen and conserves the battery life of both units. -
Page 54: Hardware Alarm
Set-Top mode is intended to be used by persons who can fully use their device, including the on/off button, and require InfraRed control. To switch off HouseMate in Set-Top mode it is necessary to hold the switch for several seconds until the unit beeps and switches off. -
Page 55: Saving Your Project
October 2015 9. Saving your Project HouseMate allows you to save all user data, including recorded infrared signals to your iOS device’s memory. You can then copy the data from your device onto your computer to have a permanent backup of your all your settings. -
Page 56: Opening An Existing Project To Open A Project
User Manual October 2015 9.2. Opening an existing project To open a project Project->Open Project. Existing Projects 1. Choose dialog will appear. AbleNet Inc. www.ablenetinc.com Page 56 of 65... -
Page 57: Adding New Projects
2. Choose the project to want to open. As before, once the project has been opened, you will be prompted as to whether you want to restore the InfraRed signal data from memory to the HouseMate hardware. 10. Adding New Projects 10.1. -
Page 58: Using Iexplorer To Transfer Existing Projects Or Backups
Using the Lightning connector, connect your iDevice to your computer via the USB port. Open iExplorer. Navigate to …/Apps/Housemate Drag and Drop File Folder in Housemate folder. Open Housemate App on iDevice Make sure you are connected to Housemate Go into Technician mode Project->Open... -
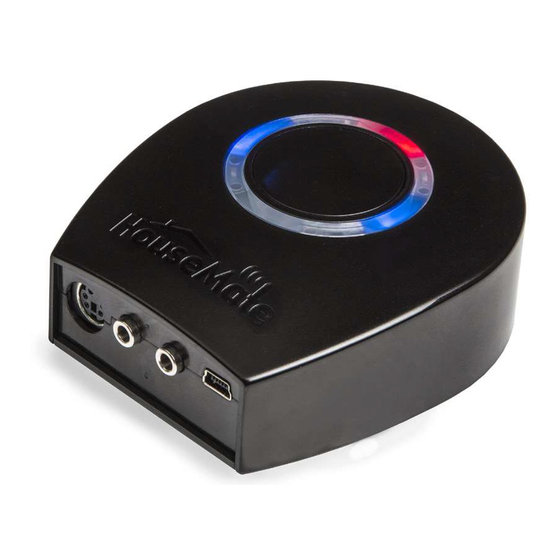
Page 59: Connections & Wheelchair Interfacing
InfraRed and Wake-up status HouseMate button Has two functions. See text Exactly the same as the below for details. Switch i/p. the HouseMate button can be used to control your iOS device. Battery Charging Illuminates orange when the battery is charging. - Page 60 Charging the battery HouseMate hardware contains a 1950mAh Li-Ion battery. When the battery is low the HouseMate hardware will beep continuously and when you connect with your device a message will appear on the screen warning you that the battery is running low.
-
Page 61: Hardware Specifications
Quiescent Current 20mA Mechanical Weight Approx. 250grams Case material Black ABS plastic. Environmental Units Operating ambient temperature range ºC Storage temperature range ºC Operating and storage humidity HouseMate is not designed for outdoor use. AbleNet Inc. www.ablenetinc.com Page 61 of 65... -
Page 62: Intended Use, Safety And Misuse Warnings
13. Intended use, Safety and Misuse Warnings Intended Use HouseMate is a combined iOS switch interface and InfraRed remote control. It is designed to enable those individuals who cannot use a standard remote control to operate television, lights, door openers, curtains and other equipment in their home or place of work/study. -
Page 63: Maintenance
User Manual October 2015 14. Maintenance Your HouseMate hardware should be regularly checked for integrity. Loose, damaged or corroded connectors or terminals, or damaged cabling should be reported to your Service Center and be replaced immediately. The Li-Ion battery should be regularly checked for corrosion or leakage. -
Page 64: Regulatory
Reorient or relocate the receiving antenna. Increase the separation between equipment and receiver. CE Marking HouseMate is marketed as a technical aid for people with disabilities and satisfies the requirements of the Medical Device Directive 2007/47/EC. This includes conformity with essential requirements of Council Directive 2004/108/EC of 15th December 2004 concerning electromagnetic compatibility. -
Page 65: Warranty
16. Warranty AbleNet manufactured products include a two-year limited warranty. This warranty is against defects in materials and manufacturing for two-years from the date of purchase. Warranty in full text, along with return / repair information is available at www.ablenetinc.com. AbleNet, Inc.
Need help?
Do you have a question about the HouseMate and is the answer not in the manual?
Questions and answers