
Related Manuals for MuxLab 500172

Summary of Contents for MuxLab 500172
- Page 1 Active VGA Managed Repeater Hub 500172 Installation Guide P/N: 94-000706-A SE-000706-A...
- Page 2 Printed in Canada. No part of this publication may be reproduced, stored in a retrieval system, or transmitted in any form or by any means, electronic, mechanical, photocopying, recording or otherwise without prior written permission of the author. Trademarks: MuxLab and VideoEase are registered trademarks of MuxLab Inc. Page 2...
-
Page 3: Table Of Contents
© MuxLab Inc. Active VGA Managed Repeater Hub Installation Guide Table of Contents 1. System Overview ............4 1.1. Description .............. 4 1.2. System Features ............6 2. Technical Specifications ..........7 3. Installation Procedure ...........8 3.1. Parts List ..............8 ... -
Page 4: System Overview
Active VGA Managed Repeater Hub Installation Guide System Overview 1.1. Description MuxLab’s family of Active VGA Managed products allows a single video source to be transmitted to various remote locations in a point-to-multipoint configuration for cost-efficient connectivity. The Active VGA Managed family consists of three... - Page 5 © MuxLab Inc. Active VGA Managed Repeater Hub Installation Guide Because the Repeater Hub itself can be located as far as 1,000 feet away from the Dispatcher, the effective distance from Dispatcher to Receiver is therefore doubled to 2,000 feet (610 meters). Furthermore, since...
-
Page 6: System Features
© MuxLab Inc. Active VGA Managed Repeater Hub Installation Guide 1.2. System Features Supports VGA, Audio & RS232 Support up to 1,000 ft (305 m) Support up to 1920 x 1200, 1080p (depending on cable length) ... -
Page 7: Technical Specifications
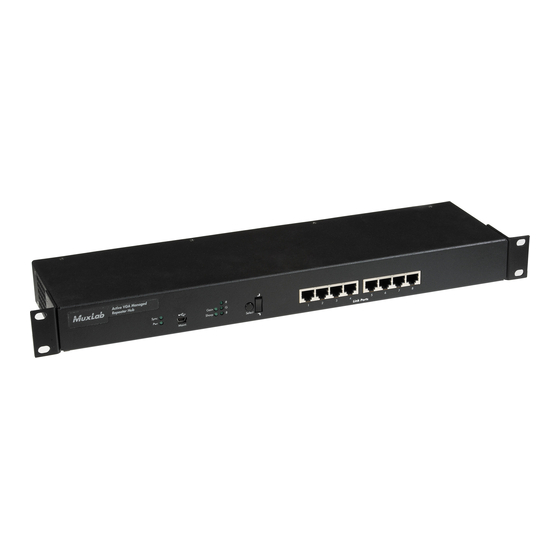
Enclosure Dimensions: 17.15” x 4.69” x 1.72” (43.56 cm x 11.91 cm x 4.37 cm) 3.8 lb (1.7 kg) Weight Regulatory FCC, CE-EMC Directive 89/336/EE, RoHS, WEEE Warranty Two (2) years 500172: Active VGA Managed Repeater Hub (8 Port) Order Information Page 7... -
Page 8: Installation Procedure
© MuxLab Inc. Active VGA Managed Repeater Hub Installation Guide Installation Procedure 3.1. Parts List The Active VGA Managed Repeater Hub (500172) comes with the following parts: Base Unit One (1) 110-240V/12VDC, 1.25A Power Supply with three interchangeable blades ... -
Page 9: Product Overview
© MuxLab Inc. Active VGA Managed Repeater Hub Installation Guide 3.2. Product Overview The external connections and connection indicators of the Active VGA Managed Repeater Hub are detailed in Figures 2 and 3. Please familiarize yourself with them before installing the unit. - Page 10 © MuxLab Inc. Active VGA Managed Repeater Hub Installation Guide Figure 3: Back Panel of Repeater Hub Detail A Detail B VGA Local Out = Local In Link Port = Power Supply Plug Page 10...
-
Page 11: Pre-Installation Checklist
© MuxLab Inc. Active VGA Managed Repeater Hub Installation Guide 3.3. Pre-Installation Checklist Prior to installing the Active VGA Managed Repeater Hub, please ensure that the maximum routing distance from Dispatcher to Repeater Hub does not exceed 1,000 feet (305 meters). Likewise, please ensure that the maximum routing distance from Repeater Hub to Receiver does not exceed 1,000 feet. -
Page 12: Physical Installation
Active VGA Managed Repeater Hub Installation Guide 3.4. Physical Installation MuxLab’s Active VGA Managed Repeater Hub comes with mounting brackets for standard 19” rack mounting. Select the final destination for the product and install the unit using standard rack-mount screws. -
Page 13: Installation Procedure
© MuxLab Inc. Active VGA Managed Repeater Hub Installation Guide 3.5. Installation Procedure In order to install the product, please follow the steps below: 1. Place the Active VGA Managed Repeater Hub in its final location. 2. Connect the Dispatcher to the Repeater Hub by using a UTP/STP Cat 5e/6 cable. - Page 14 © MuxLab Inc. Active VGA Managed Repeater Hub Installation Guide 8. Figure 5 shows a typical configuration: Figure 5: Typical Repeater Hub Configuration Page 14...
-
Page 15: Manual Image Control
Active VGA Managed Repeater Hub Installation Guide 3.6. Manual Image Control The image generated by MuxLab’s Active VGA Managed Repeater Hub may be manually controlled via the Select button and rocker switch (and their associated LEDs) located on the Repeater Hub’s front panel (Figure 6). -
Page 16: Port Control Operations
© MuxLab Inc. Active VGA Managed Repeater Hub Installation Guide 3.7. Port Control Operations MuxLab’s Active VGA Managed Repeater Hub may be controlled in any one of two different ways: 1. RS232 Control 2. USB Control 1. RS232 Control The Active VGA Managed Repeater Hub features built- in firmware that allows commands from the computer unit running MuxLab’s Control Central software to be... - Page 17 © MuxLab Inc. Active VGA Managed Repeater Hub Installation Guide 2. USB Control The Active VGA Managed Repeater Hub features built- in firmware that allows commands from an ASCII terminal to be sent directly to the Repeater Hub via a USB connection only for maintenance purposes.
-
Page 18: Driver Setup
When interfacing a MuxLab device with Windows 2000 (or more recent) operating system, a driver setup file will be required. To install the MuxLab Control Center software, go to www.muxlab.com and download the SC-000032-A USB to Serial Driver. Plug the USB cable between the device and the PC, and power up the device. - Page 19 © MuxLab Inc. Active VGA Managed Repeater Hub Installation Guide A new dialog box will open (Figure 9). Select Browse my computer for driver software. Figure 9: Found New Hardware Dialog Box Another dialog box will open (Figure 10). Click Browse and locate the SC-000032-A file that you downloaded.
- Page 20 Figure 11: Windows Security A window will appear instructing that the software for the driver has been successfully installed (Figure 12). Click Close. You are now ready to launch the MuxLab Control Center software. Figure 12: Successful Installation Dialog Box...
-
Page 21: Troubleshooting
© MuxLab Inc. Active VGA Managed Repeater Hub Installation Guide Troubleshooting The following table describes some of the problem symptoms, the probable causes and possible solutions. If the information below does not solve the problem, the technical support contact information can be found at the end of this section. - Page 22 © MuxLab Inc. Active VGA Managed Repeater Hub Installation Guide When contacting your nearest MuxLab dealer or MuxLab Technical Support at 877-689-5228 (toll free in North America) or (+1) 514-905-0588 (International), please have the following information ready: Unit model number.
-
Page 23: Appendix
Characters that are not supported will be rejected by the response: ILLEGAL CHARACTER. Commands must be entered in the following way and ended with a carriage return: version Description: Returns MuxLab product number & firmware version Example: version Arguments: [none] Response: 500XXX Version Y.Y.Y... - Page 24 © MuxLab Inc. Active VGA Managed Repeater Hub Installation Guide get –a Description: Returns complete device configuration Example: get –a Arguments: [none] Response: Device: [YY..Y] Sharpness: Brightness: Red Skew: Green Skew: Blue Skew: YY..Y Name (up to 20 characters long)
- Page 25 © MuxLab Inc. Active VGA Managed Repeater Hub Installation Guide get –t Description: Returns the brightness value Example: get –t Arguments: [none] Response: Brightness: Value (percentage from 0 to 100%) Example: Brightness: [100] get –r Description: Returns the red skew value Example: get –r...
- Page 26 © MuxLab Inc. Active VGA Managed Repeater Hub Installation Guide set –n {name} Description: Sets a device’s name to a new specified name Example: set –n REPEATER2 Arguments: name new specified name Response: Device: [YY..Y] YY.. Y Name (up to 20 characters)
- Page 27 © MuxLab Inc. Active VGA Managed Repeater Hub Installation Guide set –g {greenskew} Description: Sets a device’s green skew value Example: set –t 88 Arguments: greenskew new green skew value Response: Green Skew: Value (percentage from 0 to 100%) Example:...
-
Page 28: Product Warranty Policy
Customer Service Department and a proof of purchase date. If this product is delivered to MuxLab by mail, you agree to assume risk of loss or damage in transit, to prepay shipping charges to the warranty service location, and to use the original shipping container or equivalent. - Page 29 All RMAs issued are subject to inspection by MuxLab, and will be returned to the customer if not properly packaged – units must be returned in their original container or equivalent. MuxLab will not accept any such product for repair without an authorization for its Technical Support department and without an RMA number issued by MuxLab’s Customer Service department.
- Page 30 © MuxLab Inc. Active VGA Managed Repeater Hub Installation Guide Page 30...
- Page 31 © MuxLab Inc. Active VGA Managed Repeater Hub Installation Guide Page 31...
- Page 32 © MuxLab Inc. Active VGA Managed Repeater Hub Installation Guide MuxLab Inc. 8495 Dalton Road Mount Royal, Quebec Canada H4T 1V5 Tel.: +1 (514) 905-0588 Fax: +1 (514) 905-0589 Toll Free (North America): 877 689-5228 URL: www.muxlab.com E-mail: videoease@muxlab.com Page 32...
Need help?
Do you have a question about the 500172 and is the answer not in the manual?
Questions and answers