Advertisement
Available languages
Available languages
Quick Links
Heimsport-Trainingsgerät
Montage- und Bedienungsanleitung
für Bestell-Nr. 1830
Montage- en bedieningshandleiding voor
Bestellnummer 1830
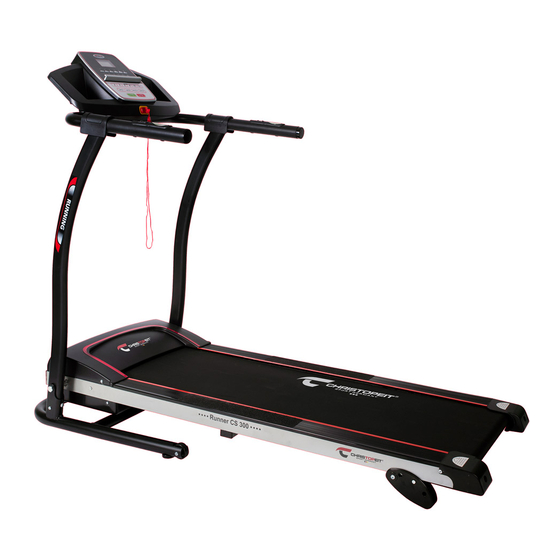
Elektrisches Laufband
CS 300
D
NL
1
GB
Assembly and exercise instructions
for Order No. 1830
F
Notice de montage et d'utilisation du
No. de commande 1830
Advertisement

Subscribe to Our Youtube Channel
Related Manuals for Christopeit Sport CS300


Summary of Contents for Christopeit Sport CS300
- Page 1 Heimsport-Trainingsgerät Elektrisches Laufband CS 300 Montage- und Bedienungsanleitung Assembly and exercise instructions für Bestell-Nr. 1830 for Order No. 1830 Montage- en bedieningshandleiding voor Notice de montage et d’utilisation du Bestellnummer 1830 No. de commande 1830...
- Page 2 Inhaltsübersicht Contents Page 14 1. Wichtige Empfehlungen und Sicherheitshinweise Seite 2. Einzelteileübersicht Seite 3. Stückliste Seite 4. Montageanleitung mit Explosionsdarstellungen Seite Garantiebestimmungen Sommaire Page 24 5. Computeranleitung Seite 10 - 11 6. Trainingsanleitung, Aufwärmübungen (Warm Up) Seite 12 - 13 Inhoudsopgave Pagina 34 Bitte beachten und befolgen Sie die Hinweise und Anweisungen dieser...
- Page 4 Stückliste-Ersatzteilliste Wenn ein Bauteil nicht in Ordnung ist oder fehlt, oder wenn Sie in Zukunft ein Ersatzteil benötigen, wenden Sie sich bitte an uns. CS 300 Best.-Nr. 1830 Technische Daten: Stand: 01. 09. 2018 Internet Service- und Ersatzteilportal: • Motor Dauerleistung 0,55 kW (0,75 PS), maximale Motorleistung 1,1 kW www.christopeit-service.de (1,5 PS) • Geschwindigkeit: 0,8 km/h bis 12 km/h (in 0,1 km/h Schritten einstellbar) Adresse: Top-Sports Gilles GmbH • 12 vorgegebene Trainingsprogramme Friedrichstr. 55 • Direktwahltasten für 2 km/h, 4 km/h, 6 km/h, 8 km/h und 10 km/h 42551 Velbert • Einstellmöglichkeit an den Handgriffen für Geschwindigkeit und Ein-/ Telefon: +49 (0) 20 51 - 6 06 70 Ausschalten Telefax: +49 (0) 20 51 - 6 06 74 4...
- Page 5 Abb.- Bezeichnung Abmessung Menge montiert an ET Nummer Federring for M8 10+15 39-9864-VC 34-35 - - - Kreuzschlitzschraube M6x20 39-10029 Sechskantschraube M8x55 2,18+19 39-10056 Senkkopfschraube M6x30 2+23 39-9945 Senkkopfschraube M6x45 2+23 39-9825 Mutter 38+39 39-9891 Dämpfer für Stützstrebe 400x30x3 36-1830-18-BT Gummi Pad 28x28x5 2+23...
- Page 6 Montageanleitung Legen Sie alles übersichtlich auf den Boden und kontrollieren Sie die Vollzähligkeit anhand der Montageschritte. Achtung: Der vereinfachte Montageablauf bedarf 100% Aufmerksamkeit besonders bei den Knick und Klappstellen. Die Montagezeit beträgt ca. 20Min. Schritt 1: 1. Entnehmen Sie alle Kleinteile, sowie loses Verpackungsmate- rial aus dem Karton und holen Sie dann mit Hilfe einer zweiten Person das vormontierte Laufband heraus. 2. Legen Sie die Schrauben M8x16 (14) und M8x55 (10) samt Un- terlegscheiben (66+67) und Federringen (33) rechts und links neben den Grundrahmen (1) griffbereit hin.
- Page 7 Schritt 3: Kontrolle und Inbetriebnahme 1. B efestigen Sie den Computer (54) mittels der Schraube (58) am Handlauf (61). 2. Alle Verschraubungen und Steckverbindungen auf ordnungs- gemäße Montage und Funktion prüfen. 3. Wenn alles soweit in Ordnung ist, stecken Sie den Netz- kabel (45) in eine vorschriftsmäßig installierte Steckdose (220-240V~50-60Hz) ein und schalten Sie den Hauptschalter (46) unten, vorne am Grundgerät ein. 4. Legen Sie dann den Sicherungsclip (59) auf die entsprechende Stelle am Computer (54) und der Computer signalisiert die Be- triebsbereitschaft. Legen sie den Sicherheitsclip (59) an Ihre Trainingskleidung (z.B. Hosenbund) an und stellen Sie sich auf...
- Page 8 Steigungsverstellung: Transportieren des Laufbandes Heben den Grundrahmen mit einer Hand an und klappen Sie das 1. Klappen Sie das Laufband durch Anheben an einer Endkappe Laufband zusammen bis das es arretiert ist. hochkant zusammen bis diese Position automatisch durch Ziehen Sie die beiden Sicherungssplinte (50) heraus, verstellen Sie Einrasten gesichert ist. die Steigungsbügel (49) in einen andere Position und setzen Sie 2. Fassen Sie das Laufband an den Endkappen mit beiden Händen die Sicherungssplinte (50) wieder ein. Anschließend kann das an, ziehen Sie das Laufband zu sich bis es auf den Transpor- Laufband wieder heruntergeklappt werden. Die Steigungsver- trollen (9) steht und es sich leicht bewegen lässt.
- Page 9 Anmerkungen zur Wartung und Einstellung 1. Pflegen der Lauffläche: Damit das Laufband dauerhaft leicht und gut läuft, sollte immer nach 50 Betriebsstunden die Unterseite der Lauffläche, welche auf dem Gleitbrett liegt auf Ihre Gleitfähigkeit geprüft werden und ggf. mit Siliconspay (Kein Schmierstoff auf ÖL- oder Petroleum Basisverwenden) nachbehandelt werden. Dazu hebt man die Lauffläche etwas von Gleitbrett an und sprüht das Siliconöl zwi- schen Unterseite der Lauffläche und Oberseite vom Gleitbrett. (Achtung: Zuviel Schmiermittel kann ein Rutschen der Lauffläche zur Folge haben.) 2. Einstellen des Laufbandes : 1. Stellen Sie das Laufband im manuellen Programm auf 3 -5km/h ein. 2. Benutzen Sie den Innensechskantschlüssel um an den End kappen das Band mittig auszurichten.
- Page 10 „-“ –Taste: Computerbeschreibung Drücken dieser Taste verringert die Geschwindigkeit während des Betriebs des Laufbandes. Bei Stillstand können Eingabewerte ver- mindert werden. Pulse/Cal -Taste: Im Normalfall zeigt der Computer Pulse an. Durch Drücken dieser Taste können Sie auf die Kalorienanzeige umschalten. Inbetriebnahme Manuelles Programm 1. Stecken Sie den Netzstecker in eine vorschriftsmäßig installierte Steckdose (230V~50Hz) und schalten Sie den Netzschalter (10) unten vorne am Grundgerät ein. 2. Stellen Sie sich auf den schwarzen Flächen am Seitenrand. 3. Legen Sie den Sicherheits-Clip (59) an Ihre Trainings Kleidung (z. B. Hosenbund) an und in die entsprechende Aufnahme am Computer und der Computer zeigt Ihnen das manuelle Programm an und ist startbereit. 4. Drücken Sie die Start -Taste um das Laufband zu starten. Nach einem 5 Sek. Count- Down setzt sich die Lauffläche in Be- wegung. Unmittelbar nach Anlauf des Bandes auf das Laufband gehen und der eingestellten Geschwindigkeit folgen.
- Page 11 Geschwindigkeitsprogramme P1-P12 Wählen Sie mittels der Prog–Taste zwischen 12 unterschiedlichen Geschwindigkeitsprogrammen aus. In diesen Programmen wird die vorgegebene Zeit in 20 Teilintervalle unterteilt und die Ge- schwindigkeit ändert sich automatisch wie in nachfolgender Ta- belle ausgewiesen ist. Durch Drücken der Start - Taste wird das Programm gestartet. Nach Ablauf des Programms ertönt ein Si- gnal und das Laufband stoppt. Um das Programm zu unterbre- chen drücken Sie die Stop-Taste. Programmablauf-Tabelle P1 –...
- Page 12 Trainingsanleitung Um spürbare körperliche und gesundheitliche Verbesserungen zu erreichen, Minuten lang, Dehnungsübungen und/oder leichte gymnastische Übungen müssen für die Bestimmung des erforderlichen Trainingsaufwandes die durchgeführt werden. folgenden Faktoren beachtet werden: Weitere Informationen zum Thema Aufwärmübungen, Dehnungsübungen oder allgemeine Gymnastikübungen finden Sie in unserem Downloadbereich 1.
- Page 13 Aufwärmübungen (Warm Up) Starten Sie Ihre Aufwärmphase durch Gehen auf der Stelle für mind. 3 Minuten und führen Sie danach folgende gymnastische Übungen durch um den Körper auf die Trainingsphase entsprechend vorzubereiten. Bei den Übungen nicht übertreiben und nur soweit ausführen bis ein leichtes Ziehen zu spüren ist. Diese Position dann etwas halten. Greifen Sie mit der linken Beugen Sie sich soweit wie Setzen sie sich mit einem Knien Sie sich in weitem Hand hinter den Kopf an die möglich nach vorn und las- Bein gestreckt auf den Bo- Ausfallschritt nach vorn und rechte Schulter und ziehen sen Sie die Beine fast durch- den und beugen Sie sich vor stützen Sie sich mit den Sie mit der rechten Hand gestreckt. Zeigen Sie dabei und versuchen Sie den Fuß Händen auf dem Boden ab. etwas an der linken Arm- mit den Fingern in Richtung mit den Händen zu errei- Drücken Sie das Becken beuge. Nach 20Sek. Arm Fußspitze. 2 x 20Sek. chen. 2 x 20Sek. nach unten. Nach 20 Sek. wechseln. Bein wechseln. Nach den Aufwärmübungen durch etwas schütteln die Arme und Beine lockern. Hören Sie nach der Trainingsphase nicht abrupt auf, sondern radeln Sie gemütlich noch etwas ohne Widerstand aus um wieder in die normale Puls-Zone zu gelangen. (Cool down) Wir empfehlen die Aufwärmübungen zum Abschluss des Trainings erneut durchzuführen und das Training mit Ausschütteln der Extremitäten zu beenden.
- Page 14 Contents 1. Summary of Parts Page 2. Important Recommendations and Safety Information Page 14 3. Technical data Page 15 - 16 4. Assembly Instructions With Exploded Diagrams Page 17 - 20 6. Console Key pad functions Page 21 - 22 7. Training Instructions, Warm up exercises (Warm Up) Page 23 Dear customer, We congratulate you on your purchase of this home training sports unit and hope that we will have a great deal of pleasure with it.
- Page 15 Part-List + Spare-Part List Please contact us if any components are defective or missing, or if you need any spare parts or replacements in future. CS 300 Order No. 1830 Internet service- and spare parts data base: Technical data: Issue: 01. 09. 2018 www.christopeit-service.de • 0,75 HP Motor continuous (0,55Kw), maximum 1,5 HP Motor Peak (1,1Kw) Top-Sports Gilles GmbH • Speed from 0,8 km/h - 12 km/h (adjustable in 0,1 km/h steps) • 2 manually programs with target of Time, Distance Friedrichstr. 55 • 12 installed programs with different speed 42551 Velbert Telefon: +49 (0) 20 51 - 6 06 70 • Quick speed buttons for 2, 4, 6, 8 + 10 km/h Telefax: +49 (0) 20 51 - 6 06 74 4 • 3 adjustable manual incline...
- Page 16 Illustration Designation Dimensions Quantity Attached to ET nber illustration No. Spring washer for M8 10+15 39-9864-VC 34-35 - - - Cross head screw M6x20 39-10029 Hex bolt M8x55 2,18+19 39-10056 Cross countersunk bolt M6x30 2+23 39-9945 Cross countersunk bolt M6x45 2+23 39-9825 38+39...
- Page 17 Assembly Instructions Put everything clearly on the ground and control the comple- teness based on the assembly steps. Attention: The simplified assembly process requires 100% attention. Especially in the crease and folding positions. Assembly time is approx. 20min. Step 1: 1. Remove all small parts, loose packing material out of the box and then take out with help of a second person the preassem- bled frame of packaging.
- Page 18 Step 3: Checks and How to start 1. Secure the computer (54) at handrail (61) into position with screw (58). 2. Check the correct installation and function of all screwed and plug connections. 3. When everything is in order, connect the power supply cable (45) with wall power (220-240V~50-60Hz) and switch on the main switch (46) below the front frame. 4. Put the safety key (59) onto the computer (54) and the com- puter will show normal manual mode. Put the safety clip (59) at your exercising cloth and stand on the side rails (21). Press Start-Button and after a Count Down the treadmill start mo- ving. Start walking onto the walk surface (20) when speed is slowly and follow the speed. Familiarize yourself with the ma- chine at a low speed settings.
- Page 19 Incline adjustment: How to move/store your treadmill: Raise the basic frame with a hand and fold the treadmill together 1. Put one hand at the end caps of the running frame and lift up until it is arrested. Pull out both security pins (50), shift the incline into vertically position that it automatically locks the upright adjuster (49) in another position and you use the security pins (50) position. again. The treadmill can folded down. The incline adjustment is 2. Place your hands on top of the handrails, than lean the machi- intended in addition to raise the load of the mountain accrual. ne toward your body until it is easy moveable on transportation rollers (9). Warning: Before folding up the treadmill switch off and wait until the running surface totally stopped. Don’t start the treadmill in fold up position!
- Page 20 Maintenance and adjusting 1. Lubrication for the running belt: In order to keep the machine in the best condition, please add some Silicone oil between the running belt and the running board after 50 hours or 1 to 2 month of use. But the running belt may slip, if you lubricate too much. To lubricate the belt please pull the walking belt up and injection the silicone oil into the gap between belt and walking deck. 2. Adjusting running belt: You need to adjust the walking belt to the normal position, per the following steps if it is off. 1. Set speed at 3-5km. 2. Using the Allen key to adjust the belt tension bolt on the end cap of the system frame. 3. If you want to move the belt towards left, turn the right tension bolt clockwise. 4. If you want to move the belt towards right, turn the left tension bolt clockwise. 5. If you have already done according to the steps above and it is still not at the good range, then the running belt should be damaged already, please contact your local dealer for replace- ment. Note: Make sure that the running surface is as centered as possible. Once these moves too far from the center, (about 10 mm) it should be readjusted into the center. 3. Running belt slips: 1. Make sure the walking belt is not too loose. 2. Make sure the motor belt is not too loose.
- Page 21 USER MANUAL OF COMPUTER MANUAL MODE: How to start manual mode: Put in the AC plug in wall power 230V~50Hz and put on the po- wer switch (10). Put safety clip (59) onto the computer and it will show normal manual mode.Stand your feet on both side rails. Put the safety key at you exercise cloth and press start-key to start with exercising. After a 5 sec. count down, the motor begin to run slowly and you can step on the running belt and follow the speed. Adjust the speed with “+” and “-“ -keys into desired speed. If put off the safety clip from computer at any time, the motor stop slow- ly and the display will show „---“. After put on the safety key on computer the normal manually program will show. Press “+” or “-“ -key to adjust value of speed. Press quick speed -key to adjust speed quickly. All values of the displays will counter up.
- Page 22 Exercise programs P1-P12: On the normal manual mode, press Prog-key to chose one of the exercise speed programs P1-P12. Each program is divided into 20 intervals of time and the speed changes as following program list shows. Initial setting time is 30min, set a time for training session and press Start to start the program. Pressing Stop to have a break or finish earlier the program. Press speed “+” or “-“-key to adjust speed during the program if it is to quick or slow. With next inter- vals of time the speed level will change back to program mode. If the program runs till end of time the motor will stop running after the display counts down time to zero. PROGRAM SPEED TABLE P1 – P12 Programs in 20 intervals of time Km/h Km/h Km/h Km/h Km/h Km/h Km/h Km/h Km/h Km/h Km/h Km/h Function of safety key The safety clip (59) has an emergency function. In fear or danger or if you fall down or jumped from it, the safety clip will lose position at computer and stops the motor with break system. Put the safety key out from computer on any status, the display is „---“, the buzzer beep each second. Put the safety key on compu- ter, then the display will enter normal manual mode. All parameter reset to zero.
- Page 23 Training instructions You must consider the following factors in determining the amount of training 4. Motivation effort required in order to attain tangible physical and health benefits: The key to a successful program is regular training. You should set a fixed time and place for each day of training and prepare yourself mentally for the 1.
- Page 24 Sommaire 1. Aperçu des pièces Page 2. Recommandations importantes et règles de sécurité Page 24 3. Nomenclature Page 25 - 26 4. Notice de montage avec écorchés Page 27 - 30 5. Manuel d’utilisation du calculateur électronique Page 31 - 32 6. Recommandations pour l’entraînement Page 33 Exercices d‘échauffement (Warm Up) Chère cliente, cher client, Nous vous félicitons pour l’achat de ce cycle d’entraînement intérieur et nous vous souhaitons beaucoup de plaisir avec. Veuillez respecter et suivre les indications et les instructions de montage et d’emploi. Si vous avez des questions, vous pouvez bien sûr vous adresser à nous. Très cordiales salutations Top-Sports Gilles GmbH Friedrichstr.
- Page 25 Liste des pièces – Liste des pièces de rechange Si une pièce n’est pas correcte, s’il manque une pièce ou si vous avez besoin d’une pièce de rechange à l’avenir, veuillez vous adresser à : CS 300 N° de réf. 1830 Service- Internet et les pièces de rechange base de données Technical data: Issue: 01. 09. 2018 www.christopeit-service.de • 0,75CV (0,55KW) Moteur et Peak performance, 1,5CV (1,1KW) • vitesse réglable entre 0,8km/h et 12 km/h (à 0,1 km / h incréments) Top-Sports Gilles GmbH • 12 programmes d’entraînement avec programmation de la vitesse Friedrichstr.
- Page 26 Schéma Désignation Dimensions Quantité Monté sur Numéro ET n° en mm Unités schéma n° Rondelle élastique pour M8 10+15 39-9864-VC 34-35 - - - Phillips vis M6x20 39-10029 Vis á tête hexagonal M8x55 2,18+19 39-10056 Vis à tête fraisée M6x30 2+23 39-9945 Vis à...
- Page 27 Instructions de montage Mettez clairement tout sur le terrain et sous contrôle l‘exhaustivité basé sur les étapes de montage. Attention: Le processus d‘assemblage simplifié nécessite 100% d‘attention en particulier dans les sites de pliage et de dumping. Le temps de montage est d‘environ 20min. Etape n°...
- Page 28 Étape n° 3: Contrôle et mise en marche: 1. Fixez l‘ordinateur (54) par la poignée (61) au vis (58). 2. Vérifier si les assemblages et connexions ont été effectués correctement et fonctionnent. 3. Si tout est en ordre, branchez le câble d’alimentation (45) dans une prise AC (220-240V~50-60Hz) et mettez l’appareil sous in- terrupteur (46). 4. Accrochez le clip de sécurité (59) à votre tenue de sport (par exemple sur votre ceinture de pantalon) et à l’endroit prévu sur l’ordinateur (54). L’ordinateur vous indique qu’il est prêt à démarrer. Placez-vous sur les surfaces noires (21) à côté du tapis. Appuyez sur la touche Start- (Marche) pour mettre en route le tapis roulant. Après un décompte de secondes, le ta- pis de course se met en mouvement. Allez directement sur le...
- Page 29 Déguisement de montée : Comment déplacer / ranger votre tapis de course : Lèvent le cadre principal d’une main et rabattez le ruban de cours 1. Retournez le tapis de course vers le haut. ensemble jusqu’à ce que ce soit arrêté. 2. Placez vos mains en haut des poignées et inclinez l’appareil Retirez les deux goupilles de securite (50), deplacez le commande vers votre corps, vous pourrez ainsi le déplacer plus aisément (9). du niveau de difficulte (49) dans une autre position et vous mettez Attention: de nouveau les goupilles de securite (50). Le ruban de cours peut succeder de nouveau sont rabattus. Le deguisement de montee Avant de replier le tapis roulant hors tension et attendre jusqu‘à s’est souvenu en plus pour augmenter la charge de l’accumulation ce que la surface de roulement totalement arrêté. Ne pas mettre le de montagne. tapis roulant en position haute pli!
- Page 30 Maintenance et réglages : 1. Lubrification du tapis de course Afin de conserver votre appareil dans le meilleur état, veuillez ajouter un peu d’huile de silicone entre la bande de roulement et la base après 50 heures d’entraînement (entre 1 à 2 mois d’utilisation). La surface de course risque de glisser si vous lu- brifiez trop. Afin de lubrifier le tapis de course, veuillez soulever la bande de roulement et injecter l’huile de silicone dans l’espace situé entre la bande et la base du tapis. 2. Réglage de la bande de roulement Afin de régler la bande de roulement dans sa position normale, veuillez suivre les étapes suivantes en veillant à ce que la bande de roulement soit arrêtée. 1. Régler la vitesse à 3-5 km/h. 2. Utiliser la clé Allen pour régler la tension des verrous de la bande, situés au bout du cadre système.
- Page 31 Touche «+»: Description de l’ordinateur En appuyant sur cette touche lorsque l’appareil est en marche, la vitesse du tapis roulant augmente. A l’arrêt, la valeur des données d’entrée peut être augmentée. Touche «-» En appuyant sur cette touche lorsque l’appareil est en marche, la vitesse du tapis roulant diminue. A l’arrêt, la valeur des données d’entrée peut être diminuée. Pulse/Cal -Touche : Normalement, l’ordinateur affiche les valeurs en Pulsation. En ap- puyant sur cette touche, vous pouvez afficher des Calories au lieu valeurs en Pulsation. Mise en marche Programme manuel 1. Branchez la fiche mâle dans une prise conforme à la norme (230V~50Hz) et appuyez sur l’interrupteur (10) qui se trouve en bas, sur la face avant de l’appareil.
- Page 32 Programme Vitesse P1-P12 Choisissez à l’aide de la touche Prog entre 12 différents pro- grammes de vitesse. Dans ces programmes, le temps imposé est subdivisé en 20 parties et la vitesse change automatiquement comme indiqué dans le tableau suivant. Chaque changement de vitesse est signalé par un décompte sonore de 5 secondes. Le programme est lancé en appuyant sur la touche Start. Lorsque le programme est terminé, un signal sonore se fait enten- dre et le tapis roulant s’arrête. Pour interrompre le programme, appuyez à nouveau sur la touche Stop. Tableau du deroulement des programmes P1 - P12 Programmes 20 parties et la vitesse Km/h Km/h...
- Page 33 Recommandations pour l’entraînement 4. Motivation Les facteurs ci-après doivent être pris en compte pour la détermination de Un entraînement régulier est la clef de la réussite de votre programme. l’entraînement indispensable afin d’améliorer concrètement son physique Vous devriez prévoir votre entraînement à heure fixe chaque jour et vous y et sa santé: préparer mentalement. Il est primordial d’être de bonne humeur au moment 1. Intensité: de l’entraînement et de ne pas perdre l’objectif visé. Jour après jour, en vous entraînant continuellement, vous verrez les progrès accomplis et votre L’entraînement n’aura d’effets positifs que si les efforts déployés dépassent objectif se rapprocher progressivement. ceux de la vie quotidienne, mais sans être hors d’haleine et/ou se sentir épui- sé. Le pouls peut constituer un repère valable pour un entraînement efficace. Au cours de celui-ci le pouls devrait se situer entre 70 % et 85% du pouls maximum (le déterminer et le calculer au moyen du tableau et de la formule). Pendant les premières semaines, le pouls devrait tourner autour de 70% du maximum. Pendant les semaines et les mois suivants, le pouls devrait augmenter lentement pour atteindre la limite supérieure, c.-à-d. 85% du pouls maximum. Plus la condition physique de la personne qui s’entraîne est bonne, plus il faut accroître l’entraînement pour rester entre 70 et 85% du pouls maximum. On y arrive en allongeant la durée de l’entraînement et/ ou en renforçant la difficulté de celui-ci. Si la fréquence cardiaque n’est pas affichée sur le visuel de l’ordinateur ou si, pour des raisons de sécurité, vous souhaitez la contrôler, car elle aurait pu être incorrectement indiquée suite à des erreurs d’utilisation, etc., vous pouvez alors procéder comme suit:...
- Page 34 Inhoudsopgave 1. Overzicht van de losse delen pagina 3 2. Belangrijke aanbevelingen en veiligheidsinstructies pagina 34 3. Stuklijst pagina 35 - 36 4. Montagehandleiding met explosietekeningen pagina 37 - 40 5. Handleiding bij de computer pagina 41 - 42 6. Trainingshandleiding/Warming-up pagina 43 oefeningen (Warm Up) Geachte klant Wij willen u van harte gelukwensen met de aanschaf van uw hometrainer en hopen dat u hier veel plezier aan zult beleven. Neem a.u.b. de instructies en aanwijzingen uit deze montage- en bedieningshandleiding in acht en volg deze op.
- Page 35 Stuklijst - reserveonderdelenlijst Wanneer een bepaald onderdeel niet in orde is of ontbreekt, of wanneer u in de toekomst een reserveronderdeel nodig heeft, kunt u zich wenden tot: CS 300 best.nr. 1830 Internet service- en onderdelen data base: Technische specificatie: Stand: 01. 09. 2018 www.christopeit-service.de • 0,75PK (0,55Kw) Motor with Peak prestatie 1,5PK (1,1Kw) • snelheidsregelaar voor tussen 0,8 en 12 km/h (in 0,1km/h stappen) Top-Sports Gilles GmbH • 12 trainingsprogramma‘s met voorgeprogrammeerde snelheidsregulering Friedrichstr. 55 • 2 manueel programma voor de tijd en afstand 42551 Velbert ongeveer Telefon: +49 (0) 20 51 - 6 06 70 • Direkt toets for snelheidsreguliering 2, 4, 6, 8, en 10 km/h Telefax: +49 (0) 20 51 - 6 06 74 4 • Handpulsmeting aan de handgrepen...
- Page 36 Afbeeldings- Beschrijving Afmetingen Aantal Gemonteerd aan ET-nummer stuks Afbeeldingsnr. Veerring voor M8 10+15 39-9864-VC 34-35 - - - Kruiskopschroef M6x20 39-10029 Zeskantschroef M8x55 2,18+19 39-10056 Verzonkenschroef M6x30 2+23 39-9945 Verzonkenschroef M6x45 2+23 39-9825 Moer 38+39 39-9891 Rubberen voor ondersteuning 400x30x3 36-1830-18-BT Rubberenschijf 28x28x5...
- Page 37 Montagehandleiding Zet alles duidelijk op de grond en onder controle de volledigheid gebaseerd op de assemblage stappen. Waarschuwing: De vereenvoudigde assemblageproces vereist 100% aandacht vooral in de vouw en stortplaatsen. De montage is ongeveer 20min. Stap 1: 1. Verwijder alle hardware en losse verpakkingsmateriaal uit de doos en halen u op met de hulp van een tweede persoon de compleet voorgemonteerde loopband uit.
- Page 38 Stap 3: 1. Plaats u het computer (54) met de schroef (58) aan de leuning (61) en schroeft u deze vast. 2. Alle schroef- en stekkerverbindingen op een correcte montage en juiste werking controleren. 3. Wanneer alles in orde is, steek de stekker de electriciteitskabel (45) in een AC contact doos (220-240V~50-60Hz) en zet de machine aan door drukken van de schakelaar (46). 4. Bevestig de veiligheidsclip (59) aan uw trainingskleding (bijv. aan uw broeksband) en plug uzelf met de andere kant van de draad in de computer (54), waardoor deze op het beeldscherm aangeeft dat hij klaar voor gebruik is. Ga op de zich aan de zijkant bevindende zijdebar (21) staan. Druk op de start-toets om de loopband op te starten. Na een countdown van secon- den zet de loopband zich in beweging. Stap onmiddelijk na...
- Page 39 Pitch aanpassing: Methode om uw loopband te verplaatsen/op te bergen: Til de basisframe met een hand en vouw de loopband samen totdat 1 Plaats de loopband in vertical positie. het wordt vergrendeld. Trek de twee veiligheidsspeld (50), je de 2. Plaats uw hand op het uiteinde van het systeem frame en klap helling beugels (49) passen in een andere positie en plaats de vei- dan het frame in tramsportrol (9) positie. ligheidsspeld (50) opnieuw. Aansluiten van de loopband kan worden Let op: gevouwen weer naar beneden. De helling aanpassing is bedoeld om de lasten voor de bergop lopen. Voor het vouwen van de loopband uit te schakelen en wacht tot het loopvlak helemaal gestopt. Gebruik de loopband niet starten in opgevouwen positie!
- Page 40 Onderhoud en aanpassing 1. Smeren van de loopband: O m de machine in goede staat te houden smeer wat Siliconenolie tussen de loopband en de loopplaat na gebruik van 50 uur of 1 tot 2 maanden. De loopband zal slippen als u teveel smeert. Om de band te smeren trek de loopband omhoog en injecteer de siliconenolie in het gat tussen de band en de loopplaat. 2. Loopband aanpassen: O m uw loopband aan te passen tot de gewoonlijke positie volg de volgende stappen wanneer het apparaat uit staat. 1 . Zet snelheid op 3-5km. 2 . Gebruik de Allen knop om de schroef op het uiteinde van het systeem frame aan te passen die de strakheid van de band bepaalt. 3 . Als u de band naar links wilt verplaatsen, draai de rechter schroef met de klok mee. 4 . Als u de band naar rechts wilt verplaatsen, draai de linker schroef met de klok in. 5 . Als u de bovenstaande stappen gevolgd heeft en de band is nog steeds niet in de goede positie, dan zal hij beschadigd zijn. Neem contact op met uw regionale dealer voor een vervangende band. Opmerking: Zorg ervoor dat het loopvlak zo gecentreerd is mogelijk. Zodra deze bewegingen te ver van het centrum, (ongeveer 10 mm) moet opnieuw het worden aangepast.
- Page 41 Computerbeschrijving „+“ –toets: Wanneer u gedurende uw training op deze toets drukt, verhoogt u de snelheid van de loopband. Als de loopband stilstaat, kunt u uw gewenste waarden in de computer invoeren. „-“ –toets: Wanneer u gedurende uw training op deze toets drukt, verlaagt u de snelheid van de loopband. Als de loopband stilstaat, kunt u uw invoerwaarden verlagen. Pulse/Cal -Touche: Normaal geeft de computer pulsen weer. Door op te drukken met deze knop kunt u overschakelen naar de calorieën. Inbedrijfsname Manueel programma 1. Steek de stekker in een reglementair geinstalleerd stopcontact (230V~50Hz) en schakel de aan de voorkant onderaan de loop- band geplaatste electriciteitsschakelaar (10) in. 2. Ga op de zich aan de zijkant bevindende zwart gemarkeerde vlakken staan.
- Page 42 Snelheidsprogramma‘s P1-P12 Kies met de Prog-toets één van de 12 verschillende snelheids- programma‘s uit. In deze programma‘s wordt de gekozen tijd in 20 deelintervallen verdeeld, waarbij de loopsnelheid zich in deze intervallen automatisch op de in de onderstaande tabel aange- geven snelheden instelt. Elke aanpassing van de snelheid wordt door een 5 seconden count-down akoestisch ingeleid. Druk op de start-toets om het programma te starten. Na afloop hoort u een signaal en de loopband stopt vanzelf. Wilt u het programma...
- Page 43 Trainingshandleiding of algemene gymnastische oefenen in onze downloadarea onder www. christopeit-sport.com De onderstaande factoren moeten in acht worden genomen bij het bepalen 4. Motivatie van de benodigde training voor het bereiken van een merkbare verbetering De sleutel tot een succesvol programma is een regelmatige training. U kunt van uw figuur en gezondheid: het beste een vaste tijd en plaats per trainingsdag vaststellen en u ook geestelijk op de training voorbereiden. Train alleen met een goed humeur 1. Intensiteit: en houd uw doel voor ogen. Met een continue training zult u zien dat u per De mate van lichamelijke belasting bij de training moet de normale belasting dag vooruitgang boekt, dat u zich verder ontwikkelt en dat u uw persoonlijke overschrijden, zonder dat u daarbij buiten adem en/of uitgeput raakt. De trainingsdoel beetje bij beetje nadert. hartslag kan een geschikte richtwaarde voor een effectieve training zijn. Tijdens de training moet deze tussen de 70% en 85% van de maximale hartslag liggen (zie de tabel en formule om deze te bepalen en te berekenen).
- Page 44 Service / Hersteller Bei Reklamationen, notwendigen Ersatzteilbestellungen oder Reparaturen wenden Sie sich bitte an unsere Service Abteilung. Internet Service- und Ersatzteilportal: © by Top-Sports Gilles GmbH www.christopeit-service.de D-42551 Velbert (Germany) Service: Top-Sports Gilles GmbH info@christopeit-sport.com Tel.: +49 (0)2051/6067-0 Friedrichstrasse 55 http://www.christopeit-sport.com Fax: +49 (0)2051/6067-44 D - 42551 Velbert http://www.christopeit-sport.net...
Need help?
Do you have a question about the CS300 and is the answer not in the manual?
Questions and answers