Advertisement
Quick Links
Aufbauanleitung
Assembly Manual
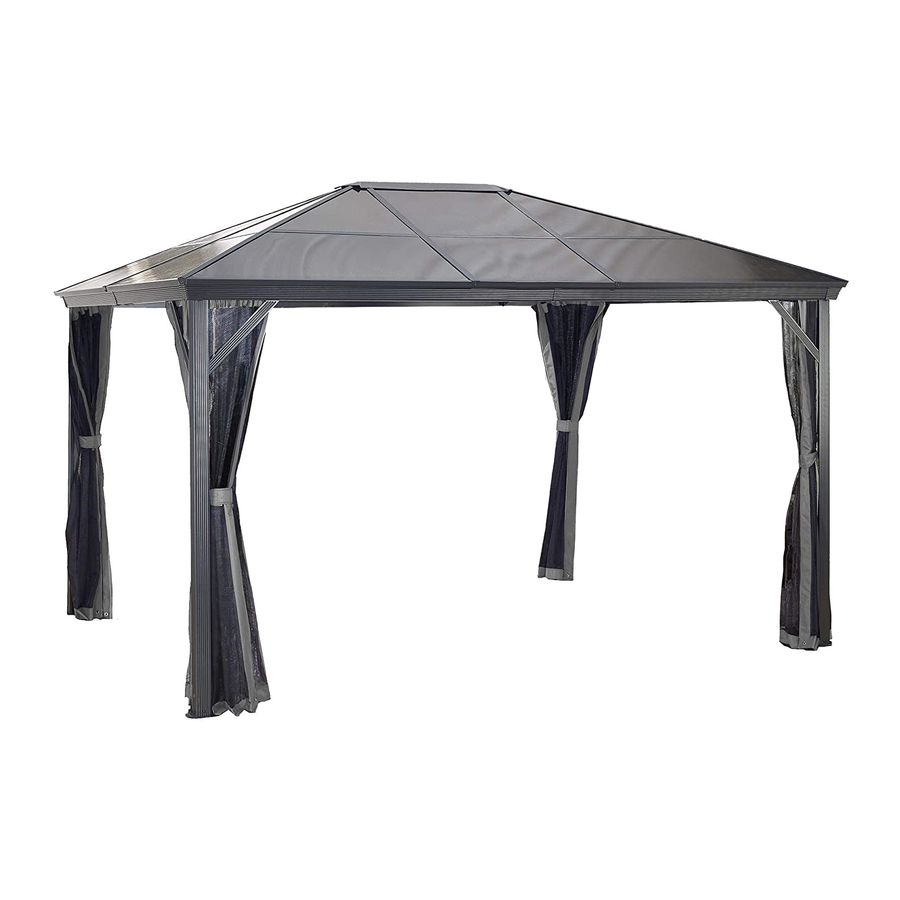
Pavillon Verona 10x14 300 x 422 cm
Sunshelter 10 x 14 ft.
Maße Dach : 295,5 x 423 cm
Exact dimension of the roof, corner-to-corner: 116.4 x 166.6 inch
Min. dimension required for the base: 113.9 x 163.3 inch
minimale Fundamentmaße : 289,2 x 415 cm
© Sojag inc. 2015
Advertisement

Related Manuals for Sojag VERONA


Summary of Contents for Sojag VERONA
- Page 1 Aufbauanleitung Assembly Manual Pavillon Verona 10x14 300 x 422 cm Sunshelter 10 x 14 ft. Maße Dach : 295,5 x 423 cm Exact dimension of the roof, corner-to-corner: 116.4 x 166.6 inch Min. dimension required for the base: 113.9 x 163.3 inch minimale Fundamentmaße : 289,2 x 415 cm...
- Page 2 flooring which it is being anchored to (not included). WICHTIG Bitte lesen Sie sich die Anleitung vor dem Aufbau sorgfältig durch. Dieses Produkt muss zwingend mit Schrauben (nicht mitgeliefert) am Boden befestigt werden. © Sojag inc. 2015...
- Page 3 Anz. M6X12 Screws Schraube M6X12 M6X20 Screws Schraube M6X20 M6X25 Screws Schraube M6X25 M6X16 Screws Schraube M6X16 M6X15 Screws Schraube M6X15 M6X12 Screws Schraube M6X12 St4X15 Screws Schraube St4X15 M6X12 Screws Schraube M6X12 Allen Key Sechskantschlüssel © Sojag inc. 2015...
- Page 4 Corner Roof Bar Dachstrebe Ecke Middle Roof bar Dachstrebe Mitte Finishing Roof Side Structure Abschlussleiste Links Finishing Roof Side Structure Abschlussleiste Rechts Finishing Roof Side Structure Abschlussleiste Mitte Solidifying Bar Dachstützstrebe Mit. Base Pfostenplatte Corner Cover Eckabdeckung © Sojag inc. 2015...
- Page 5 Moskitonetz Corner Finishing End Abschlusskappe Ecke Finishing End Abschlusskappe Mitte Outside Roof Connector Firstabdeckung Außen Inside Roof Connector Firstabdeckung Innen Haken Hook Middle Roof Panel (upper) Dachplatte Mitte Oben Middle Roof Panel (lower) Dachplatte Mitte Unten © Sojag inc. 2015...
- Page 6 1.1 Befestigen Sie den Pfosten (A) auf der Pfostenplatte (H mit den Schrauben (V). the screws (V). Wiederholen Sie diesen Schritt mit allen Pfosten (A). Repeat for all four columns (A). Parts required for this step / Benötigte Teile: © Sojag inc. 2015...
- Page 7 © Sojag inc. 2015...
- Page 8 (C) and 8 hooks (X) into the first track found on the ogee (C1) by sliding them into the track. SOLD SEPARATLY / SEPARAT ERHÄLTLICH Curtains with hooks Vorhänge mit Haken Parts required for this step / Benötigte Teile: © Sojag inc. 2015...
- Page 9 NETTING / MOSKITONETZ B/B1 Side View Seitenansicht außen C/C1 OPTIONAL CURTAINS / OPTIONALE VORHÄNGE B/B1 Side View Seitenansicht außen C/C1 © Sojag inc. 2015...
- Page 10 4 screws (V). 3.4 Verschrauben Sie die Dachträger Lang (B & B1) Repeat for all Ogees. mit 4 Schrauben (V). Wiederholen Sie diesen Schritt für alle Dachträger. Parts required for this step / Benötigte Teile: © Sojag inc. 2015...
- Page 11 © Sojag inc. 2015...
- Page 12 Schraube (V) durch die Innenseite des Pfosten fixieren. the inside of each column (A) as illustrated. Wiederholen Sie diesen Schritt bei allen Dachträgern. Repeat for the remaining ogees. Parts required for this step / Benötigte Teile: © Sojag inc. 2015...
- Page 13 © Sojag inc. 2015...
- Page 14 5.2 Install the corner cover (I) using the 5.2 Befestigen Sie die Eckabdeckung (I) mit den screws (W) on each corner of the structure. Schrauben (W) an jeder Ecke des Produktes. Parts required for this step / Benötigte Teile: © Sojag inc. 2015...
- Page 15 Important: Use the screws (W) on top of the join cover plate (L) and the screws (W1) under the join cover plate (L). Wichtig : Beachten Sie, dass in diesem Schritt 2 verschiedene Schrauben verwendet werden! © Sojag inc. 2015...
- Page 16 (V1) as illustrated. den Dachträgern und den Pfosten (A) mit den Schrauben (V1), wie abgebildet. Repeat for each corner of the unit. Wiederholen Sie diesen Schritt an allen Ecken. Parts required for this step / Benötigte Teile: © Sojag inc. 2015...
- Page 17 © Sojag inc. 2015...
- Page 18 7.1 Install the four corner roof bars (D) to the 7.1 Befestigen Sie die Dachstrebe Ecke (D) an der inside roof connector (S1) using the screws (V2). Firstabdeckung Innen (S1) mit den Schrauben (V2). Parts required for this step / Benötigte Teile: © Sojag inc. 2015...
- Page 19 8.2 Bestigen Sie die Dachstrebe Ecke (D) mit den Schrauben using a screw (V). (V) am Pfosten (A). Wiederholen Sie diesen Schritt an allen Ecken. Repeat for each corner roof bars (D). Parts required for this step / Benötigte Teile: © Sojag inc. 2015...
- Page 20 ACHTUNG: Achten Sie darauf, dass Sie an der Längsseite die Dachstreben (E) mit Ösen verbauen. An diesen Ösen verschrauben Sie im letzten Schritt 15 die Dachstützenstreben Mitte (G). Parts required for this step / Benötigte Teile: © Sojag inc. 2015...
- Page 21 SEITE MIT ÖSEN SEITE MIT ÖSEN © Sojag inc. 2015...
- Page 22 10.1 Install the outside roof connector (S) to the 10.1 Fixieren Sie die Firstabdeckung Außen (S) mit den inside roof connector (S1) using the screws (U1). Schrauben (U1) an der Firstabdeckung Innen (S1) Parts required for this step / Benötigte Teile: © Sojag inc. 2015...
- Page 23 © Sojag inc. 2015...
- Page 24 11.3 Die Dachplatten (Ma, Na & Z) müssen eine Linie roof panels (Z) not be completely pushed to the bilden. Dies verhindert, dass die Dachplatte (Z) zu back of the tracks. hoch eingeschoben wird. Parts required for this step / Benötigte Teile: © Sojag inc. 2015...
- Page 25 THIS SIDE UP / SEITE NACH OBEN D & E Ma, Na & Z © Sojag inc. 2015...
- Page 26 Dachverstärkungsstrebensitzen. 12.2 Align the middle roof support bar (J2) with the roof support bars (J and J1). 12.2 Die Dachverstärkungsstreben (J, J1 & J2) müssen eine Linie bilden. Parts required for this step / Benötigte Teile: © Sojag inc. 2015...
- Page 27 The water evacuation holes must be on this side of the bar Wichtig ist, dass die Wasserablauf- löcher in Richtung Dachfirst sitzen. J, J1 & J2 D & E © Sojag inc. 2015...
- Page 28 13.1 Setzen Sie anschließend die Dachplatte (Z) ein und of the shelter. schieben diese ebenfalls in die Dachstreben (E) ein. Führen Sie diesen Schritt auf beiden Längsseiten durch. Repeat this step for all remaining roof panels. Parts required for this step / Benötigte Teile: © Sojag inc. 2015...
- Page 29 THIS SIDE UP / SEITE NACH OBEN D & E Mb, Nb & Z1 © Sojag inc. 2015...
- Page 30 Abschlusskappe were installed. Secure both bars in the corner with Ecke (Q) und der Schraube (V). a corner finishing end (Q) by inserting a screw (V). Parts required for this step / Benötigte Teile: © Sojag inc. 2015...
- Page 31 START HERE HIER STARTEN © Sojag inc. 2015...
- Page 32 (G) using the screws (V) as illustrated. Dachstützenstreben Mitte (G) von unten am Gestell des Pavillons mit der Schraube (V). Repeat on the second 14 ft side. Führen Sie dies auf beiden Längsseiten durch. Parts required for this step / Benötigte Teile: © Sojag inc. 2015...
- Page 33 © Sojag inc. 2015...
- Page 34 Sie die Ösen in die im Schritt 2 eingesetzten Haken (X) einhängen. found along the top border of the netting. Repeat for all four netting panels. Wiederholen Sie dies an allen 4 Seiten. Parts required for this step / Benötigte Teile: © Sojag inc. 2015...
- Page 35 © Sojag inc. 2015 Made in CHINA / Fabriqué en CHINE / Hecho en CHINA...
- Page 36 Clemens HobbyTec NOCH FRAGEN RUND U M D A S P R O D U K T ODER ZUM AUFBAU? RUFEN SIE UNS AN: + 49 (0) 6571 929 222 SERVICE@CLEMENS - HOBBYTEC.DE CLEMENS HOBBYTEC GMBH RUDOLF - DIESEL - STR ASSE 8 D - 54516 WITTLICH WWW.CLEMENS - HOBBYTEC.DE...
- Page 37 www.sojag.ca...
Need help?
Do you have a question about the VERONA and is the answer not in the manual?
Questions and answers