Table of Contents
Advertisement
Quick Links
Advertisement
Table of Contents

Summary of Contents for EqualLogic PS6500
- Page 1 PS6500 Storage Arrays Rack Mount Instructions Part Number: R724M Rev. A01...
- Page 2 Copyright 2010 Dell, Inc. All rights reserved. Dell is a trademark of Dell, Inc. EqualLogic is a registered trademark. All trademarks and registered trademarks mentioned herein are the property of their respective owners. Information in this document is subject to change without notice.
-
Page 3: Table Of Contents
Step 8: Install the Bezel......................16 Step 9: Install the Power Supply and Cooling Modules ............16 Step 10: Install the Cable Management System ..............16 Where to Go Next ..........................18 Technical Support ..........................18 Contacting Dell ........................19 Online Services ........................19 PS6500 Rack Mount Instructions... -
Page 5: Introduction
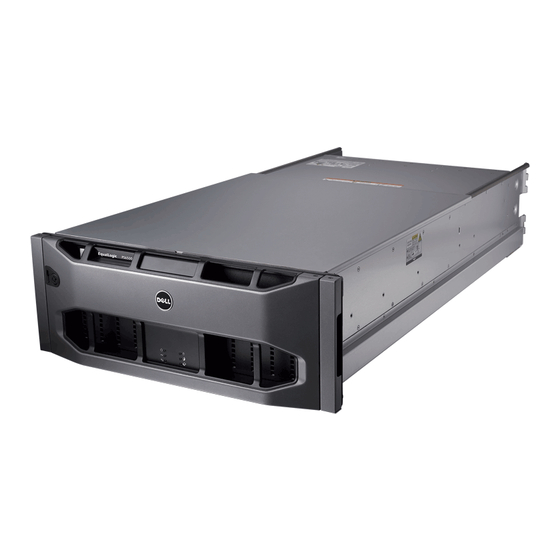
Introduction For proper operation, a PS6500 storage array must be installed in a rack. A PS6500 array uses a telescopic rail system that enables you to pull the chassis away from the rack, opening the chassis cover and exposing the disks drive slots. -
Page 6: Rack Requirements
Load a rack with arrays from the bottom to the top. Install a maximum of six arrays in a rack, for ease of access to the disk drives. In a PS6500, drives are inserted from the top. ... -
Page 7: Rail Kit Parts
Flathead screwdriver to open and close the cam locks Steps for Mounting an Array in a Rack Follow these steps to mount a PS6500 array in a rack: 1. Determine where to place the mounting rails in the rack. 2. Remove the bezel. -
Page 8: Step 1: Determine Where To Place The Mounting Rails In The Rack
2. Insert the bezel key and turn it clockwise to unlock the bezel. The key is attached to the bezel. Figure 1 Unlocking the Bezel 3. While holding the bezel on the right side, release the bezel latch by pushing the latch up. See Figure 2. PS6500 Rack Mount Instructions... -
Page 9: Step 3: Remove The Power Supply And Cooling Modules
Remove the three power supply and cooling modules to make the array lighter and easier to install in the rack. 1. Facing the rear of the chassis, squeeze together the module latches, release the handle, and rotate the handle downwards. See Figure 4 (shows power supply module by itself for clarity). PS6500 Rack Mount Instructions... -
Page 10: Step 4: Attach The Mounting Rails To The Rack Posts
Attach the mounting rail flanges to the outside of the rack post flanges. For tapped hole racks, insert the screws from the outside of the rack. Use the markings on the rack posts to make sure the rails are level. PS6500 Rack Mount Instructions... -
Page 11: Attaching The Rails To Square-Hole Or Round-Hole (Unthreaded) Posts
U 30 and 31, the rear pegs will be in U 29 and 30. 5. To remove the rails, pull on the latch release button on the middle of each end piece and unseat each rail. Figure 6 Attaching the Rails to the Rack (Square Hole Rack Shown) PS6500 Rack Mount Instructions... -
Page 12: Attaching The Rails To Tapped (Threaded) Hole Posts
1. On each rail, use a Torx driver to remove the six screws holding the front and rear peg and latch assemblies to the rail. 2. Discard the peg and latch assemblies and the screws. Orient the mounting rails in their proper position. Refer to Figure 7. PS6500 Rack Mount Instructions... -
Page 13: Step 5: Slide The Chassis Into The Rack
Be careful when lifting the chassis. If available, use a mechanical box lifter to move the chassis into position. Otherwise, use two people to lift and position the chassis. 1. On both rail arms, pull the telescoping sections out to the end of their travel and make sure they click into place. PS6500 Rack Mount Instructions... - Page 14 Do not force the rails to engage or you may damage the ball bearing race. If you meet resistance, the chassis may not be level. PS6500 Rack Mount Instructions...
-
Page 15: Step 6: Attach The Chassis Cover To The Rail Flanges
30 cm (12 inches) from the rack. This will expose the disk drive slots and provide room for you to attach the cover to the front rail flanges. 3. Attach the chassis cover to the front left flange and the front right flange (callout 1 in Figure 10). PS6500 Rack Mount Instructions... -
Page 16: Step 7: Install The Disk Drives
Insert disk drives in the correct position, with the latch toward the rear of the array. Do not force a disk drive into a slot. Follow these steps to install a disk drive: 1. Unlock the chassis cover by using a flathead screwdriver to turn both cam screws on the front panel counter-clockwise. PS6500 Rack Mount Instructions... - Page 17 4. Hold the disk drive by the plastic carrier and position the disk drive so that the latch is toward the rear of the array (where the power supplies and control modules are). Start to insert the drive (1). PS6500 Rack Mount Instructions...
- Page 18 5. Slide the replacement disk drive gently into the slot until you feel resistance (2). 6. Push the disk drive the rest of the way into place. The lever should still be open. Do not force the lever closed (3). 7. Pull back the latch (4). PS6500 Rack Mount Instructions...
- Page 19 10. Let the latch slide forward and make sure it is firmly closed (7). When correctly installed, the disk drive carrier should not protrude from the top of the chassis. If it does, remove and then reseat the drive. PS6500 Rack Mount Instructions...
-
Page 20: Step 8: Install The Bezel
It also enables you to open the chassis cover without dislodging the cables. 1. Obtain the cable management system from the array shipping box. The cable management system consists of two wire assemblies. See Figure 13. PS6500 Rack Mount Instructions... - Page 21 2. Orient the three-arm wire assembly as shown in Figure 14 and attach it to the top and bottom of the rear, right chassis flange (callouts 1, 2, and 3). Figure 14 Array with Three-Arm Assembly Attached 3. Use the attached clamps to secure the arms to the chassis and rails. See Figure 15. PS6500 Rack Mount Instructions...
-
Page 22: Where To Go Next
Dell’s support service is available to answer your questions about PS Series arrays. If you have an Express Service Code, have it ready when you call. The code helps Dell’s automated-support telephone system direct your call more efficiently. PS6500 Rack Mount Instructions... -
Page 23: Contacting Dell
You can learn about Dell products and services using the following procedure: www.dell.com 2. Visit (or the URL specified in any Dell product information). 2. Use the locale menu or click on the link that specifies your country or region. PS6500 Rack Mount Instructions...
Need help?
Do you have a question about the PS6500 and is the answer not in the manual?
Questions and answers