Table of Contents
Advertisement
Advertisement
Table of Contents

Subscribe to Our Youtube Channel
Summary of Contents for Davis Instruments MeteoBridge DB100AU
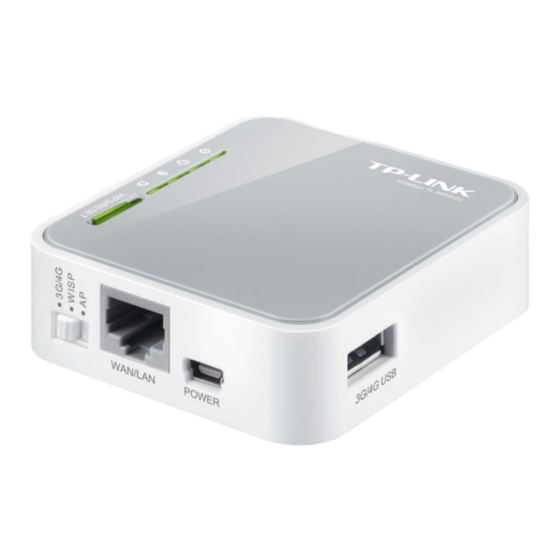
- Page 1 MeteoBridge Personal Weather Router DB100AU Powered by...
-
Page 2: Table Of Contents
5.2 Select Station .........................13 5.2.1 Weather Station ......................14 5.2.2 Weather Cam ........................14 5.2.3 Local Settings ........................14 5.3 Weather Network ........................14 5.4 Push Services .........................15 5.5 System ...........................16 5.5.1 Security ...........................16 5.5.2 Localization ........................17 Page | 2 ©Davis Instruments Australia V1.3... - Page 3 6.5 MeteoBridge Indicator Lights ....................19 6.6 Recovering Unreachable MeteoBridge ..................19 7 Liability Disclaimer ........................20 8 Warranty Information ........................20 Appendix A: Setting a WLIP to Static ....................21 Appendix B: MeteoBridge for Wireless Weatherlink Communication ...........23 Page | 3 ©Davis Instruments Australia V1.3...
-
Page 4: Introduction
MAC Address IP Address License Number Davis Instruments Australia provides a router configured with the MeteoBridge firmware. We provide assistance with technical issues related to the operation of Davis weather stations and communication between them and the MeteoBridge. For questions related to the use of MeteoBridge with other branded stations, weather networks and push services please consult www.MeteoBridge.com. -
Page 5: Connecting Your Meteobridge To Your Lan
Open a web browser and enter the IP of your LAN router. If prompted enter your User name and password. Then view connected/attached devices. Find the Physical Address (MAC address) that corresponds to your MeteoBridge and Page | 5 ©Davis Instruments Australia V1.3... -
Page 6: Software Scan Tool
You can download a free IP scan tool here: http://www.advanced-ip-scanner.com Select the Scan button in the software. After the scan is complete, find the IP address associated with the MAC Address of your MeteoBridge. Page | 6 ©Davis Instruments Australia V1.3... -
Page 7: Using Usb Stick
Once you have identified your MeteoBridge IP address you can start communicating with it via the Web Interface. Simply enter the IP address into your browser to open the Web Interface. Default login details are: Username: meteobridge Password: meteobridge Page | 7 ©Davis Instruments Australia V1.3... -
Page 8: Connecting Your Data Logger
For IP loggers there are two ways of connecting the logger, either into the LAN router or into the MeteoBridge router. For both it is recommended to set the WLIP to a static IP, see appendix A for the procedure. Page | 8 ©Davis Instruments Australia V1.3... -
Page 9: Connecting Into Lan Router
Open the MeteoBridge Web Interface. Select Setup Network tab. Select connection type Wireless LAN and enter in your network details. Ensure LAN Bridge is selected. Click Save and Apply and Reboot. Page | 9 ©Davis Instruments Australia V1.3... - Page 10 Connect the WLIP directly into the Ethernet port on the MeteoBridge. Page | 10 ©Davis Instruments Australia V1.3...
-
Page 11: Web Interface
‘Save and Apply and Reboot’ then disconnect the Ethernet cable. Your MeteoBridge should still be accessible at the same IP address. Note: To use the MeteoBridge Ethernet port with WLIP ensure LAN Bridge is selected. Page | 11 ©Davis Instruments Australia V1.3... -
Page 12: Ip Address
MeteoBridge can work through a proxy server, specify its details here. Make sure to ‘Save and Apply and Reboot’ to activate any changes. For more detailed information on the options contained on the Setup Network page visit www.meteobridge.com/wiki/index.php/Setup_Network Page | 12 ©Davis Instruments Australia V1.3... -
Page 13: Select Station
5.2 Select Station Page | 13 ©Davis Instruments Australia V1.3... -
Page 14: Weather Station
Select a service to add from the drop down menu and enter the requested details. Once you click save MeteoBridge will reboot and apply the changes. For more detailed information on the setup of the network feeds visit www.meteobridge.com/wiki/index.php/Weather_Networks Page | 14 ©Davis Instruments Australia V1.3... -
Page 15: Push Services
This can be set as periodic, scheduled or when a user defined alarm is triggered. For a detailed look at the push services provided and how to use them visit www.meteobridge.com/wiki/index.php/Push_Services Additional information on how to express alarm conditions can be found at www.meteobridge.com/wiki/index.php/Push_Services#Alarm_Conditions Page | 15 ©Davis Instruments Australia V1.3... -
Page 16: System
This allows you to change the password needed to access your MeteoBridge from the defaults. If Internet Login is enabled you can access your MeteoBridge remotely at the supplied URL. If this option is enabled you should change the password from the defaults. Page | 16 ©Davis Instruments Australia V1.3... -
Page 17: Localization
5.6 License Displays your License number and shows MeteoBridges terms and conditions. Davis Instruments Australia licenses all devices before dispatch. You will need to quote this number for any technical support or warranty claim through Davis Instruments Australia. 5.7 Live Data Page | 17 ©Davis Instruments Australia V1.3... -
Page 18: Weather Network Status
Ensure the data logger is connected into the console and that the consoles Baud Rate is set to 19200. For details on how to set the Baud rate see page 14 of your Davis Console manual. Page | 18 ©Davis Instruments Australia V1.3... -
Page 19: Meteobridge Indicator Lights
Copy this file onto a blank FAT32 formatted memory stick. Remove power to the MeteoBridge, insert the USB memory stick and reconnect power. Wait for the Status light to turn solid green and connect to the MeteoBridge as normal. Page | 19 ©Davis Instruments Australia V1.3... -
Page 20: Liability Disclaimer
8 Warranty Information Davis Instruments Australia PTY LTD provides a 90 day limited warranty on this product against manufacturing defects in materials and workmanship. This limited warranty begins on the date of purchase and is only valid for the original purchaser of this product. -
Page 21: Appendix A: Setting A Wlip To Static
3. Open the Weatherlink Software supplied with the data logger. 4. Navigate to the Setup menu and select Communications Port 5. Select TCP/IP and Local Device ID then click find The following window should open Page | 21 ©Davis Instruments Australia V1.3... - Page 22 9. Write down your static IP address some where safe. 10. Click “Save Configuration” and then “Save IP Settings” Your IP should now be set as a static IP Page | 22 ©Davis Instruments Australia V1.3...
-
Page 23: Appendix B: Meteobridge For Wireless Weatherlink Communication
If it is a showing a different version set version control to “newest” Click Save and Apply, then click Reboot. Once it’s rebooted check the version is displaying 2.5 2. Setup Communications Port Open Weatherlink Goto Setup -> Communication Port Page | 23 ©Davis Instruments Australia V1.3... - Page 24 Click “TEST”, you may get a TCP/IP error. Try the “TEST” again until the message “a vantage station was found” Once the vantage station is found download the data to verify it is working. Page | 24 ©Davis Instruments Australia V1.3...
Need help?
Do you have a question about the MeteoBridge DB100AU and is the answer not in the manual?
Questions and answers