Table of Contents
Advertisement
Quick Links
Pololu Wixel Shield for Arduino User's Guide
Pololu Wixel Shield for Arduino
1. Overview . . . . . . . . . . . . . . . . . . . . . . . . . . . . . . . . . . . . . . . . . . . . . . . . . . . . . . 2
1.a. Contacting Pololu . . . . . . . . . . . . . . . . . . . . . . . . . . . . . . . . . . . . . . . . . . . . . . 3
1.b. Shield Features . . . . . . . . . . . . . . . . . . . . . . . . . . . . . . . . . . . . . . . . . . . . . . . 3
1.c. Arduino Pin Usage . . . . . . . . . . . . . . . . . . . . . . . . . . . . . . . . . . . . . . . . . . . . . 5
1.d. Schematic Diagram . . . . . . . . . . . . . . . . . . . . . . . . . . . . . . . . . . . . . . . . . . . . . 6
1.e. Dimensions . . . . . . . . . . . . . . . . . . . . . . . . . . . . . . . . . . . . . . . . . . . . . . . . . 6
2. Getting Started . . . . . . . . . . . . . . . . . . . . . . . . . . . . . . . . . . . . . . . . . . . . . . . . . . . 7
2.a. What You Will Need . . . . . . . . . . . . . . . . . . . . . . . . . . . . . . . . . . . . . . . . . . . . 7
2.b. Assembly . . . . . . . . . . . . . . . . . . . . . . . . . . . . . . . . . . . . . . . . . . . . . . . . . . 7
2.c. Configuring the Wixels . . . . . . . . . . . . . . . . . . . . . . . . . . . . . . . . . . . . . . . . . . . 9
2.d. Connecting the Shield . . . . . . . . . . . . . . . . . . . . . . . . . . . . . . . . . . . . . . . . . . . . 10
2.e. Using the Arduino Software . . . . . . . . . . . . . . . . . . . . . . . . . . . . . . . . . . . . . . . . . 10
2.f. Writing Sketches for the Wixel Shield . . . . . . . . . . . . . . . . . . . . . . . . . . . . . . . . . . . 11
http://www.pololu.com/docs/0J47/all
User's Guide
© 2001-2013 Pololu Corporation
Page 1 of 12
Advertisement
Table of Contents

Related Manuals for Pololu Corporation Wixel Shield

Summary of Contents for Pololu Corporation Wixel Shield
-
Page 1: Table Of Contents
2.f. Writing Sketches for the Wixel Shield ........ -
Page 2: Overview
2191] Example Applications The Wixel shield for Arduino opens the door for many new Arduino projects. Here are just a few project ideas: • Program, debug/fine-tune, and control your Arduino-based robot without having to touch it. • Stream data from a remote sensor (e.g. your outdoor weather station) to your computer or Arduino. -
Page 3: Contacting Pololu
Arduinos, and more. Prototyping Space The unused portions of the Wixel shield are configured as general-purpose prototyping space in which you can construct your own circuits. The holes in this prototyping area are connected in a breadboard-like configuration, as indicated by the top silkscreen. - Page 4 Pololu Wixel Shield for Arduino User's Guide © 2001–2013 Pololu Corporation Voltage Dividers The shield has four general-purpose 2/3 voltage dividers that can be accessed by the lower “HV” and “LV” pins (pictured above) located between the Wixel socket pins. These voltage dividers can be used to safely connect 5 V outputs to the Wixel’s 3.3 V inputs: connect the 5 V signal to one of the four HV pins and then connect the...
-
Page 5: Arduino Pin Usage
Arduino shields or electronics that also use these pins, though such electronics could potentially interfere with the operation of the Wixel shield (and vice versa). For details about the connections, see the Wixel shield for Arduino schematic in Section 1.d. -
Page 6: Schematic Diagram
With the socketed Wixel but without the extended 1×8 and 1×6 shield headers, the shield itself is 0.8" tall. Since the height of the Wixel and its socket is taller than the typical available clearance between shields, we recommend using the Wixel shield as your Arduino’s top shield. The mounting holes are 1.7" apart and 0.125" in diameter, suitable for #4 screws [http://www.pololu.com/catalog/product/... -
Page 7: Getting Started
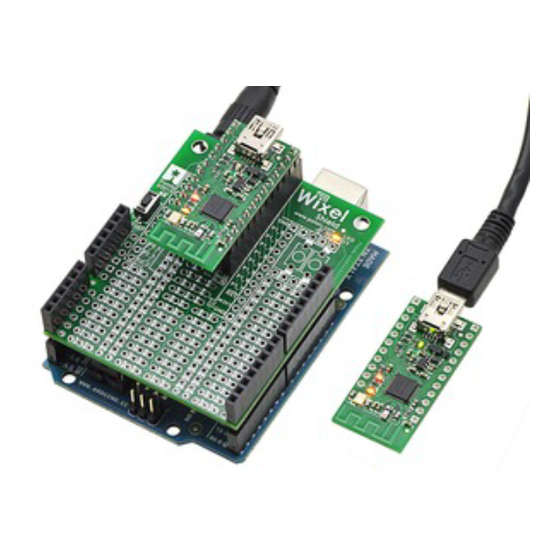
Wixels to your computer. • A soldering iron and solder. The through-hole parts included with the Wixel shield must be soldered in before you can plug the shield into an Arduino or plug a Wixel into the shield. An... - Page 8 [http://www.pololu.com/catalog/product/2191] The left picture below shows a fully-assembled Wixel shield, and the right picture below shows that assembled shield being used with a Wixel and an Arduino Uno. Note that the header pins should be soldered into the outer rows of through-holes as shown in the pictures below;...
-
Page 9: Configuring The Wixels
Pololu Wixel Shield for Arduino User's Guide © 2001–2013 Pololu Corporation Once the male header pins are installed, the Wixel can be plugged into the female socket on the Wixel shield. You can skip this step if you purchased a fully-assembled version of the Wixel [http://www.pololu.com/catalog/product/1336]... -
Page 10: Connecting The Shield
2.e. Using the Arduino Software Using the Arduino software with the Wixel shield for Arduino is not any different than using it normally, except that you will be programming on the COM port associated with a Wixel rather than one associated with your Arduino. In... -
Page 11: Writing Sketches For The Wixel Shield
2.f. Writing Sketches for the Wixel Shield Writing sketches for the Wixel shield is as easy as using the standard serial library to transmit and receive serial data. Note that when first enabling the serial port, you might receive an invalid serial byte as a result of noise on the serial lines. - Page 12 Pololu Wixel Shield for Arduino User's Guide © 2001–2013 Pololu Corporation Serial monitor connected to an Arduino running the Wireless Physical Pixel sketch. 2. Getting Started Page 12 of 12...
Need help?
Do you have a question about the Wixel Shield and is the answer not in the manual?
Questions and answers