Table of Contents
Advertisement
Quick Links
Advertisement
Table of Contents

Summary of Contents for Infopia SelexOn
-
Page 2: Table Of Contents
Contents Intended Use Product Overview Background Product Components Names of Parts Caution Power Supply Main Menu Code Registration Patient Test (Basic Measurement) Quick Test (Quick Measurement) Memory QC Test (Quality Control) Device Settings SelexOn .1... -
Page 3: Intended Use
PC Sync Software Product Overview Troubleshooting SelexOn meter is easy to use. After injecting the collected venous blood sample into the sensor on the test strip, the strip changes its color Appendix depending on the concentration of the analyte. This reaction is then quantitatively measured to calculate the results. -
Page 4: Background
Meter Components In this quantitative measurement method, by using an antigen, a gold nanoparticle-labelled detection antibody is combined with an antibody SelexOn Meter 1 Meter specific to disease markers. The antigen concentration within blood appears as the thickness of the 1 User's Manual red band on the test line. -
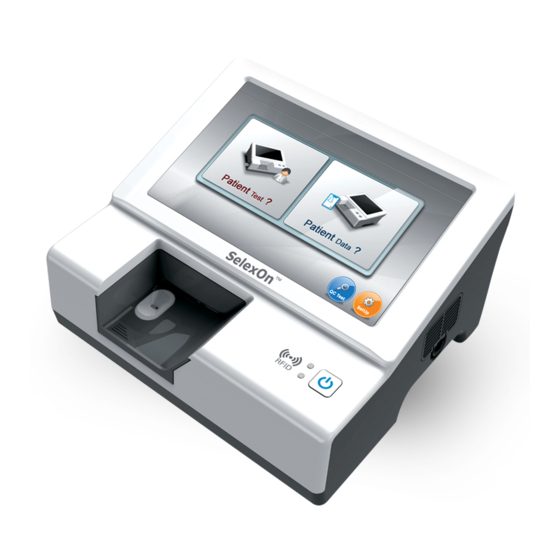
Page 5: Names Of Parts
Names of Parts Product Components Optional SelexOn Meter Optional Components Quantity 1 Box SelexOn test strip 1 ea. SelexOn printer 1 ea. Barcode scanner 1 ea. SelexOn battery 1 ea. Data cable SelexOn Test Strip You can purchase the optional components from your nearest dealer. -
Page 6: Caution
9. Use the meter at a stable temperature range (18 - 32℃). 10. Avoid the electric and magnetic field. 5. Power switch 11. Use the only SelexOn strip. Storage After Use and Maintenance <CAUTION!> 1. Do not arbitrarily disassemble or alter the device. -
Page 7: Power Supply
Quick Test Power Adapter" to the Runs the quick "Power Adapter Port" measurement mode. on the back of the SelexOn meter. 4. Flip the "Power Switch" 'ON'. 5. Briefly press the "Power Button" on top of the meter. 6. After the system initialization, the Main Menu appears. -
Page 8: Code Registration
Place the RFID label of the strip box onto the "RFID Reader" on top of Please refer to 'Troubleshooting' if an error message appears. the meter. <CAUTION!> Ensure that the RFID code is registered when using a new strip box. SelexOn .12 SelexOn .13... -
Page 9: Patient Test (Basic Measurement)
Contaminants may cause an error in the results. Step 4 Hold the strip handle and insert the strip into the strip insertion port on the left side of the meter. Push the strip to the end. SelexOn .14 SelexOn .15... - Page 10 When the strip is recognized, the meter automatically runs 'System check'. Step 6 When the 'System check' is complete, the meter automatically runs 'Heating'. Step 8 The measurement runs automatically and the measurement time is dis- played on the LCD. SelexOn .16 SelexOn .17...
-
Page 11: Quick Test (Quick Measurement)
The results are automatically saved. (Please refer to 'Device Settings' for changing the settings.) Strip Handle Press 'Delete' to delete the results. Measuring Window Press 'Print' to print the results on the 'SelexOn Printer'. Blood Inlet Press to return to the Main Menu. Strip Code <CAUTION!>... - Page 12 If 'SKIP' is pressed, the timer stops and the next step is executed. <CAUTION!> You must proceed to the next step after the reaction time specified in the strip manual is passed by using the timer. SelexOn .20 SelexOn .21...
- Page 13 The results are automatically saved. (Please refer to 'Device Settings' for changing the settings.) Press 'Delete' to delete the results. Press 'Print' to print the results on the 'SelexOn Printer'. Press 'Continue' to return to Step 4 and to measure another strip. Press to return to the Main Menu.
-
Page 14: Memory
If the results for CK-MB are displayed with an inequality sign such as '> 40 ng/mL' or '< 3 ng/mL‘, the results are out of the measurement range. Please refer to the strip instruction for the measurement range and Cutoff concentration. SelexOn .24 SelexOn .25... - Page 15 Selects all results on the current page. Up to 1000 results can be saved. Print Prints the selected results on the SelexOn Printer. The latest results appear at the top of the list. By using the ▲/▼ icons, the previous or next result can be viewed.
- Page 16 Up to 1000 results can be saved. The latest results appear at the top of the list. Print Prints the selected results on the SelexOn Printer. By using the ▲/▼ icons, the previous or next result can be viewed. Deletes the selected results.
-
Page 17: Qc Test (Quality Control)
QC Test Meter Quality Control Management Press each icon in order to sort the data accordingly. Please inspect if the SelexOn meter operates properly by using the Displays the current page / all pages. standard strip. Standard Strip -SelexOn Standard Strip LOW : Standard1... - Page 18 Press 'QC Test' on the Main Menu. <NOTE> Store the standard strip in its container when it is not in use. (It may be deformed due to direct sunlight or other sources of light.) Step 2 Press 'Standard Strip Test'. SelexOn .32 SelexOn .33...
- Page 19 If an RFID is required, register the RFID tag on the standard strip storage Step 6 After completing the test, remove the standard strip from the meter. container. Store the standard strip in its storage container while avoiding direct sunlight. SelexOn .34 SelexOn .35...
- Page 20 QC Test QC Test Strip Quality Control Management How to use the control solution SelexOn Control Solution verifies the accuracy of the SelexOn test Step 1 strip. Press 'QC Test' on the Main Menu. Control Solution The control solution is a solution that verifies the accuracy of the test strip.
- Page 21 Insert an unused strip that has the same marker as the control solution to be tested. Push the strip to the end. If an RFID is required, register Step 6 the RFID tag on the strip box. When the 'System check' is complete, the meter automatically runs 'Heating' SelexOn .38 SelexOn .39...
- Page 22 Please rerun the QC test if FAIL appears. If FAIL persists, stop using the strip and contact the nearest dealer for service. Step 8 The test runs automatically and the measurement time is displayed on the LCD. SelexOn .40 SelexOn .41...
-
Page 23: Device Settings
Beep on/off, Touch sound effect on/off DEVICE Printer on/off, Barcode reader on/off Press in order to not save the changes. RFID Runs RFID communication mode Press 'OK' to save the changes. QC test alarm settings QC Period SelexOn .42 SelexOn .43... - Page 24 The measurement order varies depending on either the Operator ID or Patient ID on the ID Setup. Press in order to not save the changes. Please refer to "ID Input" for details. Press ‘OK’ to save the changes. SelexOn .44 SelexOn .45...
- Page 25 Auto Print Sets the Auto Print feature. If the RFID is not recognized within 30 seconds, an error message If the SelexOn Printer is connected, the results are appears. Please refer to 'Troubleshooting' for details. automatically printed after the test.
-
Page 26: Id Input
ID Input ID Input Settings QC Period The SelexOn meter can manage the results by ID through entering either the Operator or Patient ID. Press 'ID Setup' in 'SetUp' mode in order to allow either the Operator ID or Patient ID to be entered. The measurement order changes depending on this setup. - Page 27 Press ‘ENTER’ after entering the ID in order to display the Main Menu. The ‘OPID’ icon to change the Operator ID appears on the right corner of the Main Menu. If the Operator ID is set to 'NONE' on the ‘ID Setup’ menu, the ‘OPID’ icon disappears. SelexOn .50 SelexOn .51...
-
Page 28: Printer
Press 'Patient Test' and the Patient ID input message appears. printer port (1) on the rear panel of the meter. 2. Turn on the printer and then turn on the SelexOn meter. Press 'Device' in 'Setup' mode to turn ON the Thermal Printer. -
Page 29: Barcode Scanner
Press 'Device' in 'Setup' mode to turn ON the Barcode Reader. 3. Press 'Barcode Reader' on the 'ID Input' screen. When the barcode reader is ready to use, the message "Please use the barcode reader" appears. SelexOn .54 SelexOn .55... -
Page 30: Battery
4. Scan a barcode with the scanner in Barcode Input Standby mode in SelexOn Battery order to display the barcode information in the ID input field. The SelexOn meter can be operated by using the SelexOn Battery with- <NOTE> out the power adapter. -
Page 31: Pc Sync Software
Do not remove the data cable while running the PC Sync program. 2. After turning on the PC, turn on the meter. 3. When the meter is in "Main Menu" mode, run the PC Sync program from the PC. SelexOn .58 SelexOn .59... -
Page 32: Troubleshooting
Use a new strip and rerun the contaminated Barcode cannot be read Check if the strip code label is con- measurement. taminated. If the label has no prob- lem, slowly insert the strip again. If the problem persists, contact the nearest dealer. SelexOn .60 SelexOn .61... -
Page 33: Appendix
The level selected from the stan- dard strip test and the standard strip level do not match. When the Level 1 is selected, Standard1 should be inserted. When the Level 2 is selected, Standard2 should be inserted. SelexOn .62 SelexOn .63... -
Page 34: Selexon
SelexOn. 1. Open the fan filter cover on the right side of the meter. 2. Carefully remove the used fan filter. 3. Replace it with a new fan filter. 4. Close the fan filter cover. SelexOn .64 SelexOn .65... - Page 35 18 ~ 32℃ (64 ~ 90℉) Authorised representative in the European Community. Humidity 10% ~ 85% in vitro diagnostic medical device. Peripheral Devices Thermal Printer Barcode Scanner Battery (8.4V / 4400mAh) Data Cable Batch code Catalog number Serial number Manufacturer SelexOn .66 SelexOn .67...
- Page 36 Temperature Limitation Do not reuse Date of Manufacturer Keep away from sunlight Direct Current Waste Electrical and Electronic Equipment This symbol indicates that the system is type A equipment, which provides a particular degree of protection against electric shock. SelexOn .68...
Need help?
Do you have a question about the SelexOn and is the answer not in the manual?
Questions and answers