Advertisement
Quick Start Guide
Release Date: 09/28/2015
Quick Start version
Firmware versions
Software version
1
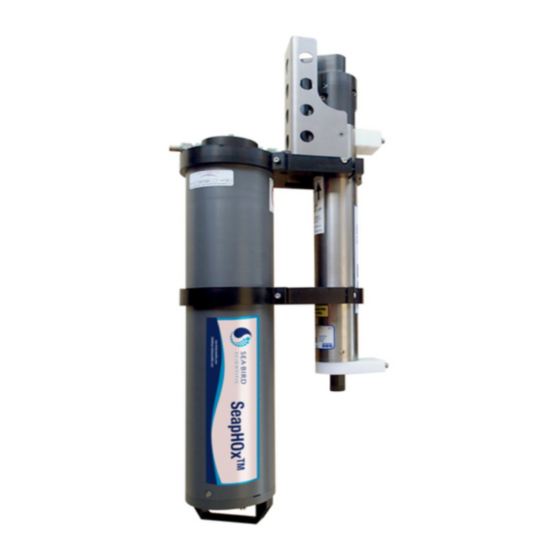
SeapHOx™
Satlantic SeaFET™ pH Sensor integrated with
Sea-Bird Electronics SBE 37-SMP-ODO MicroCAT
CTD + DO Recorder
• #001
• SeaFET v 3.6.3 and later
• MicroCAT v 2.0 and later
• SeaFETCom V 1.2.4 and later
Advertisement
Table of Contents

Summary of Contents for SBE SeapHOx
- Page 1 SeapHOx™ Satlantic SeaFET™ pH Sensor integrated with Quick Start Guide Sea-Bird Electronics SBE 37-SMP-ODO MicroCAT CTD + DO Recorder Release Date: 09/28/2015 Quick Start version • #001 Firmware versions • SeaFET v 3.6.3 and later • MicroCAT v 2.0 and later Software version •...
- Page 2 Table of Contents Section Page 1. Introduction 2. Unpacking SeapHOx 3. Preparing SeapHOx for Deployment 4. Recovering SeapHOx 5. Instrument Configuration (reference) 6. Cabling (reference) 7. FAQs/Troubleshooting (reference)
- Page 3 The SeapHOx is intended for moored applications to 50 m depth. The SeapHOx integration approach was originally developed by Dr. Todd Martz of Scripps Institution of Oceanography.
- Page 4 2. If necessary, configure the MicroCAT for compatibility with the SeaFET. Note: When delivered as part of a SeapHOx, the MicroCAT is configured at the factory for integration with the SeaFET. If you replace the MicroCAT in the field, see Instrument Configuration at the end of this document for the required MicroCAT settings, and see the MicroCAT manual for instructions on using Seaterm V2 to program the MicroCAT.
- Page 5 Deployment Orientation in the MicroCAT manual. Recovering SeapHOx 1. If the SeapHOx is not going to be used in the short term, de-activate the SeaFET battery pack to preserve their charge. 2. Remove the SeaFET flow cell, uninstall the fittings, and reinstall the hex plug that is closest to the MicroCAT (the one shown on the right in Figure 2).
- Page 6 Instrument Configuration (reference) As part of the SeapHOx integration, both the SeaFET and MicroCAT were configured and tested at the factory to ensure proper operation together. The SeaFET and MicroCAT settings are provided below for reference only (customers should not changes these settings).
- Page 7 When should the SeaFET ‘Power CTD’ option be enabled? Enabling this option could reduce substantially the SeapHOx deployment duration. It should only be enabled when the projected battery life of the MicroCAT is not sufficient for the deployment. When it is enabled, the SeaFET must be powered from an external power supply in addition to having its internal batteries installed.
Need help?
Do you have a question about the SeapHOx and is the answer not in the manual?
Questions and answers