Table of Contents
Advertisement
Quick Links
Advertisement
Table of Contents

Summary of Contents for ACUTRONIC InfantView
- Page 1 Ventilation Beyond Limits InfantView Instructions for Use V01/16 en...
- Page 2 Manufacturer: ACUTRONIC Medical Systems AG Fabrik im Schiffli 8816 Hirzel Switzerland 2 / 46 InfantView | V01/16 en...
-
Page 3: Table Of Contents
Accessories ....................... 24 CAMERA socket ..........................24 LIGHT socket ..........................25 Adjusting a camera image ................26 On-screen display ..................... 27 USB image saving ..................... 28 Cleaning, disinfection, sterilisation ........29 Detaching ......................29 3 / 46 InfantView | V01/16 en... - Page 4 EndoTV Coupler ....................43 EndoLight Source ..................... 43 ThoraxShine ...................... 44 VeinFinder ......................44 LaryngoBlade Mac Style 1 ................44 9.10 LaryngoBlade Miller Style 0 ................45 9.11 LaryngoBlade Miller Style 00 ................45 4 / 46 InfantView | V01/16 en...
-
Page 5: Important Information
Please read these Instructions for Use carefully before using InfantView; keep them in a safe place for reference. These Instructions for Use will help you to use, clean, disinfect and sterilise InfantView properly. They are not intended as an introduction to the technique of laryngoscopy or transillumination. -
Page 6: Controls
REF 8101 Accessories VisionHandle REF 8102 LaryngoBlade REF 8110 | REF 8109 | REF 8108 VeinFinder REF 8107 ThoraxShine REF 8106 EndoCamera Head REF 8103 EndoTV Coupler REF 8103.C EndoLight Source REF 8104 6 / 46 InfantView | V01/16 en... -
Page 7: Approved Connection Combinations
1.5 Approved connection combinations LIGHT CAMERA Connection to ControlUnit Combination Accessories VisionHandle VeinFinder ThoraxShine VeinFinder VisionHandle ThoraxShine VisionHandle EndoLight Source EndoCamera Head 7 / 46 InfantView | V01/16 en... -
Page 8: Approved Applications
1.7 Device-specific changes Acutronic Medical Systems AG stands for ongoing innovation and further development. That is why we reserve the right to make changes in design, features and technology. Consequently, it is not possible to file any claims based on these Instructions for Use. -
Page 9: Symbols
Item number Serial number Marking as per Medical Devices Directive 93/42/EEC Date of manufacture Manufacturer Non-sterile Do not dispose of as household waste Fragile, handle with care Keep away from sources of heat 9 / 46 InfantView | V01/16 en... - Page 10 Symbol Meaning Keep dry / protect from moisture This way up Do not use hooks Do not stack 10 / 46 InfantView | V01/16 en...
-
Page 11: Safety
2 Safety 2.1 Intended use InfantView is an introducing aid for intubation and it serves to visualise the airways and illuminate veins and the chest. InfantView is portable and intended for use within hospitals and health facilities and may only be used by suitably qualified staff. -
Page 12: Safety Information
WARNING: Never use InfantView on a patient if a defect or malfunction is found during the device check. WARNING: Never operate InfantView if it is covered up or set up in such a way that its operation, performance or function is impaired. - Page 13 WARNING: InfantView is not sterile when it is delivered. Before it is used for the first time and before every further use, the main unit and all the accessories must be cleaned, disinfected and sterilised. CAUTION: No objects may be placed on the surfaces of InfantView, no matter whether the ControlUnit is open or closed.
-
Page 14: Device Description
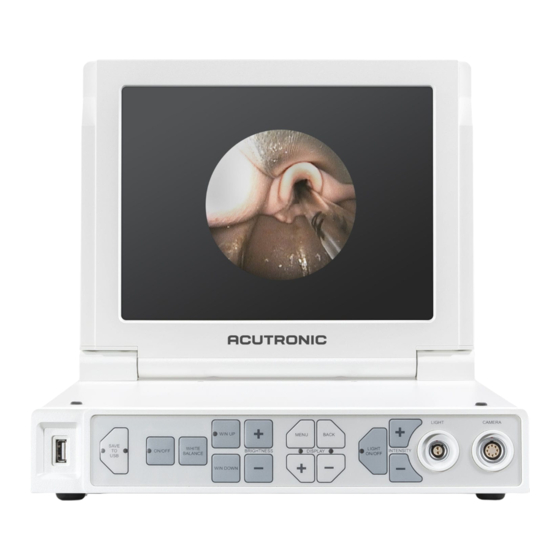
Button CAMERA SAVE TO USB Button INTENSITY + Button Button WHITE BALANCE BRIGHTNESS + Button Button ON/OFF Button BRIGHTNESS - USB Port INTENSITY - Button Button Connection Socket WIN DOWN LIGHT ON/OFF LIGHT 14 / 46 InfantView | V01/16 en... -
Page 15: Rear View Of The Controlunit
3.2 Rear view of the ControlUnit Equipotential Bonding Ventilation Fuse Holder Mains Switch S-Video Output Mains Input Rating Plate for Monitor 15 / 46 InfantView | V01/16 en... -
Page 16: Putting Into Operation
4 Putting into operation 4.1 Main unit ControlUnit (REF 8101) Place the InfantView ControlUnit on a clean, flat surface and open the display. NOTE: Fold up the display with one hand while you hold the bottom part with your other hand. -
Page 17: Accessories
To release the plug and the locking mechanism, pull the locking sleeve to the rear. NOTE: Make sure the plug is always completely in the socket. 17 / 46 InfantView | V01/16 en... -
Page 18: Visionhandle With Laryngoblade
NOTE: When attaching, make sure the LaryngoBlade is located at the stop and locked in place. The ball latch keeps the LaryngoBlade securely in position. NOTE: The LaryngoBlade is provided with a specific InfantView coupling that optimally locks the lens system of the LaryngoBlade onto the VisionHandle. - Page 19 ON/OFF button. The VisionHandle switches on automatically. NOTE: The LED light integrated into the VisionHandle is simultaneously connected when the cable is plugged in. No additional connection is required. The video laryngoscope is now ready for operation. 19 / 46 InfantView | V01/16 en...
-
Page 20: Veinfinder
The ThoraxShine can be switched on and off separately using the LIGHT ON/OFF button. NOTE: The LIGHT ON/OFF button only works if the unit is in operating mode. The ThoraxShine is now ready for operation. 20 / 46 InfantView | V01/16 en... -
Page 21: Endocamera Head, Endotv Coupler And Endolight Source
EndoLight Source switch on automatically. The EndoLight Source can be switched on and off separately using the LIGHT ON/OFF button. NOTE: The LIGHT ON/OFF button only works if the unit is in operating mode. 21 / 46 InfantView | V01/16 en... -
Page 22: Optional Ports
The image can be sent to external monitors via two S-Video outputs as optional. For this purpose no special settings are required; the image is sent directly as soon as a monitor has been connected up (Plug and Play). 22 / 46 InfantView | V01/16 en... -
Page 23: Operation
5 Operation InfantView is operated using a membrane keyboard on the front panel of the ControlUnit 5.1 Main unit Switching ON/OFF LED off: device has no connection to the mains / is not ready for operation ON/OFF Toggles between operating mode and standby mode and activates/deactivates the LIGHT and CAMERA sockets. -
Page 24: Accessories
There is no need to switch the display on and off yourself. NOTE: If the accessory plugged into the CAMERA socket is unplugged, the display switches off automatically. 24 / 46 InfantView | V01/16 en... -
Page 25: Light Socket
INTENSITY - you can reduce the amount of light emitted. NOTE: The end values are indicated by a long, high-pitched tone. NOTE: Regulation of light intensity is mainly useful when changing endoscopes and thus allowing for extreme changes in endoscope diameter. 25 / 46 InfantView | V01/16 en... -
Page 26: Adjusting A Camera Image
WIN function is switched off (the LED is not lit). If the size of the viewing window is smaller than the size of LED lit: WIN switched on the screen, the WIN function is switched on (the LED is continuously lit green) 26 / 46 InfantView | V01/16 en... -
Page 27: On-Screen Display
The on-screen menu has 3 levels Levels First Second Third MENU • Opens the on-screen menu • Forward to next level • Confirms menu item BACK • Back to the previous level • Closes the on-screen display 27 / 46 InfantView | V01/16 en... -
Page 28: Usb Image Saving
If the USB stick is removed, the green LED goes out. NOTE: Do not remove the USB stick during the saving process. LED lit green: USB stick detected / saving process completed 28 / 46 InfantView | V01/16 en... -
Page 29: Cleaning, Disinfection, Sterilisation
InfantView is not sterile when it is delivered. CAUTION: Start the cleaning process as soon as possible after using the InfantView in order to prevent incrustations, corrosion, etc. and resulting irreparable damage. Effective cleaning and disinfection is an essential prerequisite for effective sterilisation. -
Page 30: Controlunit
Remove the EndoTV Coupler from the EndoCamera Head WARNING: Before cleaning, disinfection and sterilisation, InfantView must be switched off and unplugged from the mains and any other devices that are plugged into the mains. 6.2 ControlUnit ControlUnit (REF 8101) Cleaning... -
Page 31: Endocamera Head And Endotv Coupler
EndoCamera Head (REF 8103) EndoTV Coupler (REF 8103.C) CAUTION: Every time before cleaning or disinfection always unplug the cable from the InfantView ControlUnit and screw the cap onto the cable plug. Cleaning The EndoCamera Head and the EndoTV Coupler can be cleaned with cleaning fluid approved for endoscopy. -
Page 32: Endolight Source
6.4 EndoLight Source EndoLight Source (REF 8104) CAUTION: Every time before cleaning or disinfection always unplug the cable from the InfantView ControlUnit and screw the cap onto the cable plug. Cleaning The EndoLight Source can be cleaned with cleaning fluid approved for endoscopy. -
Page 33: Laryngoblade
The LaryngoBlade can be cleaned with cleaning fluid approved for endoscopy. Refer to the information on this provided by the manufacturer. If badly soiled, the glass covering surfaces can be carefully cleaned with a cotton swab soaked in WFI. 33 / 46 InfantView | V01/16 en... -
Page 34: Veinfinder
6.7 VeinFinder VeinFinder (REF 8107) CAUTION: Every time before cleaning or disinfection always unplug the cable from the InfantView ControlUnit and screw the cap onto the cable plug. 34 / 46 InfantView | V01/16 en... -
Page 35: Thoraxshine
6.8 ThoraxShine ThoraxShine (8106) CAUTION: Every time before cleaning, always unplug the cable from the InfantView ControlUnit and screw the cap onto the cable plug. Cleaning/disinfection Cables and casings are typically subjected to a wipe-down disinfection, heeding the operating instructions provided by the manufacturer of the cleaning solution. -
Page 36: Maintenance
Button cell for USB image saving The InfantView ControlUnit contains a button cell for dating the patient images, which can be saved to a USB stick at the press of a button. The button cell has a service life of 24 months, after which it should be replaced. -
Page 37: Changing The Fuse
7.5 Warranty Assuming proper treatment, Acutronic Medical Systems AG grants a 12-month warranty as of the date of delivery on all as-new InfantView controls (main unit and accessories). For repairs the term of the warranty is 6 months. Within the specified period and on quoting the invoice number Acutronic Medical Systems AG will supply a replacement of verifiably defective material or bad workmanship free of charge. -
Page 38: Disposal
IEC 60601-1:2005 + A1:2012, IEC 62366:2007, IEC 60601-2-18:2009 ed3: • Degree of protection against electric shock: protection class I • Degree of protection against electric shock: type BF applied part IEC 60601-1-2:2001: • See information on electromagnetic compatibility 38 / 46 InfantView | V01/16 en... -
Page 39: Troubleshooting
- No voltage - Check main fuses - Return to service centre No image - Device not switched on - InfantView switched on? - Camera cable has not been - Check connections plugged in correctly - Check monitor setting - Camera cable defective/broken... -
Page 40: Specifications
Active screen size 12,1 inches(307,5mm) diagonal Pixel pitch 0,30075 mm x 0,30075 mm Pixel format 800 horiz. By 600 vert. pixels Luminance, White 450 cd/m2 (typ) CAMERA Socket Compatibility with Accessory 8102 VisionHandle 40 / 46 InfantView | V01/16 en... -
Page 41: Visionhandle
Reprocessing Soakable, manual cleaning and desinfection Camera Image Sensor High resolution Interline transfer 1-CCD-1/3" Active Pixel 752 (H) x 582 (V) 4,8 (H) x 3,7 (V) mm (equivalent to 1/3”) Active Image Area 41 / 46 InfantView | V01/16 en... -
Page 42: Endocamera Head
4,8 (H) x 3,7 (V) mm (equivalent to 1/3”) Active Image Area Scanning Lines Scanning System 2:1 Interlaced Sync System Internal Scanning Frequency (H) 15.625 kHz Scanning Frequency (V) 50 Hz Aspect Ratio 42 / 46 InfantView | V01/16 en... -
Page 43: Endotv Coupler
3,2 V DC Nominal Current 0,12 A Fuse No own fuse Weight 150g (incl. cable and plug) Dimensions Kopf (Ø x L) 11,5mm x 40,1mm / Cable 3m Reprocessing Soakable, manual cleaning and manual disinfection 43 / 46 InfantView | V01/16 en... -
Page 44: Thoraxshine
Head (LxBxT) 50mm x 30,6mm x 50 mm / Cable 3m Reprocessing Wipe disinfection 9.9 LaryngoBlade Mac Style 1 8108 CAD computed tensionless composed lens for optimal Lens image quality Image Transmission CAD computed rod lens system for optimal image quality 44 / 46 InfantView | V01/16 en... -
Page 45: Laryngoblade Miller Style 0
All applied material is of high-quality stainless medical Biocompatibility steel and therefore biocompatible Weight Dimensions Working length: 44mm / Total length: 74.6mm Reprocessing Autoclavable, max. 134° C / 2,2 bar / 5 min 45 / 46 InfantView | V01/16 en... - Page 46 Manufacturer: ACUTRONIC Medical Systems AG Fabrik im Schiffli 8816 Hirzel Switzerland 46 / 46 InfantView | V01/16 en...
Need help?
Do you have a question about the InfantView and is the answer not in the manual?
Questions and answers