Table of Contents
Advertisement
Quick Links
Thank you for your purchase of the Baader MaxBright II Binoviewer! Properly used, this
sophisticated optical accessory will provide you with a lifetime of amazing views. To ensure
optimal performance, please read this instruction manual before using your binoviewer.
– EN ver. 08/2019 –
BAADER PLANETARIUM
Zur Sternwarte 4 • D-82291 Mammendorf • Tel. +49 (0) 8145 / 8089-0 • Fax +49 (0) 8145 / 8089-105
www.baader-planetarium.com • kontakt@baader-planetarium.de • www.celestron.de
# 2456460
Manual
G
M
B
H
Advertisement
Table of Contents

Subscribe to Our Youtube Channel
Related Manuals for Baader Planetarium MAXBRIGHT II

Summary of Contents for Baader Planetarium MAXBRIGHT II
- Page 1 # 2456460 Manual Thank you for your purchase of the Baader MaxBright II Binoviewer! Properly used, this sophisticated optical accessory will provide you with a lifetime of amazing views. To ensure optimal performance, please read this instruction manual before using your binoviewer.
-
Page 2: Table Of Contents
Table of Contents Baader MaxBright II Binoviewer . . . . . . . . . . . . . . . . . . . . . . . . . . . . . . . . . . . . . . . . 3 ®... -
Page 3: Baader Maxbright
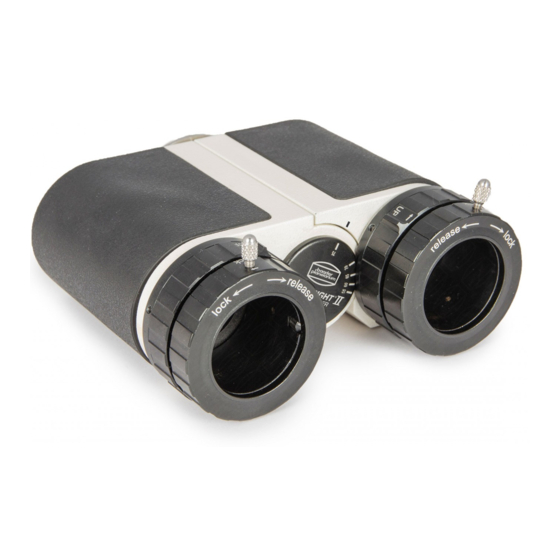
27 mm large prisms are so precise that the image doesn't deterio- rate even at highest magnifications. If you you want to experience the universe relaxed with both eyes open, then the MaxBright II Binoviewer is the right choice for you! ® © Baader Planetarium GmbH | 2020... -
Page 4: Scope Of Delivery And Accessories
Scope of Delivery and Accessories 1. MaxBright II Binoviewer ® 2. Rotatable T-2 Coupling Nut (pre-mounted) 3. Zeiss microbayonet (dovetail ring) 4. Spanner tool to fix T-2 adapter or Zeiss- Microbayonet to the bino-viewer. 5. ABS hard-top case with compartment for a T-2 star diagonal and a nosepiece Please note: This is only the scope of delivery of the MaxBright... -
Page 5: Optional Accessories
T-2 coupling nut or the optional TQC quick changer with a focuser/eyepiece clamp. They can also be used to use a T-2 # 2458105 # 2408150 star diagonal at 1¼" or 2" focusers. 1¼" nosepiece 2" nosepiece © Baader Planetarium GmbH | 2020... -
Page 6: 1¼" Star Diagonals
1¼" Star Diagonals The optical length (that is, the necessary back-focus) must be added to the optical length of the binoviewer. Part Number Name Optical Length # 2456100 T-2 Maxbright mirror diagonal 43 mm dielectrical mirror made of Sitall glas ceramic # 2456005 T-2 90°... -
Page 7: 2" Star Diagonals And Herschel Wedge
Please note: Some T-2 threads may be a little bit too short for the T-2 coupling nut of the MaxBright II. We have incuded a T-2 spacer ring which can be placed into the female thread of the coup- ling nut. -
Page 8: Configurations
The MaxBright II can be attached directly to our 2" star diagonals with the 2"/T-2-adapter # 1508035 – as shown here with Baader est accessories. -
Page 9: How To Find The Perfect Glasspath Corrector
"only" a brighter image because of their lower magnification. The reason for this is that the Two 36 mm Hyperion Aspheric at ® the MaxBright II Binoviewer ® nosepiece (with the field stop inside of it) physically limits © Baader Planetarium GmbH | 2020... -
Page 10: Using Zoom-Eyepieces
the part of the sky which you can see in it. That's why a 32 mm Plössl with about 50° apparent field of view usually shows already the largest true field of view. Neverthe- less, we have two eyepieces which can show you even more. This is only possible because their field stop is not inside of the nose piece. -
Page 11: Setting The Interpupillary Distance
The lower ring collar is used for the diopter adjust- ment – compare the position of the eyepiece clamp on the left and on the right. © Baader Planetarium GmbH | 2020... -
Page 12: Connecting The Maxbright ® Ii Binoviewer To A Telescope
Connecting the MaxBright ® Binoviewer to a Telescope There are many options to connect the binoviewer to your telescope. Depending on the back-focus and the optical design of your telescope, you can chose the option which best fits to your needs. Assembly with T-2 Coupling Nut With glasspath correctors 1,25x # 2456314,... -
Page 13: Option 2: Assembly With A 1¼" (Or 2") Nosepiece, Without Star Diagonal
GC, so that it will be centered in the adapter. Once the glasspath corrector is placed and centered in the 2"/T-2 nosepiece, you can screw it onto the T-2 counter nut of the binoviewer. © Baader Planetarium GmbH | 2020... -
Page 14: Assembly With Zeiss Microbayonet
Assembly with Zeiss Microbayonet With glasspath correctors 1,25x # 2456314Z, 1,7x # 2456316Z or 2,6x # 2456317 For this, you need the optional TQC Heavy Duty T-2 Quick Changer # 2456313A . To use the included dovetail ring, you need to remove the T-2 counter nut first. Use the included tool for this. -
Page 15: Option 2: Assembly Without Star Diagonal
(im- age below). Insert the GC into the nosepiece and screw the TQC quickchanger onto the nosepiece. Now you can use the MaxBright II with every 2" focuser. This image shows how to insert a glas- spath corrector into the optional T-2/2"... -
Page 16: Assembly With 2" Newtonian 1.7X Glasspath Corrector
Assembly with the 2" Glasspath Corrector 1 .8x for Refractors and SC's As described before, attach the Zeiss microbayonet to the MaxBright II instead of the T-2 counter nut. Attach the Glasspath Corrector to one side of the T-2 Maxbright... -
Page 17: Further Adaptations
Before you start exploring the Sun it is very important to be informed about all the possible risks of solar observation. Please take a careful look at the manuals of all the equipment and filters before pointing your telescope at the Sun. © Baader Planetarium GmbH | 2020... -
Page 18: Adapting The Maxbright ® Ii To The Cool Ceramic Safety Herschel Wedge
Adapting the MaxBright II to the Cool Ceramic Safety Herschel Wedge ® We recommend to use the Zeiss microbayonet in combination with the optional TQC- quickchanger # 2456313A instead of the T-2 counter nut, because you can then screw the glasspath correctors 1,25x and 1,7x directly into the binoviewer. For the 2.6x GC, please see the note at the end of this chapter. -
Page 19: Shortest Possible Adaptation Without Glasspath Corrector
It is only screwed into the ring, you can put it into any of the three threaded holes which are all around the locking ring, each 120° apart. © Baader Planetarium GmbH | 2020... -
Page 20: Addendum
Addendum Addendum 1: The right Glasspath Corrector Back-Focus Sometimes referred to as “in-focus” or “in-travel”, back-focus is an important factor to consider when choosing a binoviewer or any other long accessory (cameras, Herschel Wedge, etc). Back-focus is simply the distance from a telescope's focal point to the surface of its fully retracted focuser. -
Page 21: Choosing A Glasspath Corrector
By using a Glasspath Corrector, the focal point of the telescope can be extended sufficiently to ac- commodate the length of the binoviewer. © Baader Planetarium GmbH | 2020... - Page 22 It also compensates the colour aberrations which would otherwise occur beause of the huge amounts of glass inside of the binoviewer. A GC is more than a simple Bar- low element! The optical design is from Carl Zeiss and Astro Physics – we have tested many lens systems from other sources which only extend the focal point, but which do not remove the colour aberrations.
-
Page 23: Addendum 2: Servicing And Maintenance
Baader Optical Wonder Cleaning Fluid is the perfect cleaning fluid for sensitive opti- ly cleaned optical surfaces. cal surfaces. It removes dirt, fat and finger prints from modern, multi-coated lenses without leaving stains or residues. Item-Nr.: # 2905007 © Baader Planetarium GmbH | 2020... -
Page 24: Problems, Maintenance And Warranty
.com © 2020 Baader Planetarium. All Rights reserved. Products or instructions may change without notice or obligation. Images and illustrations may differ from the original products. We reserve the right of errors. Reproduction of this instruction manual, complete or in parts, only with written permission by BAADER PLANETARIUM Zur Sternwarte 4 •...
Need help?
Do you have a question about the MAXBRIGHT II and is the answer not in the manual?
Questions and answers