Advertisement
Advertisement
Table of Contents

Summary of Contents for Sovol SO-1
- Page 1 SO-1 Pen Plotter User Manual...
-
Page 2: Table Of Contents
Contents 1. Introduction....................1 1.1 NOTE....................2 1.2 SO-1 Anatomy..................3 2. General List....................4 3. Assembly....................5 4. Screen Information..................6 5. Quick Start....................7 6. Inkscape SO-1 1.0 Operation Guide............9 7. Troubleshooting..................15 8. Circuit Wiring.....................16 9. More technical supports................17... -
Page 3: Introduction
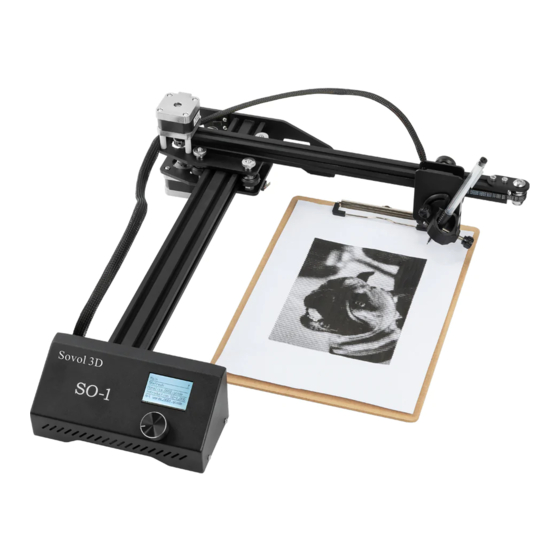
3d printer and other related products. SO-1 is capable of writing or drawing on paper, cards, book page, and any flat surface. It can write with your favorite pens and markers. SO-1 is designed to serve a wide variety of everyday and specialized drawing and writing needs. -
Page 4: Note
1.1 Note Do not use the plotter any way other than described here in order to avoid personal injury or property damage. Do not place the plotter near any heat source and flammable/explosive objects. Please place your plotter under a stable environment in order to achieve good drawing quality. -
Page 5: Anatomy
1.2 SO-1 Anatomy X Motor Board Power Jack Operation Button Pen Lock Screw Controller Cover Side Plate Servo Motor USB Port Fixed Plate Slide Plate Angle Adjust Screw TF Card Y Axis Knurled-Head Thumb Nut Y Motor Pen Holder LCD Screen... -
Page 6: General List
2. General List Pen Plotter Accessories List TF Card & Adaptor AC/DC Adaptor Qty:1 Qty:1 Board set Knurled-Head Thumb Nut Servo Motor Qty:1 Qty:4 Qty:1... -
Page 7: Assembly
3. Assembly Thumb Nut Roller Screw X Motor Mount Roller Screw Figure 2 Figure 1 Step1. Carefully lift X Axis and position it as showed in the figure 1. Step2. Match the holes on the X motor mount with the four Roller Screws. And slowly put press the X motor Mount down until it touches the Roller Screws. -
Page 8: Screen Information
4. Screen Information Model Number X Coordinate Y Coordinate Motor Speed Process Bar Plotter status... -
Page 9: Quick Start
5. Quick Start 1. Place the machine on a stable 2. Connect the power jack. desktop or flat surface. 3. Manually move the two axes to a clear 4. Follow the Screen Info and area above the drawing board. select [Pen down] option. - Page 10 5. Quick Start 5. Insert a pen and make the pen tip touch 6. On the screen, select [Auto home] to the paper. Then lock the hand screw. move the plotter to its origin. 7. Insert the TF card, select [Plot from TF] and choose one sample to test the machine. Then you can start to install the software and enjoy the art world.
-
Page 11: Inkscape So-1 1.0 Operation Guide
6. Inkscape SO-1 1.0 Operation Guide 6.1 Install Inkscape SO-1 and run. (Please download the software from our official website https://sovol3d.com/pages/download)... - Page 12 6. Inkscape SO-1 1.0 Operation Guide 6. 2 Follow the steps and create a wireframe sphere.
- Page 13 6. Inkscape SO-1 1.0 Operation Guide 6. 3 You can drag the arrows to change the size and shape of your object. Click it to lock the aspect ratio. At this moment, we have created a simple art.
- Page 14 6. Inkscape SO-1 1.0 Operation Guide 6. 4 Now we need to convert the Object to Path. Object to Path...
- Page 15 6. Inkscape SO-1 1.0 Operation Guide 6. 5 This window provides machine related parameter settings and values. Click "apply" after filling in the proper values. Note: you need to manually add the file output location in this blank space. The reliable to do this is to copy and paste the target location in the target folder.
- Page 16 6. Inkscape SO-1 1.0 Operation Guide 6. 6 You will find the Gcode file in you r direction folder as showed. The last step is to copy it into your SD card and start the plotting. This window indicates normal operation. The code generation time is determined by the complexity of the object.
-
Page 17: Troubleshooting
7. Troubleshooting 1 Exceed the machine limit 1. It is possible to happen if you setup the wrong paper size in the software, or did not [Auto Home].Please make sure the paper size is A4, letter or less. 2. Use the [Auto Home] function before start a new drawing. 7.2 Servo motor stops working 1.Check the wire connection. -
Page 18: Circuit Wiring
8. C ircuit Wiring - Limit Switch Switch... -
Page 19: More Technical Supports
9.M ore technical supports Please contact technical support directly if you need assistance with troubleshooting or repairing a mechanical issue. Shenzhen Lian Dian Chuang Technology Co.LTD.
Need help?
Do you have a question about the SO-1 and is the answer not in the manual?
Questions and answers