Advertisement
Quick Links
Advertisement

Subscribe to Our Youtube Channel
Related Manuals for Blaupunkt B1111T


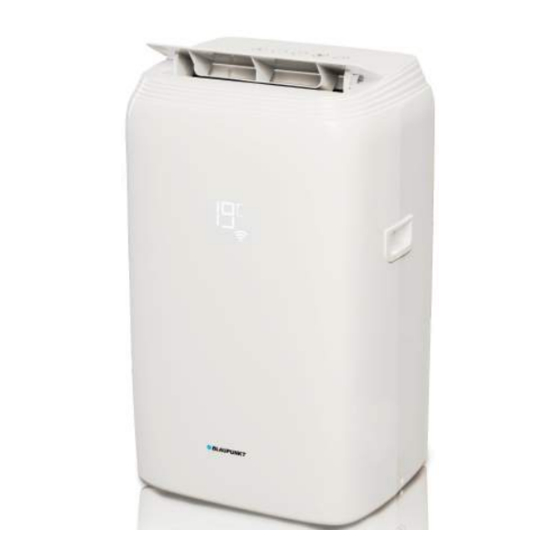
Summary of Contents for Blaupunkt B1111T
- Page 1 B1111T mit WiFi...
- Page 6 ...
- Page 10 ...
-
Page 12: Turning The Appliance On
TURNING THE APPLIANCE ON Plug into the mains socket, then the appliance is standby. Press the button to make the appliance turn on. The last function active when it was turned o will appear. Never turn the air conditioner o by unplugging from the mains. -
Page 14: Dry Mode
operation, it is normaI for the noise made by the appliance to change. - In this mode, you may have to wait for a few minutes before the appliance starts giving out hot air. - In this mode, the fan may operate for short periods, even though the set ternperature has aIready been reached. - Page 15 To set this made correctly: • Press the M button a number of times until the symbol appears. In this mode, fan is selected automatically by the appliance and can not be set manually. Switch the unit of temperature When the appliance is standby, press the M button 20 seconds, then you can change the unit of temperature.
-
Page 16: Self-Diagnosis
SELF-DIAGNOSIS The appliance has a self diagnosis system to identify a number of malfunctions. Error messages are displayed on the appliance display. WHAT SHOULD I DO? The appliance is tted with a Frost protection device to avoid excessive formation of ice. The appliance starts up again automatically when the defrosting process is completed. -
Page 17: Tips For Correct Use
TIPS FOR CORRECT USE To get the best from your air conditioner, follow these recommendations: • Close the windows and doors in the room to be air conditioned ( g. 1). When installing the air conditioner semi-permanently, you should leave a door slightly open (as little as 1cm) to guarantee correct ventilation. - Page 18 NOTE As a safety measure, to positively prevent water spillage, the air conditioner is equipped with a fail safe device, if, the water tank fails. The unit will com- pletely stop the control panel displays „ " (FULL TANK as mentioned in SELF-DIAGNOSIS), the compressor and fan will nor restart until the tank has been drained.
- Page 19 ...
-
Page 20: Cleaning The Cabinet
CLEANING Before cleaning or maintenance, turn the appliance o by pressing button on the control panel or remote control, wait for a few minutes then unplug from the mains socket. CLEANING THE CABINET You should clean the appliance with a slightly damp cloth then dry with a dry cloth. -
Page 21: Start-End Of Season Operations
START-END OF SEASON OPERATIONS START-END OF SEASON OPERATIONS START OF SEASON CHECKS START OF SEASON CHECKS Make sure the power cabbie and plug are unda- Make sure the power cabbie and plug are unda- maged and the earth system is e cient. Follow maged and the earth system is e cient. - Page 23 The air conditio- • Wait ner does not •Plug into the mains. come on. • Wait 30 minutes, if the problem persists, contact your service center. • Here are bends in the air The air ...
- Page 24 room (oven, hairdryer, etc.) sources. • The air exhaust hose is deta- • Fit the air exhaust ched from the appliance. hose in the housing • The technical speci cation of at the back of the the appliance is not adequate appliance ( g.
- Page 26 ...
- Page 27 ...
- Page 28 ...
- Page 29 ...
- Page 30 ...
- Page 36 B1111T mit WiFi...
- Page 37 Bevor Sie das Gerät in Betrieb nehmen, lesen Sie bitte diese Bedienungsan- leitung für Ihre Sicherheit sorgfältig und vollständig durch. Lesen und beachten Sie alle Warnhinweise auf dem Gerät und in der Bedienungsanlei- tung. Bewahren Sie die Bedienungsanleitung zum späteren Nachschlagen an einem sicheren Ort auf.
- Page 38 Es ist gefährlich das Gerät zu zerlegen oder umzubauen. Dies kann zum sofortigen Verlust des Garantieanspruchs führen. Installieren Sie das Gerät gemäß den nationalen ElektroGeräte- und Installationsvorschriften. Auf keinen Fall installieren Sie das Gerät in einem Raum, wo sich Gas, Öl oder Schwefel be nden können.
- Page 39 Wenn der Netzstecker an die Wandsteckdose angeschlossen ist, ist auch das Gerät an die Stromversorgung angeschlossen, selbst wenn Sie das Gerät nicht eingeschaltet haben. Überprüfen Sie regelmäßig den Netzstecker (das Netzkabel) auf Beschädi- gungen. Ist der Netzstecker (das Netzkabel) beschädigt, sollen Sie das Gerät auf keinen Fall einschalten und bedienen.
- Page 40 Schieben Sie keine Gegenstande durch die Ö nungen hinein. Sie können dabei Spannung führende Teile berühren oder Bauteile kurzschließen. Sprühen oder schütten Sie niemals irgendwelche Flüssigkeiten direkt aufs Gerätegehäuse. Dabei besteht Brand- und Stromschlaggefahr Wenn das Gerät nicht ordnungsgemäß funktioniert, stellen Sie nur diese Bedienelemente ein, die in der Bedienungsanleitung benannt werden.
- Page 41 Vor der Reinigung schalten Sie das Gerät aus und trennen Sie es vom Stromnetz. Auf diese Weise beugen Sie dem Brand oder der Gefahr des elektrischen Stromschlags vor. Reinigen Sie den Luft lter mindestens einmal pro Woche. Das Gerät soll immer senkrecht und liegend auf einer Seite transportiert werden.
- Page 42 Weitere Informationen zur Entsorgung von Elektro- und Elektronik-Alt- geräten erhalten Sie bei Ihrer Gemeindeverwaltung oder im Fachgeschäft, wo Sie das Gerät erworben haben. Bevor Sie ein Altgerät verschrotten, entfernen Sie die Batterien aus der Fern- bedienung, um sie ordnungsgemäß an einer Sammelstelle zu entsorgen. In vielen Ländern der EU ist die Entsorgung von Elektro- und Elektronik-Alt- geräten Ober den Haus- und/oder Restmüll ab 13.8.2005 verboten - in Deutschland ab 23.3.2006.
- Page 43 Unsachgemäße Installation von Batterien kann Auslaufen und Korrosionsschaden verursachen. Wenn Batterien auslaufen, wischen Sie die Flüssigkeit aus dem Batteriefach ab. Anschließend tauschen Sie die Batterien aus. VORSICHT! Batterie üssigkeit kann Hautausschlag verursachen. Sind Sie mit Batterie üssigkeit in Berührung gekom- men, spülen Sie die betro enen Hautstellen sofort mit Wasser.
- Page 45 PRODUKTBESCHREIBUNG Luftuslassgitter Display Gri e Lufteintrittsgitter Rollen Bedienfeld Filter Abluftschlaucheingang Kondenswasserab uss Netzkabel Abluftschlauch Fensterausgang Schlaucheinlass Verlängerbare Querträger Ablaufschlauch Fernbedienung...
- Page 46 INBETRIEBNAHME Klimagerät vorläu g installieren Die folgenden Anweisungen erklären, wie das Klimagerät so e zient wie möglich für den Betrieb vorbereitet werden soll. Bevor Sie das Gerät zu benutzen anfangen, stellen Sie sicher, dass die Luftauslassgitter und Luftein- trittsgitter nicht versperrt werden. Mit ein paar einfachen Schritten, können Sie das Gerät nutzen um sich gemütlich zu machen: ...
- Page 64 Moby Blue S 1111 Moby Blue S 1111...
- Page 70 Moby Blue S 1111...
- Page 71 Moby Blue S 1111 Moby Blue S 1111 Blue S 1111...
- Page 72 Moby Blue S 1111 Moby Blue S 1111 Moby Blue S 1111 Moby Blue S 1111 Moby Blue S 1111 Moby Blue S 1111 Blue S 1111...
- Page 86 Moby Blue S 1111 Moby Blue S 1111 Moby Blue S 1111 Moby Blue S 1111 Blue S 1111...
- Page 87 Moby Blue S 1111 Moby Blue S 1111 Moby Blue S 1111 Moby Blue S 1111 S 1111...
- Page 88 Importeur/Vertrieb Arcom Vertriebs GmbH. Handelsweg 12 A-2542 Kottingbrunn Österreich Telefon: +43 (0)2252 72152 Internet: www.arcom-sat.at Email: service@arcom-sat.at...
Need help?
Do you have a question about the B1111T and is the answer not in the manual?
Questions and answers