Table of Contents
Advertisement
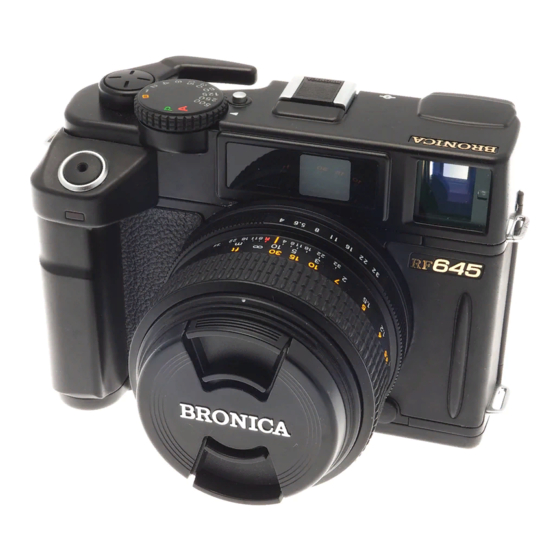
RF645
Thank you for your purchase of the Bronica RF645 medium format rangefinder camera.
Incorporating the best of Bronica's know-how and technological expertise, the Bronica
RF645 achieves a new dimension in compactness as the world's first medium format 6 x 4.5
rangefinder camera to feature interchangeable lenses, and comes with a superb line up of
lenses to take full advantage of the rangefinder camera. The RF645 employs manual film
advance lever and dual-image superimposing rangefinder focusing for maximum user con-
trol where it counts, while enhancing handling ease with Program AE, automatic shutter
cocking via a motor designed for the maximum enjoyment of photography in mind.
The features and handling procedures described in this owner's manual are based on use of
the Bronica RF645 in combination with the Zenzanon RF65mm f/4 standard lens. To obtain
best results from your new camera, please read this instruction manual carefully before use.
With proper care and handling, the unit will continue to provide pleasure and performance
for many years to come.
1
Advertisement
Table of Contents

Summary of Contents for Bronica Rangefinder RF645
- Page 1 RF645 Thank you for your purchase of the Bronica RF645 medium format rangefinder camera. Incorporating the best of Bronica's know-how and technological expertise, the Bronica RF645 achieves a new dimension in compactness as the world's first medium format 6 x 4.5 rangefinder camera to feature interchangeable lenses, and comes with a superb line up of lenses to take full advantage of the rangefinder camera.
-
Page 2: Table Of Contents
Special Features of the Bronica RF645 Nomenclature 1. Getting Started 1-1 Loading batteries 1-2 Attaching and detaching lens 1-3 Attaching strap 1-4 Attaching the proper diopters adjustment lens 2. Preparing to Shoot 2-1 Checking the battery capacity 2-2 Loading film 2-3 Setting the film speed 2-4 Exposure counter, Film memo holder, How to remove a used roll of film... -
Page 3: Special Features Of The Bronica Rf645
Special Features of the Bronica RF 645 ·A medium format coupled-meter rangefinder camera. The Bronica RF 645 is a very compact and lightweight camera with a picture area approxi- mately 2.7 times larger than the 35mm format. The superior portability and versatility of this model compared with other medium format cameras ushers in an entirely new world of photographic possibilities. - Page 4 Special Features of the Bronica RF 645 ·Shooting parameters of the camera are clearly indicated on the internal viewfinder display panel. An oversized LCD panel is installed inside the viewfinder to display constantly updated shooting status data such as shutter speed, lens aperture, AE lock setting, exposure compen- sation setting, correct exposure setting and exposure deviations of manually set exposure values and so on.
-
Page 5: Nomenclature
Nomenclature Shutter speed dial lock release button Shutter speed dial Film advance lever Shutter release button Strap lugs Rear cover lock release Selftimer indicator Exposure compensation dial scale Multiple-exposure (ME) button Selftimer starting button Viewfinder eyepiece Rubber eyecup Film type display window Film memo holder Strap lugs... -
Page 6: Getting Started
Nomenclature Lens mounting index (camera body) Lens Lock pin Lens lock release button Rear cover 1. Getting Started The RF645 will not function without batteries loaded. 1. Appropriate batteries 2. Open the battery chamber cover 3. Insert batteries 4. Close the battery chamber cover Rangefinder coupling roller Electronic contacts... -
Page 7: Loading Batteries
1. Getting Started 5.Battery Checking 1. Getting Started 1-2-1 Attaching the Lens Note: Do not touch the electronic contacts, the rangefinder coupling roller, or the light shielding curtain located around and behind the camera mount section. Contact with these may cause damage and/or leave stains on vital systems, leading to malfunctioning of the camera. -
Page 8: Attaching Strap
1. Getting Started Note 1: The 65mm and the 100mm viewframes in the viewfinder are automatically switched as the respective lenses are attached. Note 2: When mounting the 45mm lens, insert the dedicated viewfinder into the accessory hotshoe on the camera body. Refer to the instruction manual of the 45mm lens for more information. -
Page 9: Preparing To Shoot
2. Preparing to Shoot 2-1 Check Battery Capacity The Bronica RF 645 requires a set of batteries to function, since the camera employs an electronically controlled shutter. Note 1: Approximately 100 rolls of 120 type film can be shot on a fresh set of batteries before the batteries must be replaced (under Bronica manufacturer test conditions.) Note 2: Replace depleted batteries with new ones as soon as the bat-... - Page 10 2. Preparing to Shoot 2-2 Loading Film 3. Install the film take-up spool in the right hand film chamber, align- ing the key-hole of the spool shaft of the camera. Push up the pro- truding film spool shaft into the bottom plate of the camera until it locks into position.
-
Page 11: Loading Film 9
2. Preparing to Shoot 8. Close the back cover and lock it securely. Operate the film advance lever with few strokes until it stops. At this point, the exposure count- er window displays a "1". Note: After closing the camera back, make sure both film shafts are completely pressed back into the camera bottom. -
Page 12: Exposure Counter, Film Memo Holder
2. Preparing to Shoot 2-4 Check the number on the exposure counter 2-4-1 Exposure Counter The exposure counter resets itself to "S" (start) position as the camera back is opened. When the fresh film is loaded and advanced to the first frame, the exposure counter displays "1". -
Page 13: Shooting 3-1 Main Switch
2. Preparing to Shoot 3. Remove the empty film spool from the feeding side film chamber and transfer it to the take-up film chamber in preparation for loading of the next roll of film. Note: When opening the camera rear cover for film loading and removal, avoid exposing the camera to direct sunlight. -
Page 14: Shutter Release Button, Viewfinder Display
3. Shooting 3. Taking advantage of a tripod or a monopod: The difference between sharp pictures and shots blurred by camera shake is one second away. When using a 100mm lens, 1/100 sec., is the limitation for holding the camera steady. A faster shutter speed is strongly recommend- ed for shooting with a medium format camera, since this unit is larger and heavier than a 35mm camera. -
Page 15: Exposures
3. Shooting 3-3-2 Viewfinder Display The viewfinder contains the following displays: 1. An LCD panel to the left of the viewing field, 2. View frame bright frame display, and in its center, a focusing frame with dual superimposed images. Note: 65mm or 100mm lens when attached. -
Page 16: Exposure Metering System
3. Shooting The numerals 1 to 500 on the shutter speed dial represent shutter speeds or exposure times expressed in reciprocals. In other words, "500" actually means 1/500 second and "60" is 1/60 second. The lens aperture can be set by rotating the lens aperture ring. The 65mm lens provides an aperture range of f/4 to f/32. -
Page 17: Exposure Control Modes
3. Shooting 3-4 Exposures 3-4-3 Exposure Control Modes The Bronica RF 645 provides three exposure control modes: the Program AE mode, the Aperture-priority AE mode and the manual exposure control mode. Any of the three exposure control modes mentioned can be selected and set using the shutter speed dial. 1. -
Page 18: Exposure Control Modes
3. Shooting 3. Manual Exposure Control This exposure control mode is particularly important to those serious pho- tographers who intentionally determine specific shutter speeds and lens apertures in order to produce creative images. The Bronica RF 645 with its extremely precise electronic shutter speed and lens aperture control system makes an ideal manual exposure control camera. -
Page 19: Exposure Compensation
3. Shooting When an exposure compensation is applied, a (+) or (-) warning sym- bol is illuminated in the viewfinder panel. It is important to remem- ber there is no numerical indication for exposure compensation. Note: Once the exposure compensation is completed in a photo ses- sion, do not forget to return the exposure compensation dial to the original "0"... -
Page 20: Automatic Parallax Compensation
3. Shooting The image contrast will become noticeably sharp when the two images superimpose precisely. That is the point where the lens criti- cally focuses on the subject. 3. Split image focus: Split-image is an image divided into upper and lower halves. Human vision naturally perceives the most critical image matching when comparing the alignment of edges in a split image. -
Page 21: Selftimer
4. Other Features Note 1: The ME button electronically cancels out the shutter release button lock system. Five seconds after pressing the ME button, the canceling effect of the ME button will be cleared, the shutter button will be locked, and the LCD will switch off once again. Note 2: There is no exposure compensation feature in the Bronica RF 645 for multiple exposure modes. -
Page 22: Electronic Flash Photography
4. Other Features 4-3 Electronic flash photography 4-3 Electronic Flash Photography Equipped with a lens shutter system, the Bronica RF 645 features flash synchronization at all shutter speeds. Connect an electronic Speedlight unit to either the hotshoe or the sync terminal located at the front of the camera. -
Page 23: Electronic Flash Photography
4. Other Features 4. Other Electronic Flash Features * Exposure compensation: The flash exposure of the Speedlight RF 20 can be compensated from -3 to +2 stop in ½-stop increments according to the subject's reflectivity. * Backlit LCD: For insufficient lighting, the LCD panel of the Speedlight RF 20 can be illumi- nated from the back for better legibility. -
Page 24: Depth Of Field
4. Other Features 4-6 Depth of Field Since the Bronica RF 645 is a coupled rangefinder camera compro- mising separate shooting and viewfinder optical systems, the sharp focus range is not directly displayed in the viewfinder. The depth of field must therefore be read from the depth of field scale on the lens, or calculated from the depth of field table. -
Page 25: Troubleshooting
5. Troubleshooting Before taking your camera in for repairs, check your camera referring to the following table. Viewfinder LCD What’s happening Shutter release No LCD button indication depressed lightly but LCD does not light. Shutter speed LCD flashing Aperture & Flashing LCD shutter speed warning... - Page 26 5. Troubleshooting What’s Viewfinder LCD Cause of trouble Means to solve How to operate happening AL mark indication Warning indications “X” mark indication No LCD indication Shutter does not click “X” mark flashing ME button does not work No LCD indication Selftimer does not work...
- Page 27 5. Troubleshooting Exposed film is... What’s Cause of trouble happening Shot in AE lock mode Cancel AE lock mode Under exposed, Over exposed Shot in AE lock mode Not exposed at all Shot with lens cap on Images very blurred Camera shakes Flash picture appears to be...
-
Page 28: References
6. References Exposure Measuring Range and Ev The exposure measuring range with the RF645 is EV3 to 18 (with ISO 100 film). For example: If EV 14 is the correct exposure with ISO 100 film, the shutter speed setting will be 1/250 sec. -
Page 29: Specifications
7. Specifications Camera Type Picture Format Film Lens Filter Size Focusing Focus ring rotations Shutter Aperture Coupled-meter rangefinder, lens shutter 6 x 4.5 format camera. 41.5mm x 56mm 16 frames on 120 type film, 32 frames on 220 type film. Interchangeable with Bronica bayonet mount, 45mm f/4 Wide, 65mm f/4 Normal and 100mm f/4.5 Tele. -
Page 30: Specifications
7. Specifications Film Advance Rangefinder Viewfinder In-Finder Display Exposure Metering Exposure Control Modes Battery Dimensions Weight By rapid winding lever placed on top of cam- era with either 186° single stroke or ratch- eted strokes, with 12° stand by angle. Coupled. -
Page 31: Preliminary Checklist
8. Preliminary Checklist (Before loading film) A basic checklist of points and basic procedures to confirm before embarking on a shoot is listed below. When you plan an important photographing session, it is essential to test your camera to ensure the unit and other equipment is in good working order. -
Page 32: Enduring Years Of Enjoyment Through Proper Care And Handling
8. Preliminary Checklist (Before loading film) Film Wind Lock Release If battery power drops below the camera's operational level, or the main switch is mistakenly turned off during a long exposure shot (B or longer than 1 second exposure), the film wind lock mechanism will interrupt the camera operation and prevent the film from being advanced any further. - Page 33 9. Ensuring years of enjoyment through proper care and handling Camera Cleaning · Do not apply any solvent such as thinners and/or alcohol to clean the external parts of the camera. · To wipe dirt or fingerprints from the camera surface, apply a soft cloth or silicone-treated cloth after blowing dust off the camera.
Need help?
Do you have a question about the Rangefinder RF645 and is the answer not in the manual?
Questions and answers