Table of Contents
Advertisement
Quick Links
Originalbedienungsanleitung
Original operating manual
Notice d'utilisation d'origine
Manual de instrucciones original
Originele gebruiksaanwijzing
Oryginalna instrukcja eksploatacji
Оригинал Руководство по эксплуатации
SBS 1031 SYS
D322661
Teil 1
I/
1
Part 1
I/
3
Partie 1
I/
5
Parte 1
I/
7
Deel 1
I/
9
Części 1
I/ 11
Часть 1
I/ 13
G880523_001
2008/11/risa-08
Teil 2
II/
1
Part 2
II/
6
Partie 2
II/ 11
Parte 2
II/ 16
Deel 2
II/ 21
Części 2
II/ 26
Часть 2
II/ 31
Advertisement
Table of Contents

Subscribe to Our Youtube Channel
Related Manuals for Schneider Airsystems SBS 1031 SYS

Summary of Contents for Schneider Airsystems SBS 1031 SYS
- Page 1 Parte 2 II/ 16 Originele gebruiksaanwijzing Deel 1 Deel 2 II/ 21 Oryginalna instrukcja eksploatacji Części 1 I/ 11 Części 2 II/ 26 Оригинал Руководство по эксплуатации Часть 1 I/ 13 Часть 2 II/ 31 SBS 1031 SYS D322661 G880523_001 2008/11/risa-08...
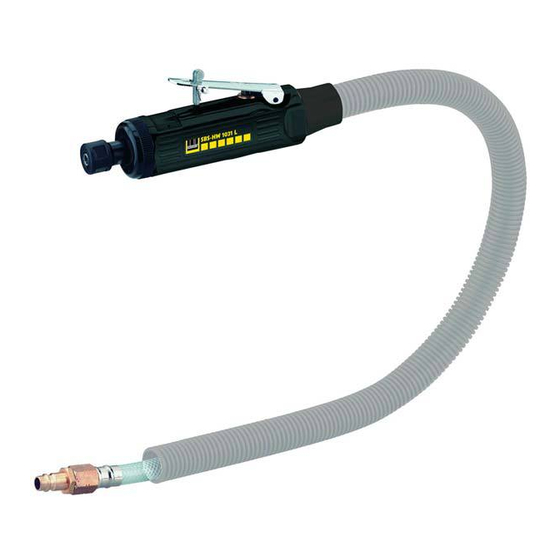
- Page 5 SBS 1031 SYS Inhaltsverzeichnis - Teil 1 Lieferumfang – Stabschleifer Allgemeine Hinweise....– Abluftschlauch steckbar Lieferumfang ......– Montageschlüssel ( 2 x ) Bestimmungsgemäße Verwendung – Werkzeugaufnahme 3 mm Technische Daten ..... – Werkzeugaufnahme 6 mm Aufbau ........– Schutzbrille Inbetriebnahme .......
-
Page 6: Eg-Konformitätserklärung
SBS 1031 SYS Montage: 1. Welle (Pos. 05) mit Montageschlüssel festhalten (Bild 2a). 2. Klemmmutter (Pos. 06) mit zweitem Montageschlüssel lösen (Bild 2a). 3. Entsprechende Werkzeugaufnahme (Pos. 04) einsetzen (Bild 3a). 4. Klemmmutter (Pos. 06) lose auf die Wel- le drehen (Bild 4a). -
Page 7: General Information
SBS 1031 SYS Table of contents - Part 1 Scope of delivery – Axial grinder General information ....– Detachable exhaust air hose Scope of delivery ...... – Assembly key ( 2 x ) Conventional use ...... – Tool fitting 3 mm Technical data ...... -
Page 8: Ec Declaration Of Conformity
SBS 1031 SYS Assembly: 1. Hold the shaft (item 05) using the as- sembly key (Fig. 2a). 2. Slacken the clamping nut (item 06) us- ing the second assembly key (Fig. 2a). 3. Insert the relevant tool fitting (item 04) (Fig. - Page 9 Inhaltsverzeichnis - Teil 2 Fragen Bezeichnung und Art.-Nr. des Gerätes angeben. Außerhalb von Deutschland kön- Allgemeine Hinweise....nen andere gesetzliche oder sonstige Vor- schriften gelten als hier beschrieben. Symbole ........Die Bedienungsanleitung muss vor Anwen- Sicherheitshinweise....dung des Gerätes gelesen, beachtet und der Inbetriebnahme ......
- Page 10 Symbol Bedeutung Symbol Bedeutung Rotierende Teile! Elektrostatische Entladung! Erdung vornehmen! Explosionsgefahr! Stolperfalle! heiße Öberfläche! Gerät ölen! Sicherheitshinweise WARNUNG GEFAHR Aufwirbeln von Staub, Flüssigkeiten, Schmutzpartikeln Funken während des Explosionsgefahr! Betriebes. Nicht in explosionsgefährdeten Bereichen Staubmaske tragen! arbeiten! Strahlschutzhaube tragen! Maximalen Druck beachten (siehe Bedie- Schutzhandschuhe tragen! nungsanleitung Teil 1, Kapitel: "Techni- Schutzkleidung tragen!
- Page 11 WARNUNG VORSICHT Rotierende Teile! Stolperfalle! Druckluftschläuche, die über den Boden Haarnetz tragen! geführt werden Verwicklungen von Haaren und Kleidung vermeiden bzw. beachten! vermeiden! Nur befestigte, am Körper anliegende Klei- dung oder Schutzkleidung tragen! HINWEIS Funkenbildung kann Brände auslösen. WARNUNG Je nach Materialverarbeitung können Funken entstehen, die Brändherde oder Wegschleudern Schleifmitteln,...
-
Page 12: Wartung
Inbetriebnahme Wartung Vor Inbetriebnahme: Regelmäßige Schmierung ist erforderlich! 1. Technische Daten, Bilder, Positionsnum- mern, bestimmungsgemäße Verwen- dung und Sicherheitshinweise beachten Ölen über eine Wartungseinheit (siehe auch Bedienungsanleitung Teil 1 mit Filterdruckminderer und Nebelöler. Kapitel „Technische Daten“ und Kapitel „Bestimmungsgemäße Verwendung“). Ölen von Hand in den 2. -
Page 13: Störungsbehebung
Störungsbehebung Sicherheitshinweise und Wartungshinweise beachten! Störung Ursache Behebung Geringe oder keine Luftregulierung (Pos. 03) falsch Korrektur Luftregulierung vor- Arbeitsleistung eingestellt nehmen Schleifmittel / Werkzeuge Schleifmittel / Werkzeuge erset- abgenutzt Arbeitsdruck (Fließdruck) zu Arbeitsdruck (Fließdruck) erhö- gering hen. Maximalen Arbeitsdruck be- achten Kompressorleistung zu klein Andere Leistungsgröße... - Page 14 Table of contents - Part 2 Document inspections, adjustments and maintenance work in a maintenance log General information ....book. Specify the name and article number of the unit when making inquiries. Outside of Symbols ........Germany, different legal or other require- Safety instructions ....
-
Page 15: Safety Instructions
Symbol Meaning Symbol Meaning Rotating parts! Electrostatic discharge! Ensure proper earthing! Explosion hazard! Tripping hazard! Hot surface! Oil the device! Safety instructions WARNING DANGER Dispersion of dust, fluids, dirt particles and sparks during operation. Explosion hazard! Wear dust mask! Do not work in potentially explosive areas! Wear a protective spray hood! Observe maximum pressure (see Instruc- Wear safety gloves! - Page 16 WARNING NOTICE Rotating parts! Sparks can cause fires. Wear a hairnet! Some material machining methods gen- erate sparks that can cause fires or Avoid tangling of hair or clothing! smouldering! Wear only protective clothing or securely Avoid spark formation! fastened clothing that fits snugly. Make sure the unit is used for the intended purpose! WARNING...
-
Page 17: Maintenance
(Figure 1a). products. If you have any special questions, Operation: please consult the Schneider Airsystems Ser- vice centre in your country (addresses in the 1. Attach the tool to the object being pro- service appendix) or your local dealer. -
Page 18: Troubleshooting
Troubleshooting Observe the safety instructions and maintenance instructions! Problem Cause Remedy Minimum or no Air regulation (item 03) set- Adjust the air regulation setting operating capacity ting incorrect correctly Abrasive / Tool worn Replace abrasive / tool Working pressure (flow pres- Increase working pressure (flow sure) too low pressure) - Page 20 Service Service Deutschland Schweiz Schneider Druckluft GmbH Tooltechnic Systems (Schweiz) AG Ferdinand-Lassalle-Str. 43 Moosmattstrasse 24 D-72770 Reutlingen 8953 Dietikon +49 (0) 71 21 9 59-2 44 +41 - 44 744 27 27 +49 (0) 71 21 9 59-2 69 +41 - 44 744 27 28 E-Mail: service@tts-schneider.com E-Mail: info-ch@tts-schneider.com Österreich...
- Page 21 Originalbedienungsanleitung Teil 1 Teil 2 II/1 Original operating manual Part 1 Part 2 II/4 Notice d’utilisation d’origine Partie 1 Partie 2 II/7 Manual de instrucciones original Parte 1 Parte 2 II/10 Originele gebruiksaanwijzing Deel 1 Deel 2 II/13 Originalbruksanvisning Del 1 Del 2 II/16 Oryginalna instrukcja eksploatacji...
- Page 22 0,46 22000 10 m 3; 6 65 x 40 x 195...
- Page 23 SBS-SET Inhaltsverzeichnis - Teil 1 Werkzeugaufnahme (Spann- zange) [mm] Lieferumfang......Schalldruckpegel L (in 1 m Bestimmungsgemäße Verwen- Abstand) nach EN ISO 15744 dung ........[db(A)] Technische Daten...... Vibration nach ISO 8662 [m/s Symbole und ihre Bedeutung..Empfohlener Schlauchdurchmes- Aufbau ........ser (innen) bei L= 10 m [mm] 10 m Inbetriebnahme ......
-
Page 24: Scope Of Delivery
SBS-SET Table of contents - Part 1 Tool fitting (collet chuck) [mm] Scope of delivery ...... Sound pressure level L (at dis- Conventional use ...... tance of 1 m) as per EN ISO 15744 [db(A)] Technical data ......Vibrations as per ISO 8662 Symbols and their meaning .. - Page 25 EG-Konformitätserklärung Wir erklären in alleiniger Verantwortung, dass dieses Produkt mit folgenden Richtlinien und Normen übereinstimmt: 2006/42/EG; DIN EN 792-9:2000+A1:2008; EN ISO 12100-1:2003+A1:2009; EN ISO 12100-2:2003+A1:2009; EN ISO 8662; EN ISO 15744 Stabschleifer: SBS-SET Serien-Nr.: T400058 Jahr der CE-Kennzeichnung: 2011 Der Unterzeichner ist Leiter Forschung und Entwicklung; Dokumentationsbeauftragter EC Declaration of Conformity We declare under our sole responsibility that this product complies with the following guidelines and standards: 2006/42/EC;...
- Page 26 Inhaltsverzeichnis - Teil 2 heiße Oberfläche! Allgemeine Hinweise....Stolperfalle! Symbole und ihre Bedeutung..Sicherheitshinweise....Serviceadressen Inbetriebnahme ......Wartung ........2.3 Sicherheitshinweise Außerbetriebnahme....Gewährleistung......GEFAHR Störungsbehebung ....Explosionsgefahr! 2.1 Allgemeine Hinweise Nicht in explosionsgefährdeten Bereichen Sicherheitshinweise beachten! arbeiten! Bedienungsanleitung Teil 1 und 2 lesen! Maximalen Druck beachten! Technische Änderungen vorbehalten.
- Page 27 WARNUNG VORSICHT Rotierende Teile! Stolperfalle! Druckluftschläuche, die über den Boden Haarnetz tragen! geführt werden Nur befestigte, am Körper anliegende Klei- vermeiden bzw. beachten! dung oder Schutzkleidung tragen! HINWEIS WARNUNG Funkenbildung kann Brände auslösen. Selbsttätiges Anlaufen des Gerätes möglich! Funkenbildung vermeiden! wenn vorhanden: Sicherheitshebel am Abzugshebel nicht •...
-
Page 28: Gewährleistung
2. Schnellkupplung des Druckluftschlau- Ohne Nebelöler: Täglich von Hand über ches auf den Stecknippel (Pos. 01) drü- den Stecknippel (Pos. 01) ölen. cken (Bild 1a). Bei längerer Betriebspause zusätzlich über Betrieb: den Stecknippel (Pos. 01) ölen. 1. Werkzeug auf das zu bearbeitende Ob- 2.6 Außerbetriebnahme jekt aufsetzen. -
Page 29: Symbols And Their Meaning
Table of contents - Part 2 Hot surface! General information ....Tripping hazard! Symbols and their meaning ..Safety instructions ....Service addresses Commissioning ......Maintenance......2.3 Safety instructions Decommissioning ...... Warranty ......... DANGER Troubleshooting ......Explosion hazard! 2.1 General information Do not work in potentially explosive areas! Observe the safety instructions! Observe maximum pressure! - Page 30 WARNING CAUTION Rotating parts! Dangerous obstacle! Air hoses laid on the ground. Wear a hairnet! Avoid or pay close attention. Wear only protective clothing or securely fastened clothing that fits snugly. NOTICE WARNING Sparks can cause fires. Tool may start up automatically Avoid spark formation! if option is available: Do not short circuit the safety lever on the...
-
Page 31: Warranty
2. Press the quick-action coupling of the air In the event of longer interruptions in op- hose onto the plug nipple (item 01) eration, also lubricate plug (Figure 1a). nipple (item 01). Operation: 2.6 Decommissioning 1. Attach the tool to the object being pro- Storage: Clean, dry, dust-free, not below cessed. - Page 33 Schneider Druckluft GmbH Ferdinand-Lassalle-Str. 43 +49 (0) 7121 959-0 D-72770 Reutlingen +49 (0) 7121 959-151 info@tts-schneider.com www.schneider-airsystems.com Ersatzteilkatalog / spare parts catalogue / catalogue de pièces de rechange en ligne / catálogo de piezas de recambio / reserveonderdelencatalogus / reservedeler katalog / katalog części zamiennych / pótalkatrész katalógusunkat folyamatosan / katalog náhradních dílů...
Need help?
Do you have a question about the SBS 1031 SYS and is the answer not in the manual?
Questions and answers