Table of Contents
Advertisement
Quick Links
BEFORE USING THE REGISTER CARRY OUT THE TASKS BELOW
UNPACKING THE CONTENTS
The following items should be located in the box:
1 x Set of operator/program keys
1 x Set of drawer keys
1 x Users manual
HOW TO INITIALISE THE REGISTER
§
Remove the till roll cover.
§
Lift the printer arm where it says "PUSH HERE".
§
Remove the battery cover by pressing the clip on the right side of the battery compartment.
§
Insert the batteries as illustrated below:-
§
Install the receipt paper as illustrated on
§
Plug the cash register into the mains power.
§
Insert the PGM key.
§
Turn the mode switch to OFF.
§
Press and hold down the
§
Turn the mode switch to PGM.
§
Release the
§
The display should show INIT on the first line and 00000000 on the second line, the display will
then show dashes as the printer issues a receipt. The display will show PGM 1.
§
Carry out the key presses as shown
§
When the receipt has printed, return to REG and remove the PGM key.
HOW TO SET THE DATE
§
Insert the PGM key.
§
Turn the mode switch to PGM. The display will show PGM 1.
§
Carry out the key presses shown.
§
When the receipt has printed, return to REG and remove the PGM key.
HOW TO SET THE TIME
§
Insert the PGM key.
§
Turn the mode switch to PGM. The display will show PGM 1.
§
Carry out the key presses shown, using the
24 Hour clock format.
§
When the receipt has printed, return to REG and remove the PGM key.
SUPPORT DESK HELP IS AVAILABLE ON :-
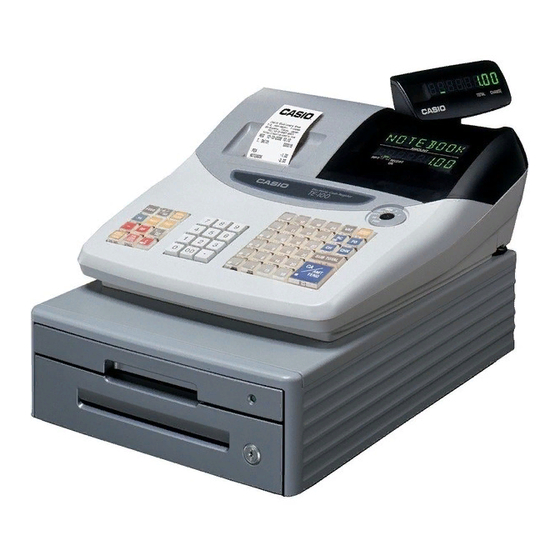
TE-100 Cash Register
button.
button.
1 x Take up spool
1 x Paper roll
3 x Memory backup batteries
of the user's manual.
page 9
(unless stated otherwise all key presses are numeric 0 - 9).
01924 438640
Page 1 –
Necessary Initialisation
Year
Month
Day
8.30am – 4.30pm
Mon-Fri
Advertisement
Table of Contents

Summary of Contents for Caso TE-100
- Page 1 TE-100 Cash Register Page 1 – Necessary Initialisation BEFORE USING THE REGISTER CARRY OUT THE TASKS BELOW UNPACKING THE CONTENTS The following items should be located in the box: 1 x Set of operator/program keys 1 x Take up spool...
- Page 2 TE-100 Cash Register Page 2 – Basic Operation HOW TO MAKE SALES USING THE KEYBOARD DEPARTMENTS There are twenty four department buttons located on the keyboard. These can be used for either manual price entries or preset pricing. Each Department can be given a 12 character name for receipt printing and reporting.
- Page 3 TE-100 Cash Register Page 3 – Extra Programming HOW TO SET THE PRICES FOR THE KEYBOARD DEPARTMENTS There are twenty four Department buttons located on the keyboard. These can be used for either manual price entries or preset pricing. Each Department can be given a 12 character name for receipt printing and reporting.
- Page 4 TE-100 Cash Register Page 4 – Extra Programming HOW TO SET PRICE LOOK UP CODES WITH PRICES It is possible to set a Price Look Up code between 1 and 1200 for each product. When the code is entered and the PLU key is pressed the pre-programmed price and 12 character name are recalled.
Need help?
Do you have a question about the TE-100 and is the answer not in the manual?
Questions and answers