
Subscribe to Our Youtube Channel
Related Manuals for Teesa TSA5012


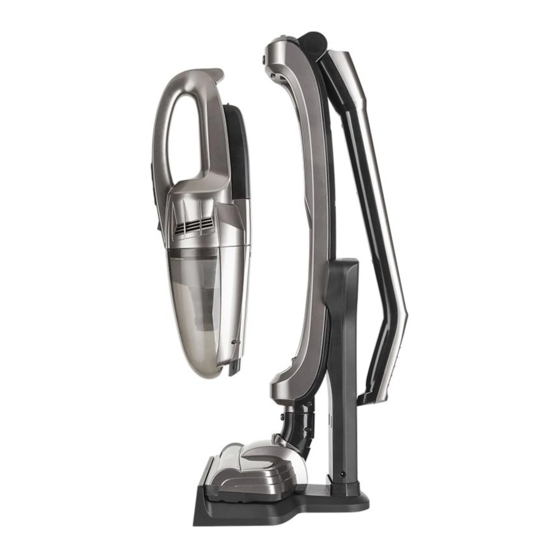
Summary of Contents for Teesa TSA5012
- Page 1 Rechargeable 2-in-1 stick vacuum cleaner TSA5012 Bedienungsanleitung Owner’s manual Instrukcja obsługi Manual de utilizare Návod na použitie...
- Page 4 Netzschalter Power switch (stick Przełącznik zasilania Comutator pornire Hlavný vypínač (Am Staubsaugergriff) vacuum cleaner) (odkurzacz pionowy) (pe manerul tija) (tyčový vysávač) Griff Handle Uchwyt Maner tija Rukoväť Przycisk odblokowujący Verriegelungstaste Griff Handle unlocking button Buton deblocare maner Aretačné tlačidlo rukoväte uchwyt Verriegelungstaste Handheld vacuum...
- Page 5 Bedienungsanleitung Danke für den Kauf des TEESA Gerätes. Bitte lesen Sie diese Bedienungsanleitung sorgfältig und bewahren diese auf für späteres Nachschlagen. Der Händler übernimmt keine Verantwortung für Schäden, die durch unsachgemäße Handhabung und Verwendung des Produktes verursacht wurden. SICHERHEITSANLEITUNGEN Um die Gefahr von Feuer, Stromschlag oder anderen Verletzungen zu vermeiden, befolgen Sie die grundlegenden Sicherheitsvorkehrungen bei der Verwendung elektrischer Geräte, einschließlich der folgenden:...
-
Page 6: Montage / Demontage
Bedienungsanleitung 13. Halten Sie das Gerät und sein Kabel fern von Hitze, Wasser, Feuchtigkeit, scharfen Kanten und andere Faktoren, die das Gerät oder das Netzkabel beschädigen könnten. 14. Stellen Sie das Gerät nicht ins Wasser oder andere Flüssigkeiten; verwenden Sie es nicht mit nassen oder feuchten Händen. 15. - Page 7 Bedienungsanleitung Ladestation: • Montage: Wandeinheit (20) mit der Bodeneinheit (22) verbinden. • Demontage: Wandeinheit von der Bodeneinheit herausziehen. Hinweis: es ist möglich die Wandeinheit (20) auf der Wand mit Schrauben (nicht mitgeliefert) zu befestigen. In diesem Falle, suchen Sie einen Platz in der nähe einer Steckdose und befestigen die Wandeinheit.
-
Page 8: Bedienung
Bedienungsanleitung 1. Vergewissern Sie sich, dass das Gerät ausgeschaltet ist. 2. Vergewissern Sie sich, dass die Ladestation auf einer flachen und stabilen Oberfläche in der Nähe der Steckdose und entfernt von Wärmequellen, direktem Sonnenlicht oder nassen Orten liegt. 3. Staubsauger und Ladestation anschließen. 4. -
Page 9: Reinigung Und Wartung
Bedienungsanleitung • Stufe 2 – hohe Leistung (das Gerät hat eine höhere Leistung für eine kürzere Betriebszeit) 5. Beginnen Sie mit dem Saugen. 6. Drücken und halten der Netztaste (6) um das Gerät auszuschalten. 7. Schieben Sie die Fugendüse zurück in den Schlitz. Leeren des Staubbehälters Hinweis: es ist empfohlen den Staubbehälter nach jeder Benutzung zu leeren. - Page 10 Bedienungsanleitung 3. Entfernen Sie den textilen Staubbeutel (13) und den Staubfilter (14) aus dem Staubbehälter (15) und reinigen diese, indem Sie den Schmutz ausklopfen oder abbürsten. 4. Nach dem Reinigen, den Staubfilter und den textilen Staubbeutel in den Staubbehälter stecken und den Staubbehälter an die Haupteinheit des Handstaubsaugers durch Linksdrehung anschließen, bis er einrastet.
-
Page 11: Technische Daten
Bedienungsanleitung LAGERUNG • Vor dem Aufbewahren sicherstellen, dass das Gerät sauber, trocken und voll aufgeladen ist. • Das Gerät an einem trockenen Ort aufbewahren. • Der Staubsauger kann in einer aufrechten Position gelagert oder mit dem Griff abgeklappt. Drücken Sie die Verriegelungstaste Griff (3) und klappen den Griff nach unten. - Page 12 Bedienungsanleitung Deutsch Korrekte Entsorgung dieses Produkts (Elektromüll) (Anzuwenden in den Ländern der Europäischen Union und anderen europäischen Ländern einem separaten Sammelsystem) Die Kennzeichnung auf dem Produkt bzw. auf der dazugehörigen Literatur gibt an, dass es nach seiner Lebensdauer nicht zusammen mit dam normalen Haushaltsmüll entsorgt werden darf.
-
Page 13: Safety Instructions
Owner’s manual Thank you for purchasing TEESA appliance. Please read this operation instruction carefully before use, and keep it for future use. Distributor does not take responsibility for damages caused by inappropriate handling anduse of the product. SAFETY INSTRUCTIONS In order to reduce the injuries or damages, follow basic safety precautions applied when using any electrical device, including the following: 1. - Page 14 Owner’s manual 15. Do not point the vacuum cleaner at persons or animals when it is working. 16. Do not use the device to vacuum up: • large, sharp-edged objects which could block and damage the appliance; • harming or erodent liquids or inflammable and explosive substances, as this could cause a fire;...
- Page 15 Owner’s manual Note: It is possible to mount the wall unit (20) on the wall using the screws (not provided). In that case select a location near a power mains socket and mount the wall unit. Stick vacuum cleaner: • Plug the stick vacuum cleaner into the electric brush (11).
-
Page 16: Operation
Owner’s manual 1. Make sure the device is turned off. 2. Make sure the docking station is placed on a flat and stable surface, near the power mains socket and away from heat sources, direct sunlight or wet places. 3. Connect the vacuum cleaner and the docking station. 4. -
Page 17: Cleaning And Maintenance
Owner’s manual 5. Start vacuuming. 6. To turn off the device, press and hold Power button (6). 7. Push the crevice tool back into the slot. Emptying the dust container Note: It is recommended to empty the dust container after each use. 1. - Page 18 Owner’s manual 3. Remove the textile dust bag (13) and the dust filter (14) from the dust container (15) and clean them by tapping out or brushing off the dirt. 4. After cleaning, insert the dust filter and textile dust bag into the dust container then assemble the dust container to the main unit of handheld vacuum cleaner by turning it left until it locks in place.
-
Page 19: Specification
Owner’s manual STORAGE • Before storing make sure the device is clean, dry and fully charged. • Store the device in a dry place. • The stick vacuum cleaner can be stored in an upright position or with the handle folded down. Press the handle unlocking button (3) and fold down the handle. - Page 20 Owner’s manual English Correct Disposal of This Product (Waste Electrical & Electronic Equipment) (Applicable in the European Union and other European countries with separate collection systems) This marking shown on the product or Its literature, indicates that It should not be disposed with other household wastes at the end of its working life.
- Page 21 Instrukcja obsługi Dziękujemy za zakup urządzenia TEESA. Przed użyciem należy dokładnie zapoznać się z treścią instrukcji obsługi oraz zachować ją w celu późniejszego wykorzystania. Producent nie ponosi odpowiedzialności za nieprawidłowe użycie produktu. KWESTIE BEZPIECZEŃSTWA Aby uniknąć uszkodzeń lub obrażeń, należy przestrzegać podstawowych środków bezpieczeństwa stosowanych przy obsłudze urządzeń...
- Page 22 Instrukcja obsługi 13. Urządzenie i kabel zasilający należy przechowywać z dala od źródeł ciepła, wody, wilgoci, ostrych krawędzi oraz innych czynników, które mogłyby spowodować uszkodzenie tego urządzenia lub kabla. 14. Nie należy zanurzać urządzenia w wodzie ani obsługiwać go mokrymi dłońmi.
- Page 23 Instrukcja obsługi Stacja dokująca: • Montaż: Należy połączyć ze sobą jednostkę ścienną (20) oraz podłogową (22) stacji dokującej. • Demontaż: Należy chwycić i pociągnąć za jednostkę ścienną stacji dokującej, aby odłączyć ją od jednostki podłogowej. Uwaga: Jednostka ścienna stacji dokującej (20) może zostać zamontowana na ścianie za pomocą...
- Page 24 Instrukcja obsługi 1. Należy upewnić się, że urządzenie jest wyłączone. 2. Należy upewnić się, że stacja dokująca znajduje się na płaskiej i stabilnej powierzchni, w pobliżu gniazda zasilania sieciowego oraz z dala od źródeł ciepła, bezpośredniego nasłonecznienia oraz wilgoci. 3. Połączyć odkurzacz ze stacją dokującą. 4.
-
Page 25: Czyszczenie I Konserwacja
Instrukcja obsługi • Tryb 2 - wysoka moc (urządzenie działa z większą mocą ale przez krótszy czas) 5. Należy rozpocząć odkurzanie. 6. Aby wyłączyć urządzenie, należy nacisnąć i przytrzymać przycisk zasilania (6). 7. Po zakończeniu użytkowania należy wsunąć ssawkę szczelinową. Opróżnianie pojemnika na kurz Uwaga: Pojemnik na kurz powinien być... - Page 26 Instrukcja obsługi 3. Należy wyjąć filtr tekstylny (13) oraz filtr pyłu (14) z pojemnika na kurz (15) i wyczyścić je poprzez wytrzepanie lub wyczesanie. 4. Po zakończeniu czyszczenia należy umieścić filtry w pojemniku na kurz, po czym przymocować go do odkurzacza ręcznego poprzez przekręcenie w lewo, aż...
- Page 27 Instrukcja obsługi PRZECHOWYWANIE • Przed przechowywaniem urządzenia, należy upewnić się, że jest ono czyste, suche i całkowicie naładowane. • Urządzenie należy przechowywać w suchym miejscu. • Odkurzacz może być przechowywany w pozycji pionowej lub ze złożonym uchwytem. Należy nacisnąć przycisk odblokowujący uchwyt (3), aby złożyć...
- Page 28 Instrukcja obsługi Poland Prawidłowe usuwanie produktu (zużyty sprzęt elektryczny i elektroniczny) Oznaczenie umieszczone na produkcie lub w odnoszących się do niego tekstach wskazuje, że po upływie okresu użytkowania nie należy usuwać z innymi odpadami pochodzącymi z gospodarstw domowych. Aby uniknąć szkodliwego wpływu na środowisko naturalne i zdrowie ludzi wskutek niekontrolowanego usuwania odpadów, prosimy o oddzielenie produktu od innego typu odpadów oraz odpowiedzialny recykling w celu promowania...
-
Page 29: Instructiuni Privind Siguranta
Manual de utilizare Va multumim pentru achizitionarea acestui produs TEESA. Va rugam sa cititi cu atentie instructiunile de utilizare inainte de utilizarea produsului sis a le pastrati pentru consultari ulterioare. DIstribuitorul nu isi asuma nici o responsabilitate pentru posibilele daune cauzate de utilizarea necorespunzatoare a produsului. - Page 30 Manual de utilizare 15. Nu indreptati produsul catre personae sau animale cand acesta se afla in functiune. 16. Nu utilizati aspiratorul daca: • exista obiecte mari, ascutite ar putea bloca sau deteriora produsul ; • exista substante inflamabile, erosive sau explosive deoarece exista riscul aparitiei unui incendiu;...
- Page 31 Manual de utilizare Nota: este posibila montarea unitatii de perete (20) direct pe perete utilizand suruburi (nu sunt furnizate). In acest caz selectati o locatie apropiata de o priza de la retea si montati unitatea de perete. Conectarea periei de podea: •...
- Page 32 Manual de utilizare 1. Verificati ca dispozitivul sa fie oprit. 2. Verificati ca statia de incarcare sa fie amplasata pe o suprafata stabila, aproape de o priza de alimentare si departe de surse de caldura, medii umede si sa nu fie expusa direct la razele solare.
-
Page 33: Curatare Si Intretinere
Manual de utilizare 5. Incepeti aspirarea. 6. Pentru a opri dispozitivul, apasati si tineti apasat butonul de pornire (6). 7. Apasati accesoriul pentru spatii inguste inapoi in slot. Golirea recipientului de colectare a prafului Nota: este recomandat sa goliti recipientul de colectare a prafului dupa fiecare utilizare. - Page 34 Manual de utilizare 3. Indepartati sacul textil (13) si filtrul de praf (14) din recipientul de praf (15) si curatati murdaria prin scuturare sau periere. 4. Dupa curatare, introduceti din nou sacul textil si filtrul de praf in reciepentul de colectare a prafului si asamblati recipientul de praf in aspirator prin rotirea acestuia catre stanga.
- Page 35 Manual de utilizare DEPOZITARE • Inainte de depozitare verificati ca aspiratorul sa fie curat, uscat si complet incarcat. • Depozitati dispozitivul intr-un loc uscat. • Manrul tija poate fi depozitat in pozitie verticala sau cu manerul rabatat. Pentru rabatare, apasati butonul de deblocare (3) si rabatati manerul.
- Page 36 Manual de utilizare Romania Reciclarea corecta a acestui produs (reziduuri provenind din aparatura electrica si electronica) Marcajale de pe acest produs sau mentionate in instructiunile sale de folosire indica faptul ca produsul nu trebuie aruncat impreuna cu alte reziduuri din gospod arie atunci cand nu mai este in stare de functionare. Pentru a preveni posibile efecte daunatoare asupra mediului inconjurator sau a san ata tii oamenilor datorate evacuarii necontrolate a reziduurilor, vă...
-
Page 37: Bezpečnostné Pokyny
Návod na použitie Ďakujeme Vám za nákup zariadenia značky TEESA. Pred použitím si pozorne prečítajte návod na použitie a uschovajte ho pre neskoršie použitie. Výrobca nezodpovedá za škody spôsobené nesprávnym používaním výrobku. BEZPEČNOSTNÉ POKYNY Aby nedošlo k poškodeniu alebo zraneniu, dodržujte pri manipulácii s elektrickými spotrebičmi základné... - Page 38 Návod na použitie 13. Zariadenie a napájací kábel udržujte ďaleko od zdrojov tepla, vody, vlhkosti, ostrých hrán a ďalších faktorov, ktoré by mohli spôsobiť poškodenie. 14. Neponárajte do vody a neobsluhujte s mokrými rukami. 15. Keď je zariadenie zapnuté, nesmerujte ním na ľudí a zvieratá. 16.
- Page 39 Návod na použitie Nabíjacia stanica: • Montáž: Spojte medzi sebou nástennú jednotku (20) a podlahovú jednotku (22). • Demontáž: Uchopte a potiahnite za nástennú jednotku čím ju odpojíte od podlahovej jednotky. Poznámka: Nástenná nabíjacia stanica (20) môže byť namontovaná na stene pomocou vhodných skrutiek (nie sú...
- Page 40 Návod na použitie 1. Uistite sa, že je spotrebič vypnutý. 2. Presvedčte sa, že sa nabíjacia stanica nachádza na rovnom a stabilnom povrchu, v blízkosti elektrickej zásuvky a mimo dosahu zdrojov tepla, slnečného žiarenia a vlhkosti. 3. Pripojte vysávač k nabíjacej stanici. 4.
-
Page 41: Čistenie A Údržba
Návod na použitie 5. Začnite s vysávaním. 6. Pre vypnutie spotrebiča stlačte a podržte hlavný vypínač (6). 7. Po skončení používania zasuňte štrbinovú hubicu. Vyprázdnenie nádoby na prach Poznámka: Nádoba na prach by mala byť vyprázdnená po každom použití! 1. Uistite sa, že je spotrebič vypnutý. 2. - Page 42 Návod na použitie 3. Vyberte textilný filter (13) a prachový filter (14) z nádoby na prach (15) a vyčistite ho poklepaním. 4. Po vyčistení umiestnite filtre do nádoby na prach, ktorú následne nasaďte na ručný vysávač pootočením doľava, až kým nezacvakne. Poznámky: •...
- Page 43 Návod na použitie SKLADOVANIE • Pred uskladnením spotrebiča sa uistite, že je vyčistený, suchý a plne nabitý. • Spotrebič skladujte na suchom mieste. • Vysávač môže byť uložený vo zvislej polohe, alebo so zloženou rukoväťou. Pre zloženie rukoväte stlačte aretačné tlačidlo (3). •...
- Page 44 Návod na použitie Slovensko Správna likvidácia tohto produktu (O odpade z elektronických zariadení a ich príslušenstva) (Platí v Európskej únii a v ostatných európskych krajinách so systémom triedeného odpadu) Toto označenie na výrobku alebo v dokumentácii znamená, že by nemal byť likvidovaný s inými domácimi zariadeniami po skončení...
- Page 48 www.teesa.pl...
Need help?
Do you have a question about the TSA5012 and is the answer not in the manual?
Questions and answers