Table of Contents
Advertisement
Quick Links
USERS MANUAL / GEBRUIKERSHANDLEIDING / BETRIEBSANLEITING
MANUEL D'UTILISATION / MANUAL DE UTILIZACION
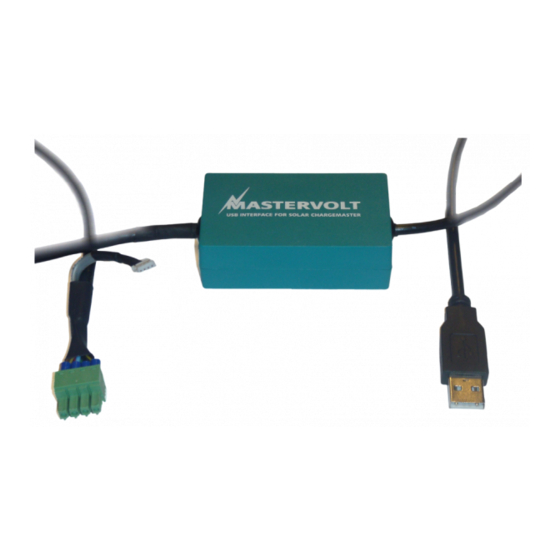
USB Interface and
DataControl software for
Solar ChargeMaster
Communication between your PC and the Solar ChargeMaster
MASTERVOLT
Snijdersbergweg 93,
1105 AN Amsterdam
The Netherlands
Tel.: +31-20-3422100
Fax.: +31-20-6971006
www.mastervolt.com
ENGLISH:
NEDERLANDS:
DEUTSCH:
FRANÇAIS:
CASTELLANO:
ITALIANO:
Copyright © 2008 Mastervolt, v 1.0 December 2008
PAGE 1
PAGINA 21
SEITE 41
PAGINA 61
PÁGINA 81
PÁGINA 101
Advertisement
Table of Contents
Troubleshooting

Related Manuals for Mastervolt USB Interface for Solar ChargeMaster

Summary of Contents for Mastervolt USB Interface for Solar ChargeMaster
- Page 1 Communication between your PC and the Solar ChargeMaster ENGLISH: PAGE 1 NEDERLANDS: PAGINA 21 DEUTSCH: SEITE 41 MASTERVOLT FRANÇAIS: PAGINA 61 Snijdersbergweg 93, CASTELLANO: PÁGINA 81 1105 AN Amsterdam ITALIANO: PÁGINA 101 The Netherlands Tel.: +31-20-3422100 Fax.: +31-20-6971006 Copyright © 2008 Mastervolt, v 1.0 December 2008 www.mastervolt.com...
-
Page 2: Table Of Contents
CONFIGURATION OF THE SOLAR CHARGEMASTER ................17 Configuration of the Nightlight Functions..................17 TROUBLE SHOOTING DATA CONTROL ....................19 SPECIFICATIONS ............................19 ADDITIONAL INFORMATION........................19 EC DECLARATION OF CONFORMITY ....................... 20 December 2008 / USB Interface for Solar ChargeMaster / EN... -
Page 3: General Information
This software runs with Windows XP. reasonably be expected to result in personal injury. You need 6 MB of free memory Mastervolt is not liable for any damage resulting from the above. EN / USB Interface for Solar ChargeMaster / December 2008... -
Page 4: Installation Of The Interface
6. Push the button once more to return to figure 5b. You now have entered the Solar ChargeMaster programming menu and the Solar ChargeMaster is ready for communication with the USB Interface for Figure 2-4 a,b,c Solar ChargeMaster. December 2008 / USB Interface for Solar ChargeMaster / EN... -
Page 5: Installation Of The Driver
Solar ChargeMaster driver from the Mastervolt web on the Mastervolt website (www.mastervolt.com). site or from your Mastervolt CD and unzip them to a Install the software on the desktop of your PC or location on your PC (e.g. C:/MastervoltDriver). -
Page 6: Installing For Windows Xp
• Open the Device Manager (located in “Control proceed. Panel\System” then select the “Hardware” tab and click “Device Manger”), the device appears as an additional port with label “Solar ChargeMaster Port. December 2008 / USB Interface for Solar ChargeMaster / EN... -
Page 7: Installing For Windows Vista
Download the latest available “Windows VISTA” Solar ChargeMaster driver from the Mastervolt web site or from your Mastervolt CD and unzip them to a Figure 3-6 location on your PC (e.g.:/MastervoltDriver). • Click on “Install this driver software Anyway” to •... -
Page 8: Uninstalling For Windows Xp And Vista
Or when an old driver has already been installed. drivers for my In this case remove the old driver by as described in the Chapter ‘Uninstalling Mastervolt Solar device. ChargeMaster Interface” If the problem still exists after the uninstall Program then run the FT_Clean Program and remove all old drivers. -
Page 9: Installation Of Datacontrol Software For Scm
In this window you can choose the folder where the removed from your system. software should be installed on your computer. Choose “Everyone” at the bottom of the window so that all users can start the software. EN / USB Interface for Solar ChargeMaster / December 2008... -
Page 10: Operation Of Datacontrol
Figure 5-4: Com port setting 5.2.1 Help function Figure 5-2: Check the ComPort at the Device If you have any problems, use the help function on manager the menu bar. December 2008 / USB Interface for Solar ChargeMaster / EN... -
Page 11: Solar Chargemaster Monitoring
Shows whether the load is connected to the Solar ChargeMaster at the moment and if the Solar ChargeMaster knows it is currently NIGHT or DAY Buzzer on Acoustic signal when the battery is almost empty EN / USB Interface for Solar ChargeMaster / December 2008... - Page 12 Current drawn by the loads connected to the Solar ChargeMaster PV Ah this day Total of amperehours generated by the PV system this day. Load Ah this day Total of amperehours drawn by the loads this day. December 2008 / USB Interface for Solar ChargeMaster / EN...
-
Page 13: Datalogger
The battery state in the mornings is exceptionally important, as no charging occurs in the mornings in % during the night. The average SOC is shown. Start of Recording Days since the Datalogger started recording the Solar ChargeMaster data. (Days) EN / USB Interface for Solar ChargeMaster / December 2008... - Page 14 Shows data for the last four weeks (last month). For Shows data for the last twelve months (last year). explanation of values see Last Week For explanation of values see Last Week December 2008 / USB Interface for Solar ChargeMaster / EN...
-
Page 15: System Performance
OPERATION OF DATACONTROL 5.4.4 Diagrams Figure 5-10 shows “Last Week” measured data, presented in values. The red bars show the minimum voltage, the yellow bars indicate the maximum voltage. The data for “Last Month” and “Last Year” can also be obtained. These diagrams will be displayed by using the weekly or monthly averages. -
Page 16: Loading And Saving Data
“search path” and choose a path in the opened Figure 6-1: Save data For reloading data you saved before, click “Load data”, choose the file to view and click “load.” Figure 6-2: Load data December 2008 / USB Interface for Solar ChargeMaster / EN... -
Page 17: Configuration Of The Solar Chargemaster
Then, choose the time you function: want the load to switch on. See figure 7-2. • Load On/Off time setting, • Load on during the whole night, • No Night Light function EN / USB Interface for Solar ChargeMaster / December 2008... - Page 18 Fig. 7-3: Setting nightlight function by hours before sunrise or hours after sundown After all settings, click “Send to Charge Controller”. Then click “Read from Charge Controller” in order to verify that your settings have been changed. December 2008 / USB Interface for Solar ChargeMaster / EN...
-
Page 19: Trouble Shooting Data Control
131804000 Solar ChargeMaster SCM-N 40 Mastervolt can offer a wide range of products for your electrical installation, including an extended program of components for your MasterBus network or MasterVision switchboard. See our website www.mastervolt.com for a complete overview of all our products. -
Page 20: Ec Declaration Of Conformity
Safety directive 2006/95/EC, with the following standard: Low voltage standard: EN 60950: 2000 Amsterdam, P. F. Kenninck, General Manager MASTERVOLT Snijdersbergweg 93, 1105 AN Amsterdam, The Netherlands Tel: + 31-20-3422100 Fax: + 31-20-6971006 Email: info@mastervolt.com December 2008 / USB Interface for Solar ChargeMaster / EN...
Need help?
Do you have a question about the USB Interface for Solar ChargeMaster and is the answer not in the manual?
Questions and answers