Table of Contents
Advertisement
Advertisement
Table of Contents

Subscribe to Our Youtube Channel
Summary of Contents for Ctronics H885
- Page 1 www.ctronics-tech.com...
- Page 3 Introduction Congratulations on the purchase of your new device. You have s elected a high-quality product. The operating instruction is one co nstituent of this product. It contains important information about s afety, use and disposal. Before using the product, familiarise yourself with all operating an d safety instructions.
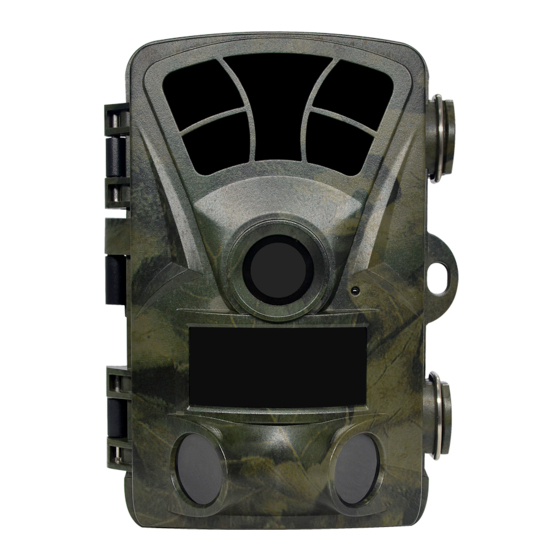
- Page 4 CAMERA OVERVIEW 1.Display Screen 2.Up/Video Button 3.Shot Button 4.Right Button 5.OK Button 6.Speaker 7.Menu Button 8.Left Button 9.Playback Button 10.Down/Photo Button 11.Micro SD Card Slot 12.AV Jack 13.USB Jack 14.OFF-TEST-ON Mode Button 15.Infrared LEDs 16.Lens 17.Front Motion Sensor 18.Side Motion Sensor...
- Page 5 1.5V AA batteries. Please make sure the electrode is correct. ♦ If the camera is in low power, please connect the camera to the Ctronics solar panel. Storage Media Please prepare a Micro SD card and insert it into the camera for saving more files.
- Page 6 Operation Turn On / Off The Camera Switch the Mode Button to“Test/On”to turn on the camera. Switch the Mode Button to “Off” to turn off the camera. System Setup Switch Mode Button to “Test”, then you can set the camera‘s parameters as your need.
- Page 7 Setup menu are as below: Mode Set the working mode. In photo mode,the camera just take pictures. In Video mode,the camera just record video. In photo&video mode,the camera will take a photo first, then start to record video. Options:【Photo】/【Video】/【Photo&Video】. Photo Resolution Set the image resolution.
- Page 8 TL Video Resolution Set the resolution of time lapse video. Options:【5200x3900P】/【4608x3456P】/【4416x3312P】/ 【4000x3000P】 / 【 3648x2736P】 / 【 3264x2448P】 / 【 3072x2304P】 /【2592x1944P】/【2048x1536P】. Video Length The shortest time is 3 seconds and the longest time is 10 minutes. Options:3 seconds~10 minutes. Audio Recording The camera will record audio when recording video.
- Page 9 Set the sensitivity of the sensors. “High Sensitivity”applies to mild environment. ” Low Sensitivity ” applies to cold environment. Options:【Low】/【Middle】/【High】. Target Recording Time Target recording time Start: Stop: Hr:Min Hr:Min Set the target recording time. As 00 00 shown in below picture, you can set MENU Back OK Select the start and stop time.
- Page 10 [Off]: Close the time lapse function. Language Set the language display on screen. Options: 【English】 / 【 German】 / 【 Danish】 / 【 Finnish】 / 【 Swedish】 【Spanish】/【French】/【Italian】/【Dutch】/【Portuguese】/ 【Simplified Chinese】/【Traditional Chinese】/【Japanese】. Endless Capture Set the camera to record video in loop. Options:【On】/【Off】.
- Page 11 Options:【On】/【Off】. WIFI SSID Set and change the WIFI name. WIFI Password Set and change the WIFI password. Beep Sound Open/close the button sound. Options:【On】/【Off】. Format Memory Card Formatting the memory card will delete all data permanently. Before using a new memory card or a card that has been used in another device, please format the memory card.
- Page 12 Version Look up the Firmware information of the camera. Take Photos,Record Video,Playback Switch the Mode Button to “Test”. In this mode,you can take photos, record video and playback files manually. ♦ Take Photos: Press Photo button to switch to photo mode. Press Shot button to take a picture.
- Page 13 4)Write protect:Lock the file. It can avoid accident deletion. Options:【Write-protect current file】/【Write-protect all files】/ 【Unlock current file】/【Unlock all files】. Aligning the camera In test mode you can adjust the optimum exposure angle and the range of the motion sensors.During alignment, consider whether the use of the side motion sensors may be useful for attaining the desired observation results.
- Page 14 If the wild animals enter the detection range of the motion sensors , the camera will be activated and detect the motion trail. If the wild animals continue to move to the detection zone of the sensor, the camera will take photos or record video automatically. When the wild animals leave the detection zone of the sensors , the camera will be deactivated and turn back to standby mode.
- Page 15 3 seconds, the camera will turn on and enter WiFi mode automatically. 4. Open the WiFi connection interface on your smartphone, find account “H885 X XXXXX”, enter initial password ”12345678” to connect the WiFi. (Tips:If the wifi is not display, please close the WLAN and then open it again.
- Page 16 memory card button setting button information review button operating guidelines phone album Memory card button Click memory card button, user will see below interface shown the photo and video files stored in the TF card. Click the icon the top right corner, then can choose , download delete the files.
- Page 17 choose download delete files download file to smartphone...
- Page 18 Setting button Click setting button, user will see below interface shown the setup menu list of camera. Can set the parameters of camera on APP. Information review button Click information review button, user will see below interface shown the information of camera storage, number of files and battery.
- Page 19 Phone album User can review the photo and video files downloaded in the pad or smartphone album. Can zoom in image, playback,choose, delete and share files. Operating guidelines Check the APP version and user can view the operating guidelines.
- Page 20 6. After setting finished in APP, turn back to the APP main interface. Click the power-off icon on the top right corner or exit the APP. Hold and press “OFF” button on the remote control for 3 seconds, the camera will enter sleeping mode. Connecting To TV The camera can transfer the video signal to an external monitor or a television.
- Page 21 IMPORTANT This device complies with Part 15 of the FCC Rules. Operation is subject to the following two conditions: (1) This device may not cause harmful interference. (2) This device must accept any interference received, including interference that may cause undesired operation.
Need help?
Do you have a question about the H885 and is the answer not in the manual?
Questions and answers