Advertisement
Quick Links
Advertisement

Summary of Contents for Ss Brewtech Brew Cube
- Page 1 ENGINEERING BETTER BEER Brew Cube│Product Guide Page 1...
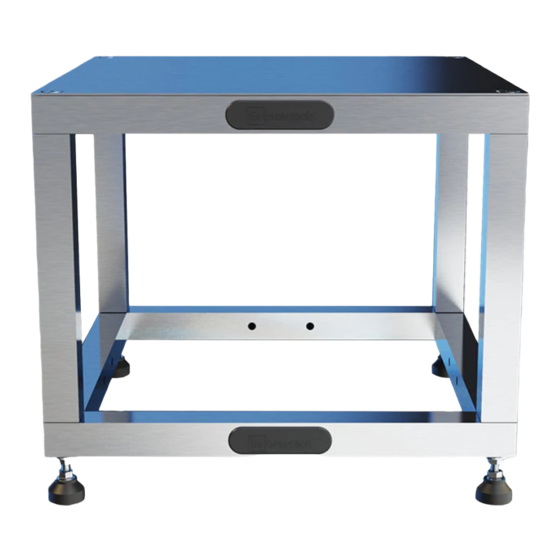
- Page 2 OVERVIEW IN THE BOX (2) Frame (1) Top Plate│Solid (4) 12” Leg Note: Additional plates sold seperately (4) 3/8” - 16 x 2” Stainless (4) Threaded Foot (8) Silicone Hole Plug Steel Frame Screws (8) Silicone Strip Page 2...
-
Page 3: Frame Assembly
OVERVIEW FRAME ASSEMBLY Page 3... - Page 4 INSTRUCTIONS FRAME ASSEMBLY 1. Apply a Silicone Strip to the top surface on each member of the square top Frame (4 strips per frame). If an additional Plate will be used, also apply a Silicone Strip to each member of the square bottom Frame.
- Page 5 INSTRUCTIONS FRAME ASSEMBLY (CONTINUED) 5. Place top Frame onto the Legs with the Silicone Strips facing up. 6. Position the countersinks of the Top Plate over the large holes on the top Frame. 7. Use the four 3/8” - 16 x 2” Stainless Steel Frame Screws to secure the Top Plate and Frame to the Legs.
- Page 6 COMPLETED ASSEMBLY Page 6...
- Page 7 COMBINING BREW CUBES COMPONENTS SHOWN (2) 12” Brew Cube Kit (1) Connection Bolts Kit (2) extra Top Plate (optional) FRAME ASSEMBLY Page 7...
- Page 8 2. For the second Brew Cube, use (2) 3/8”-16x2-1/4” screw and washer assemblies in place of two Threaded Feet as shown above. The top and bottom holes on one side of the Brew Cube will be used for the connection hardware. Silicone Hole Plugs will not be needed on this side.
- Page 9 COMPLETED ASSEMBLY Page 9...
- Page 10 SsBrewtech.com SsBrewtech.com REV 07102020...
Need help?
Do you have a question about the Brew Cube and is the answer not in the manual?
Questions and answers